PGP (Pretty Good Privacy) is an encryption system for emails / texts, files / folders, or even whole partitions. It was created by Philip Zimmermann back in 1991 and is widely used in many email clients and services by default, for securely exchanging messages.
PGP is using (amongst others) public key encryption, which solves the main problem of securely exchanging keys with another person. For example, when you encrypt something using symmetric cryptography and send the encrypted file to a friend, that friend has to know the key that you used so he can reverse the process and take the original file. Also, if the file and the key fall into the wrong hands, it’s pretty clear that anyone will be able to read that file.
PGP is using a keypair where both a private key and a public key are generated. You can freely send the public key to anyone and even share it online. People can then encrypt messages and files with your shared public key, send the encrypted data to you, and you can use your private key to decrypt that data and read it. This means that even if the data fall into the wrong hands, the decryption will be impossible since it can only be done with your private key which you will never share with anyone.
HOW DOES IT WORK?
PGP first generates a quite large number which is called a session key. The session key is unique for every encryption and its length makes it impossible to crack. The session key encrypts the data that you want to send (we now have encrypted data) and gets signed with the recipients public key (we now have an encrypted session key). Both of the encrypted data and the encrypted session key are sent to the recipient.
The recipient recieves the encrypted file. By using his private key on the encrypted session key he gets the original session key with which he decrypts the encrypted data and gets the original data.
A MESSAGE / FILE ENCRYPTION / DECRYPTION EXAMPLE
We are going to see a real world example by using two different applications, GPG4Win which in our example is used by Alice who wants to send an encrypted text and file to Bob, and GPG4USB (this is a discontinued app, do not use it) which is used by Bob who will decrypt the message and reply back, and will also decrypt the file.
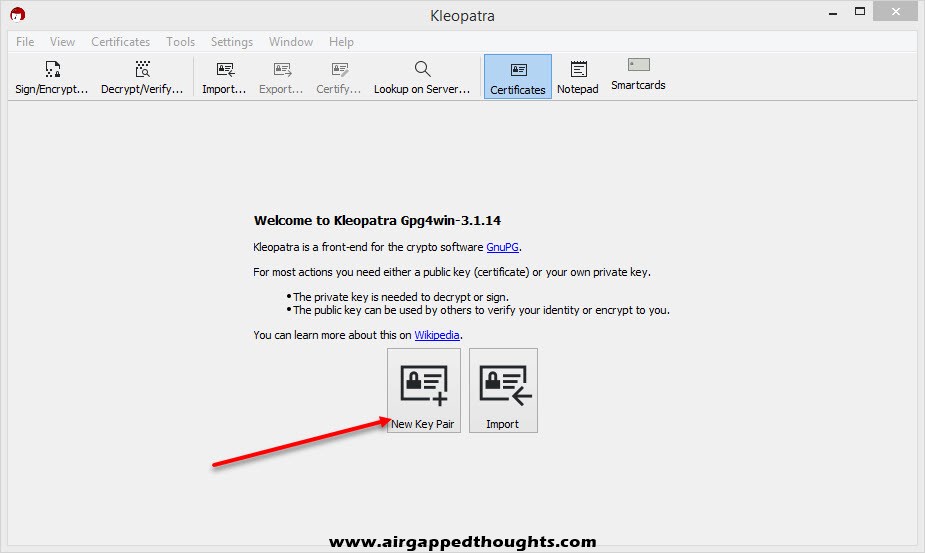
First thing we have to do is to create a keypair, which is, well… a pair of keys! (a private key which we must not share with anyone, ever!, and a public key that we have to share with anyone who wants to send us encrypted messages / files). So after installing GPG4Win and run it, choose to create a “New Key Pair”.
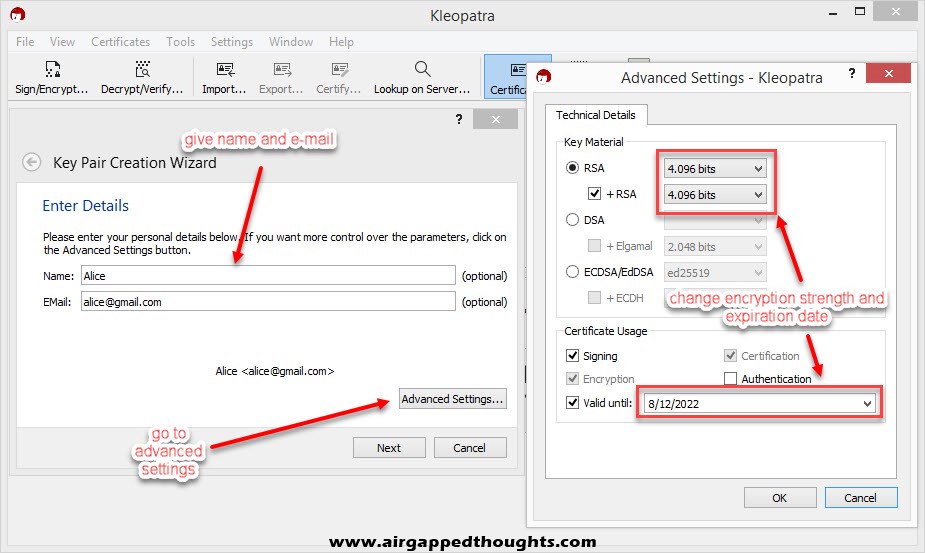
In the next screen you will have to use a name and e-mail. This isn’t mandatory if you want to give your public key in just a few people by e-mailing it to them, but it’s mandatory if you plan on uploading the public key in a key server for public use, so that people can easily find your key (more on key servers later). Also since PGP is mainly used for e-mails, most applications wont let you continue without providing an e-mail, you can ignore it with Kleopatra though. In the Advanced Settings you can use a stronger encryption and change the expiration date of your key. This is mostly a precaution step cause you don’t want your private key to fall into the wrong hands after a few years and still be valid, right?
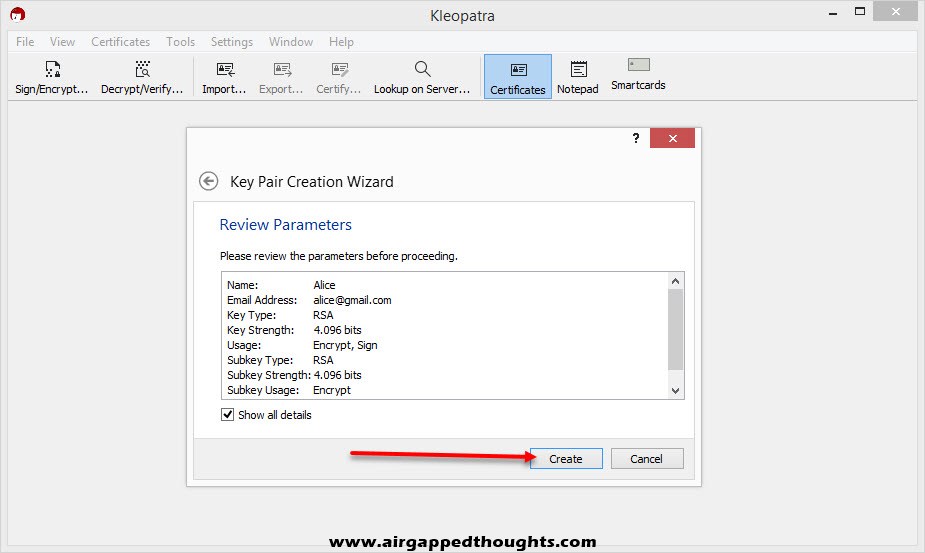
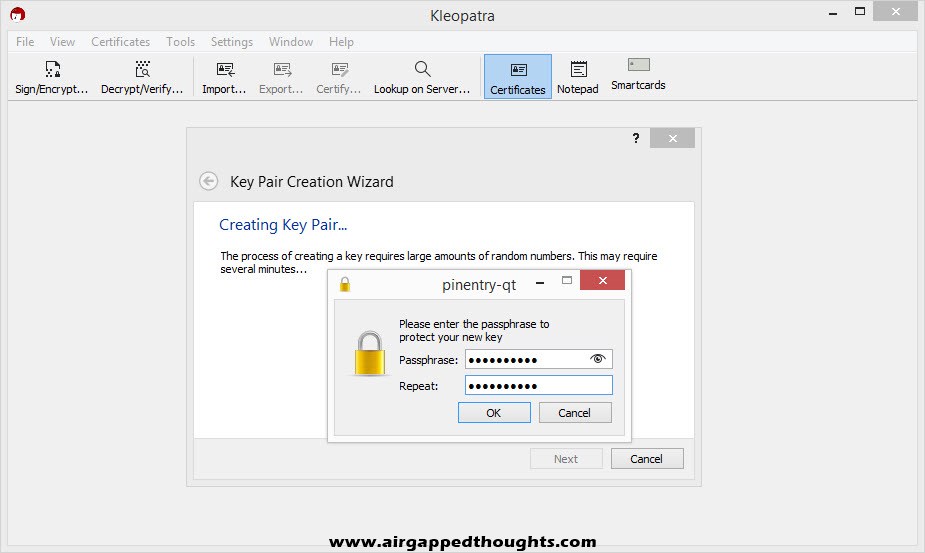
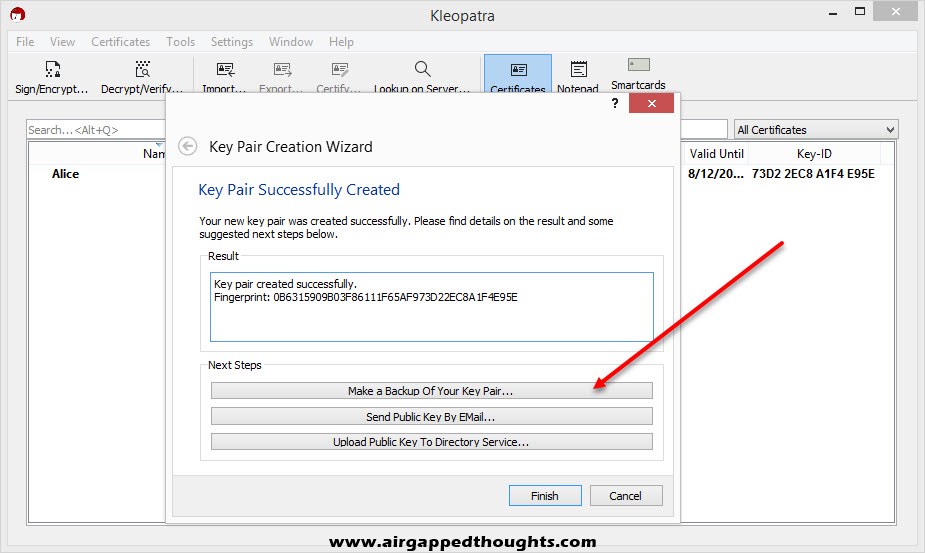
Press the Create button and you’ll be prompted to add password protection which will be used to decrypt the data that people send to you.
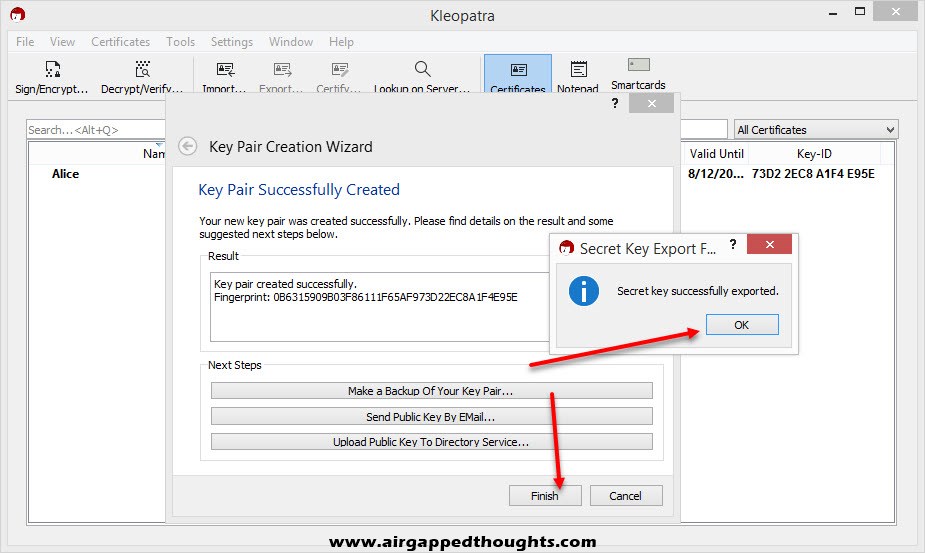
Select “Make a Backup Of Your Key Pair…” and save it in a secure location. Keep in mind that your file is only password protected inside the Kleopatra application, your exported file isn’t protected.
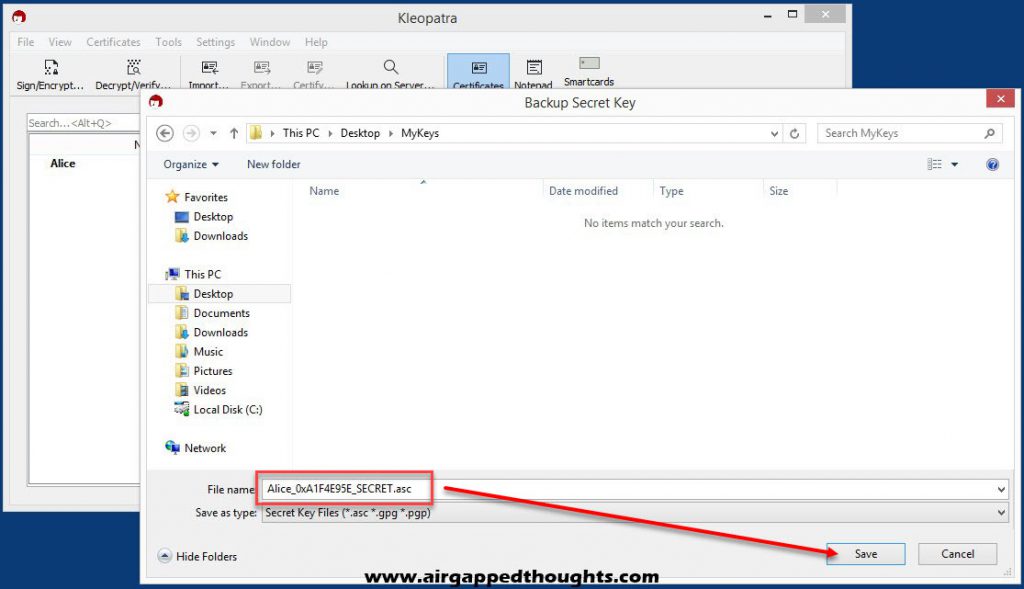
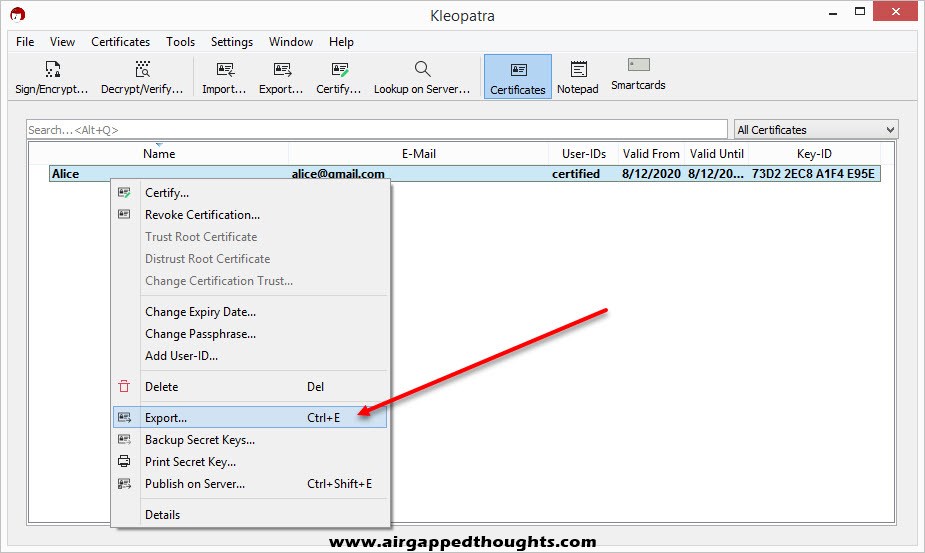
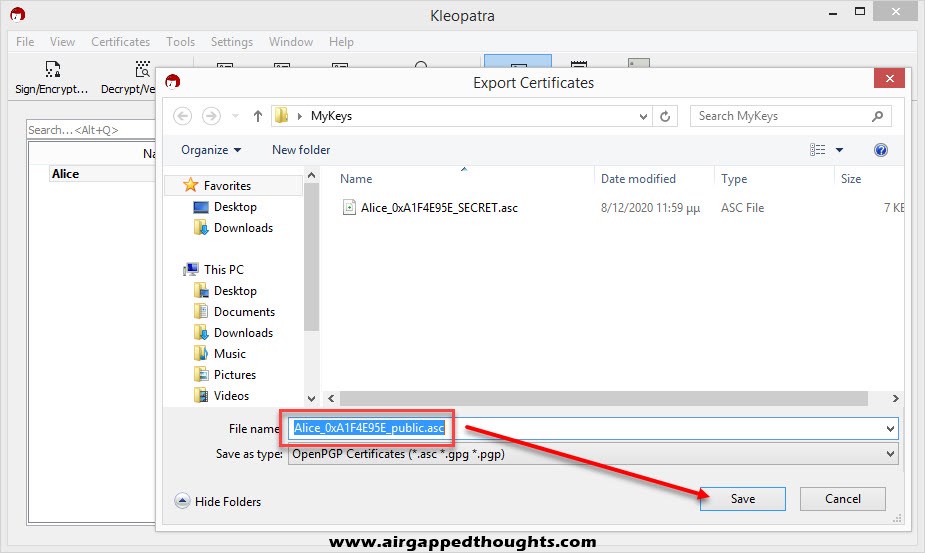
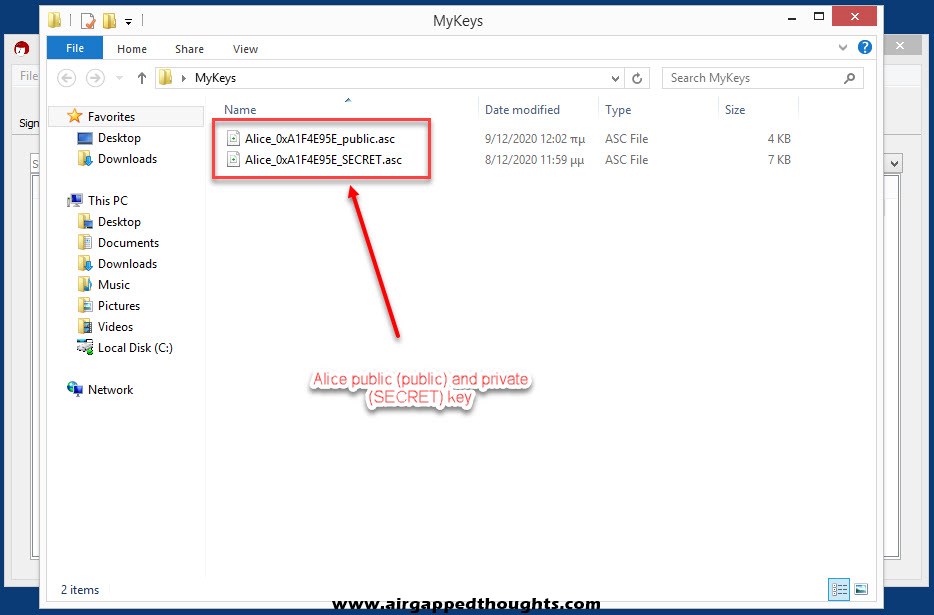
Now that we have our Key Pair we will have to export our public key so we can start sharing it to people. Right click on the name and choose “Export…”. Notice that the file name ends with the word public while our Key Pair backup file ended with SECRET, DO NOT SHARE THE SECRET FILE WITH ANYONE!
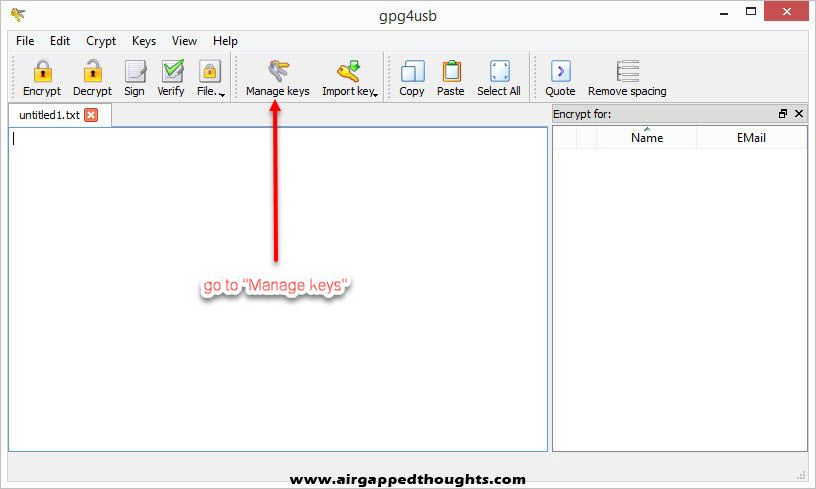
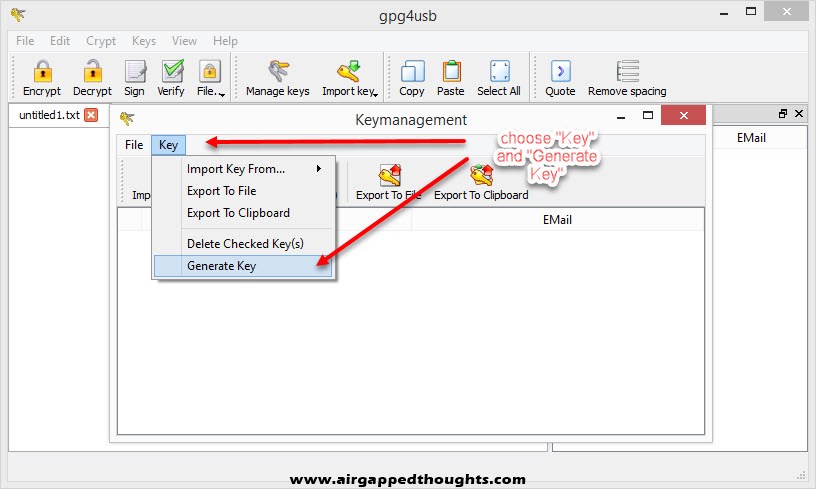
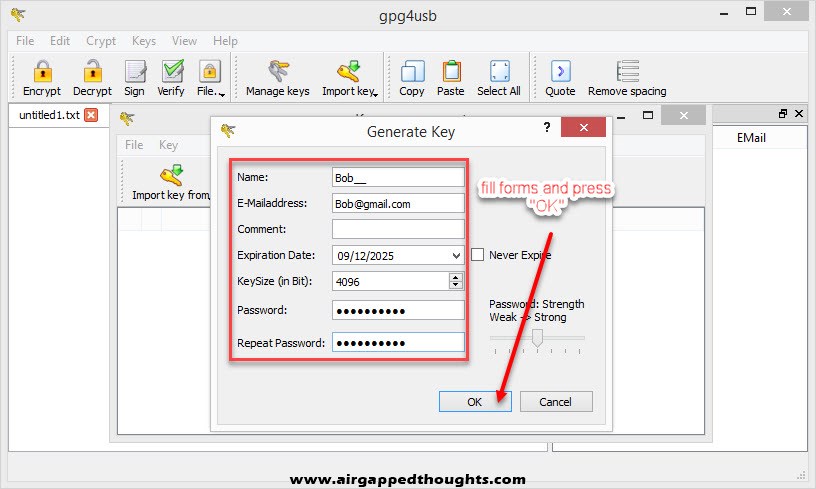
Alice is all set up! Now we are going to GPG4USB and Bob! Bob also needs to generate a Key Pair and so we will have to select “Manage keys”, “Key” and “Generate Key”. Fill out the fields and press OK.
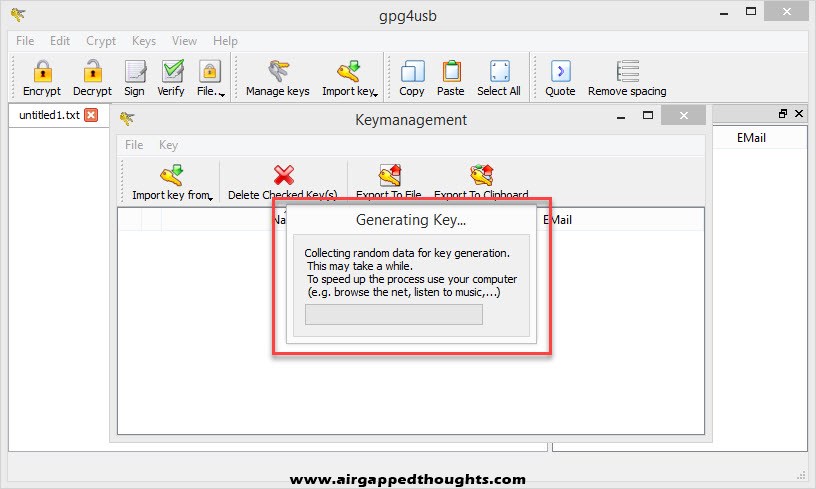
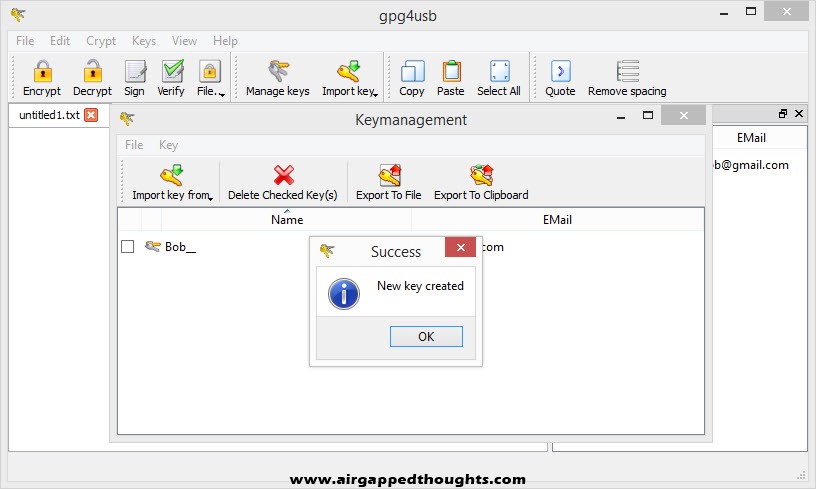
GPG4USB will prompt you to do various stuff to generate entropy for your Key Pair, so just do so and after some seconds you will get “New key created” verification.
Time to export your private and public key.
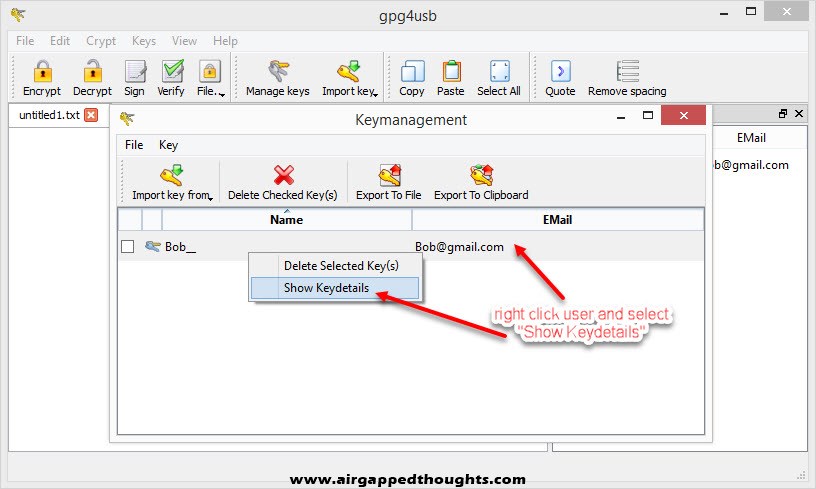
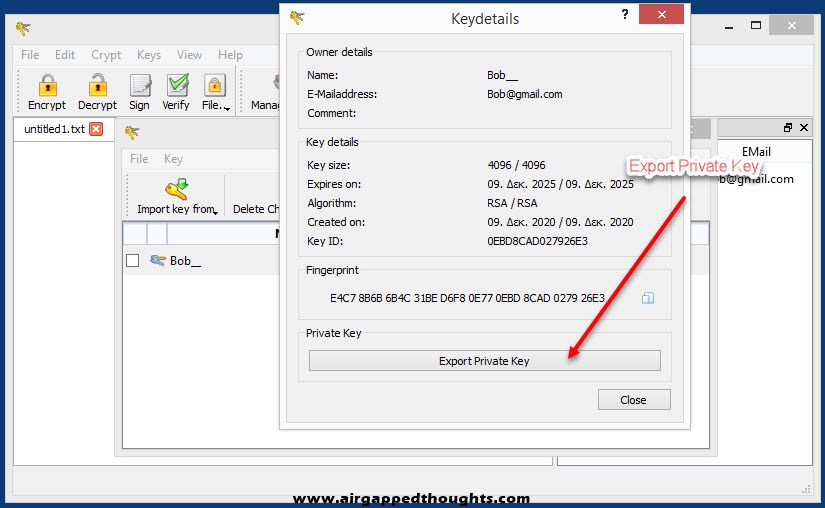
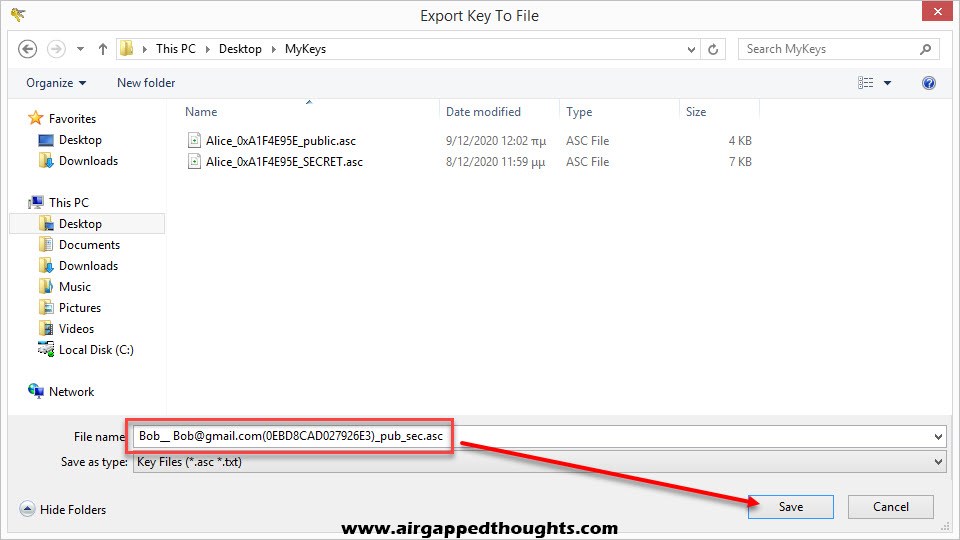
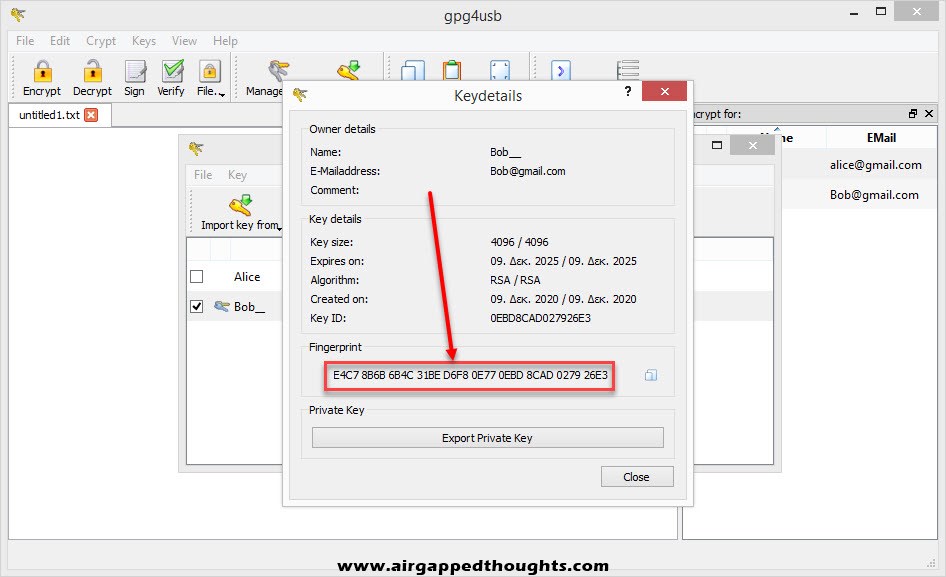
For the private key right click on the new key pair and select “Show keydetails” and “Export Private Key” to export your valuable key that you’ll never share with anyone.

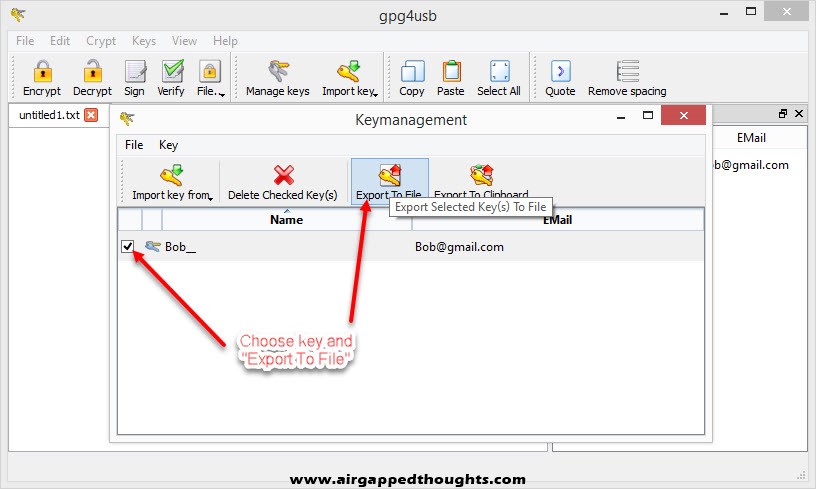
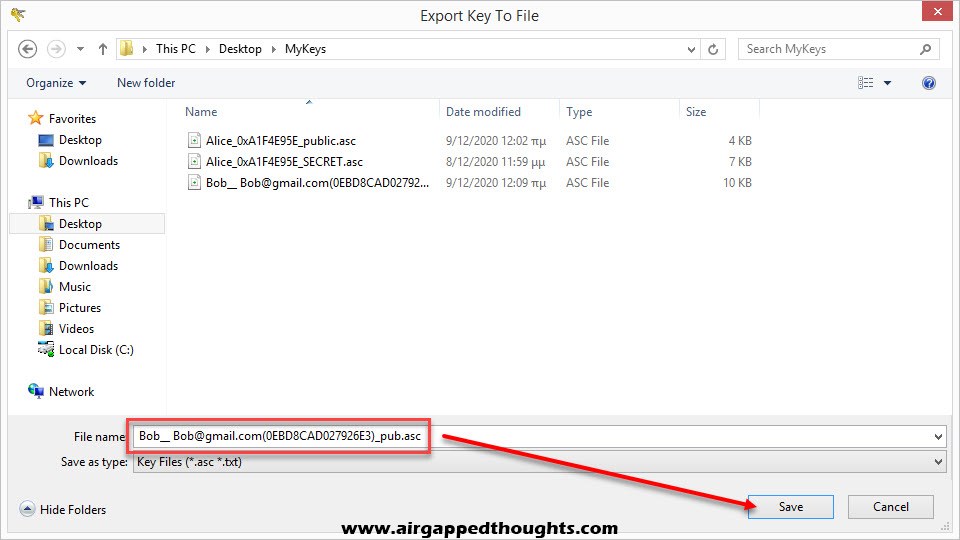
For the public key choose the “Export To File” icon.
Bob is also ready. Since he wants to start sending encrypted data to Alice, Alice is giving him her public key and Bob has to import it inside the application.
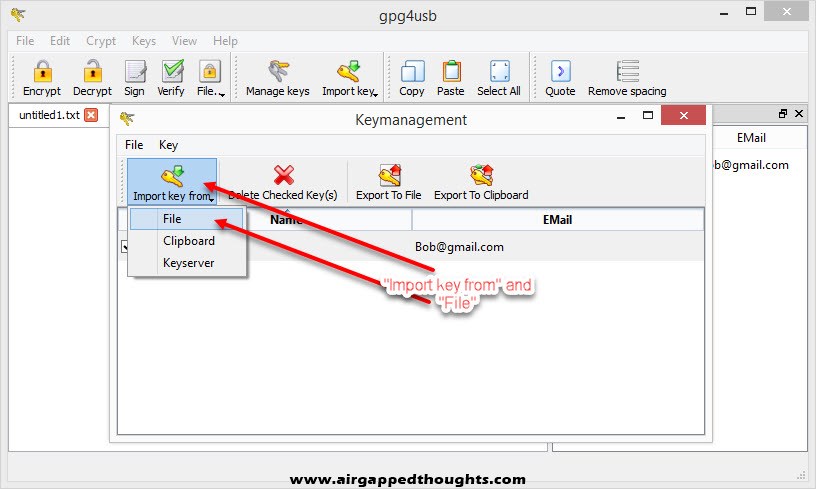
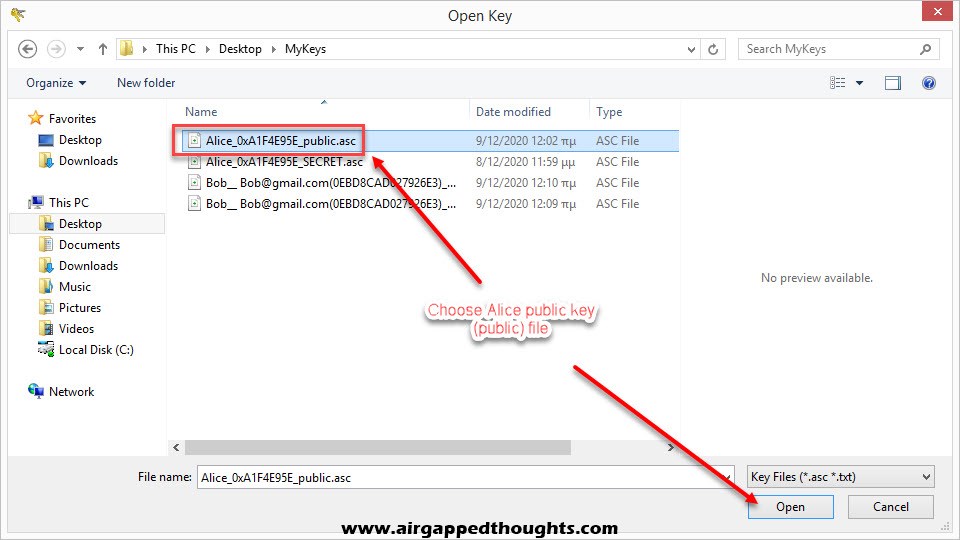
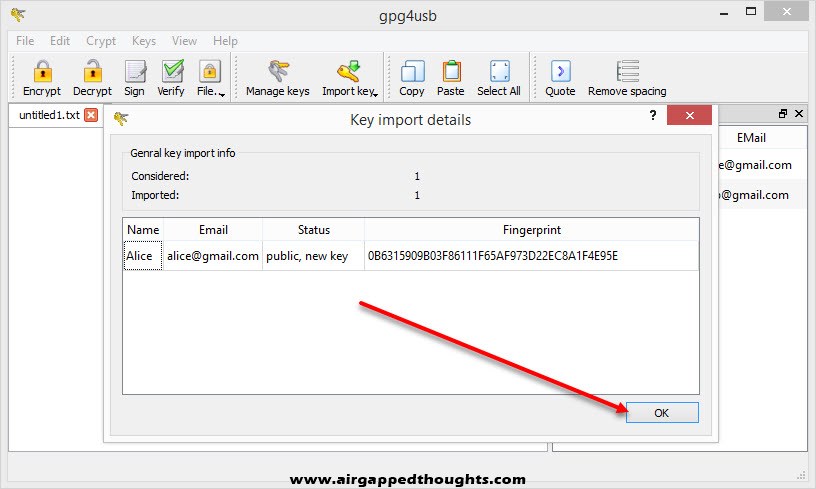
So we go to “Import key from” and “File” and we choose Alice public key.
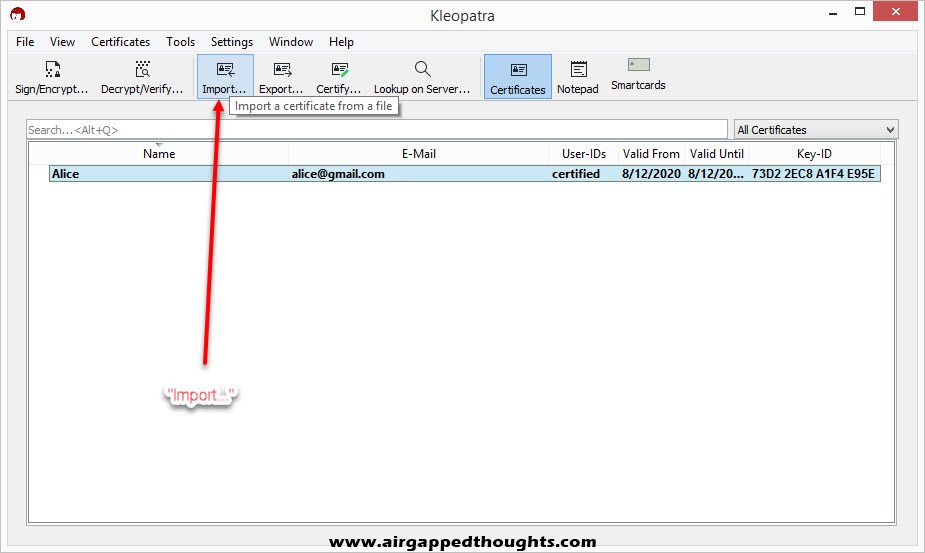
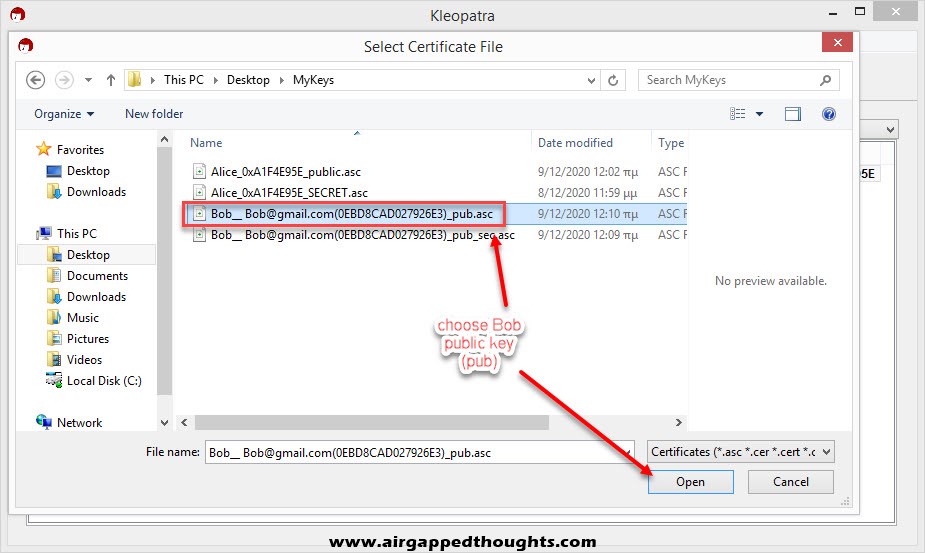
Bob replies back with his public key, we can import it to Kleopatra by choosing “Import” and selecting Bobs public key.
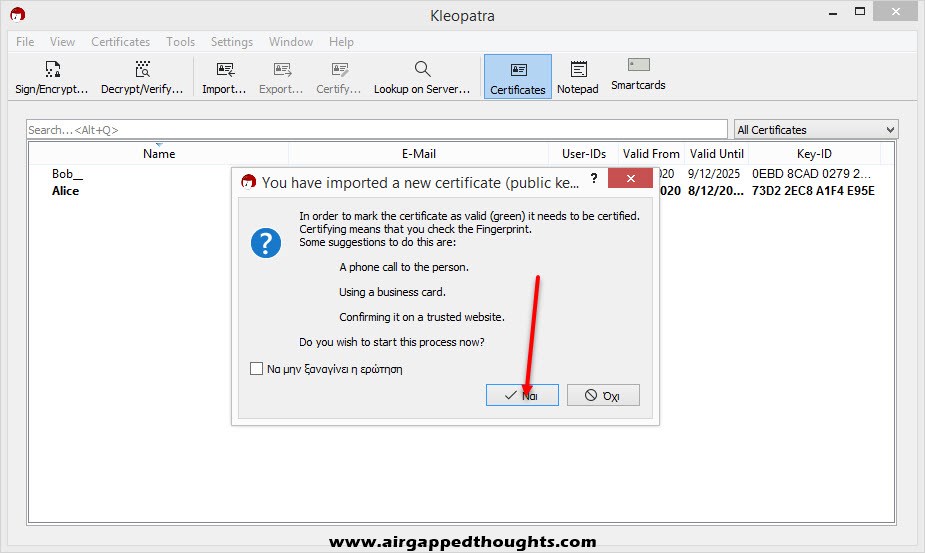
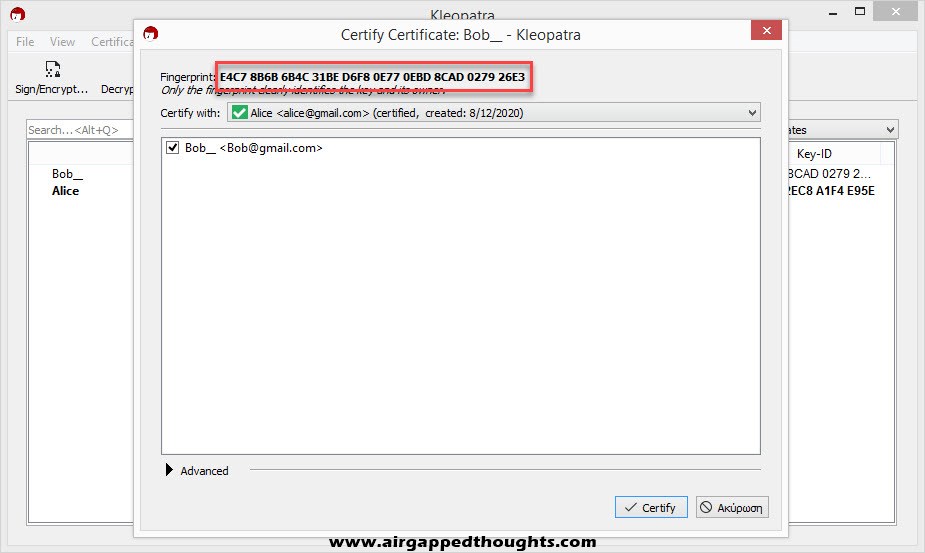
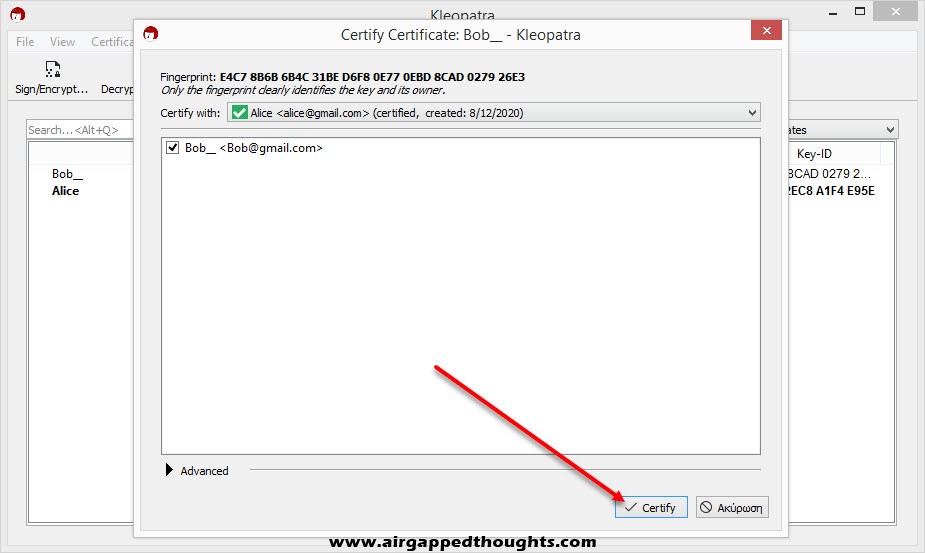
For security reasons, Kleopatra tells us to confirm the fingerprint of the public key that we just imported. To check the fingerprint we choose “Yes” and we take a note of it, contact our friend Bob and ask him to confirm his fingerprint to us.
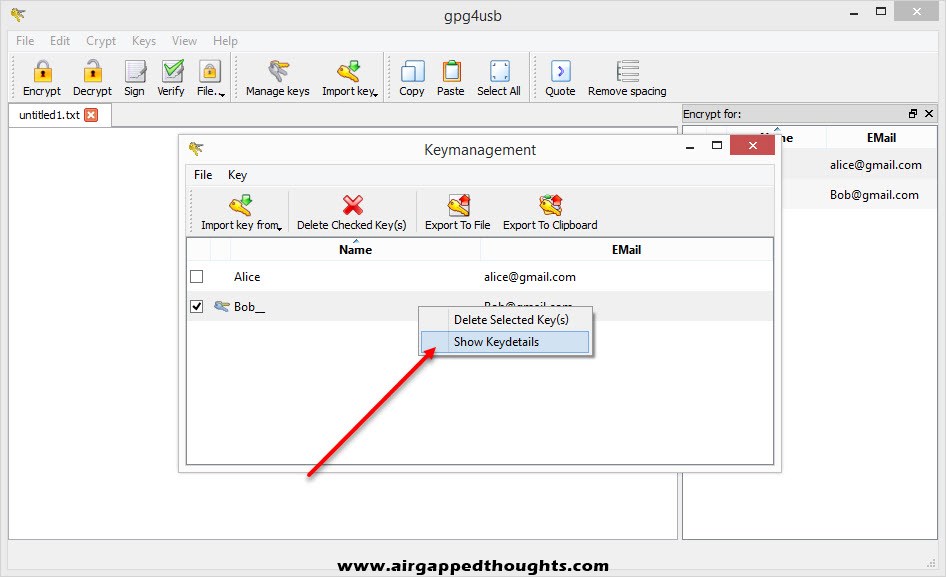
That’s a precaution step in case you’ve downloaded the public key from a key server because the name you’re looking for may be used by many different people since you can literally give fake names and emails on the public key. You can check fingerprints anytime by right clicking on a key and selecting “Details” in Kleopatra and “Show Keydetails” in GPG4USB.
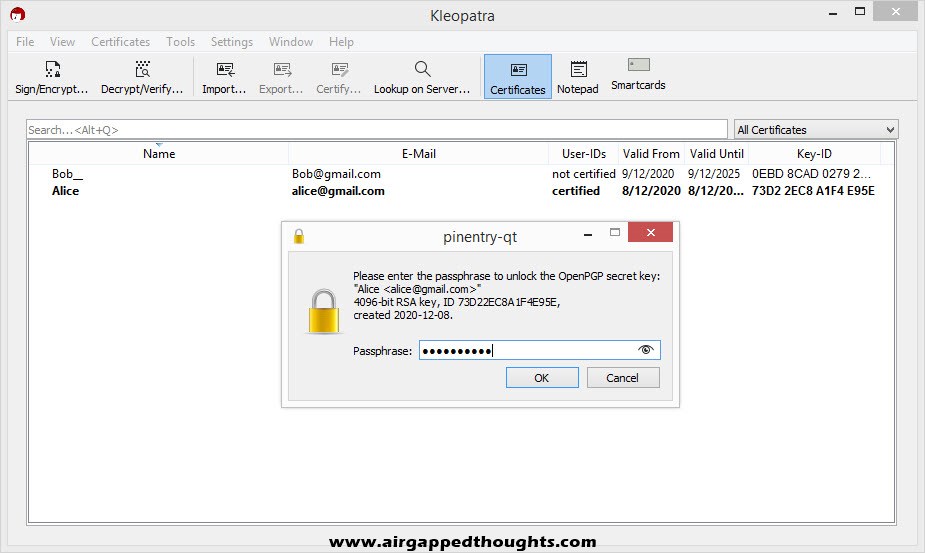
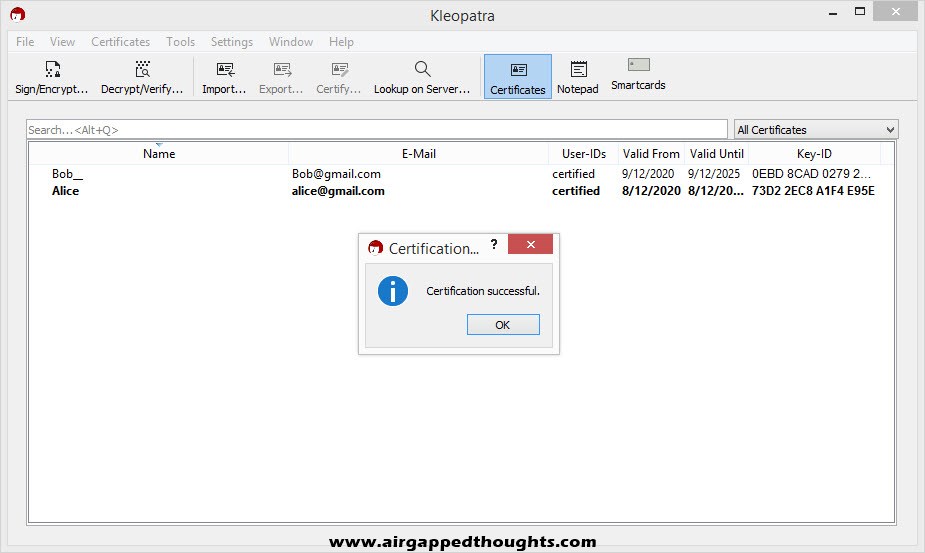
Choose “Certify”, give your password and you’re good to go.
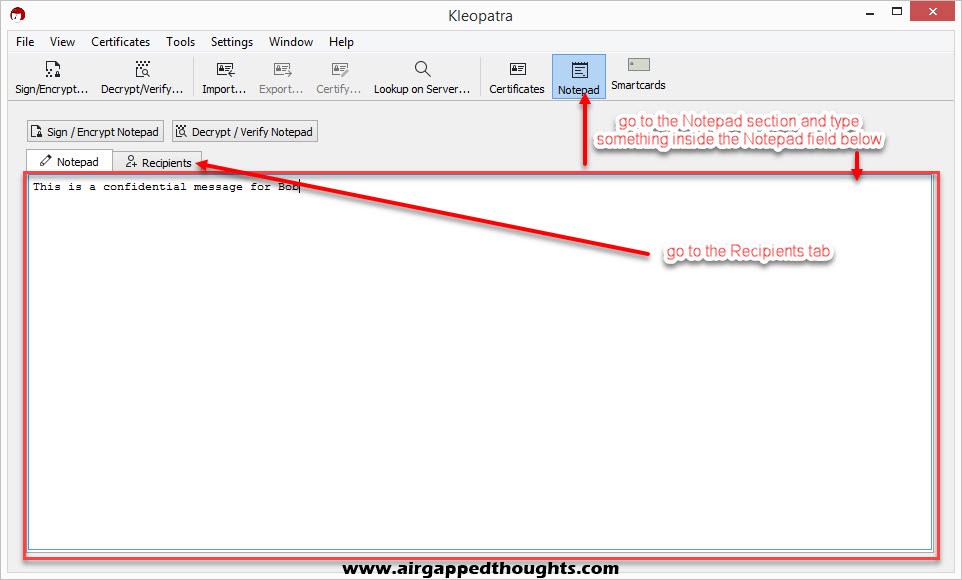
Now we will encrypt a message for Bob and send it to him.
Choose “Notepad” from the top, type something, and then choose “Recipients”.
Notice the two different sections: Prove authenticity (sign) and Encrypt.
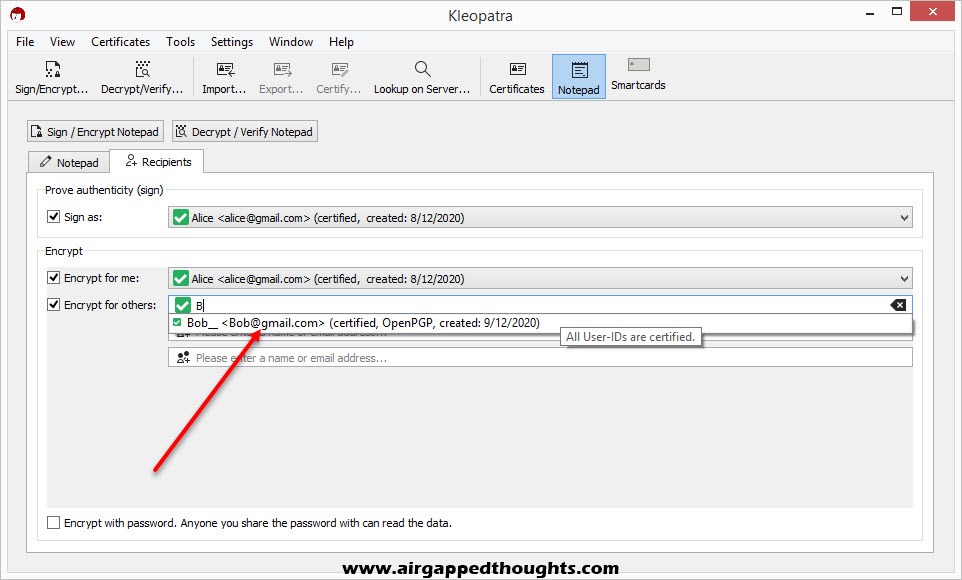
On the first section, leave the “Sign as” box ticked. This will sign the message with your private key which will result with a fingerprint that will confirm to Bob that the message was indeed encrypted by you since Bob will have the same fingerprint using your public key. If you have more than one Key Pair (private keys), don’t forget to select the correct user for the Sign process.
In the second section you choose who will be able to decrypt your message. You can even prevent yourself from decrypting it by not choosing yourself! Don’t forget to choose Bob though, so he can decrypt the message with his private key.
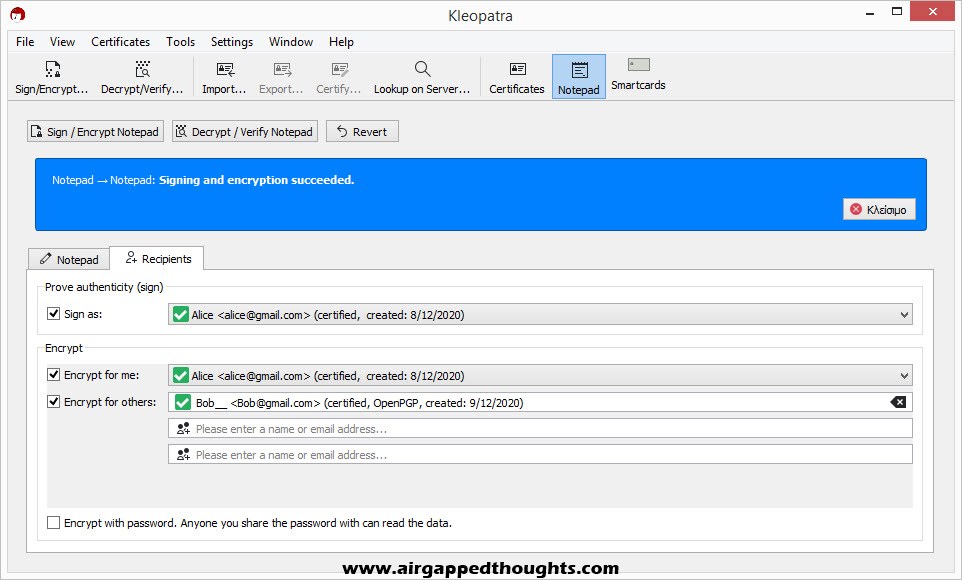
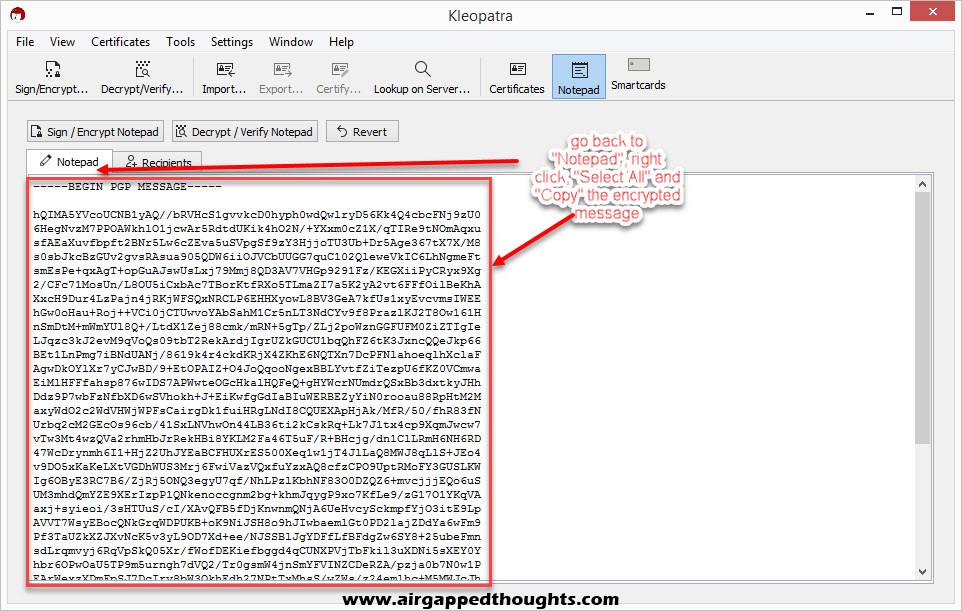
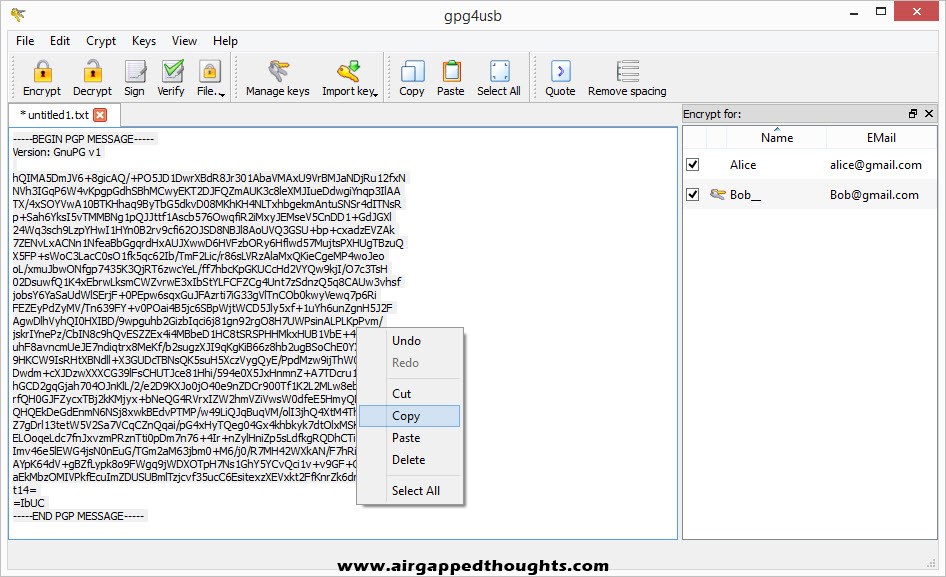
Go back to the Notepad tab and you’ll see the encrypted message. Select it, right click and copy it, and send it to Bob!
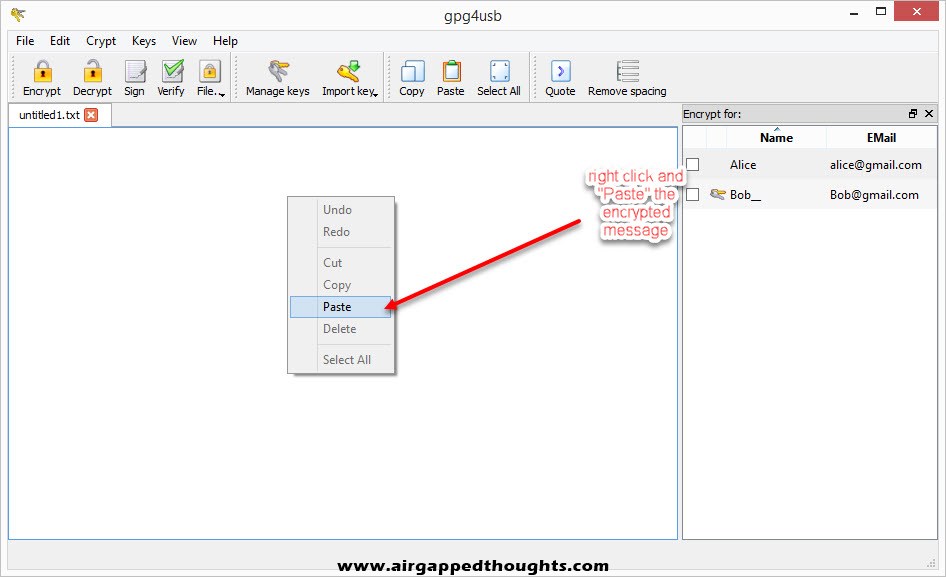
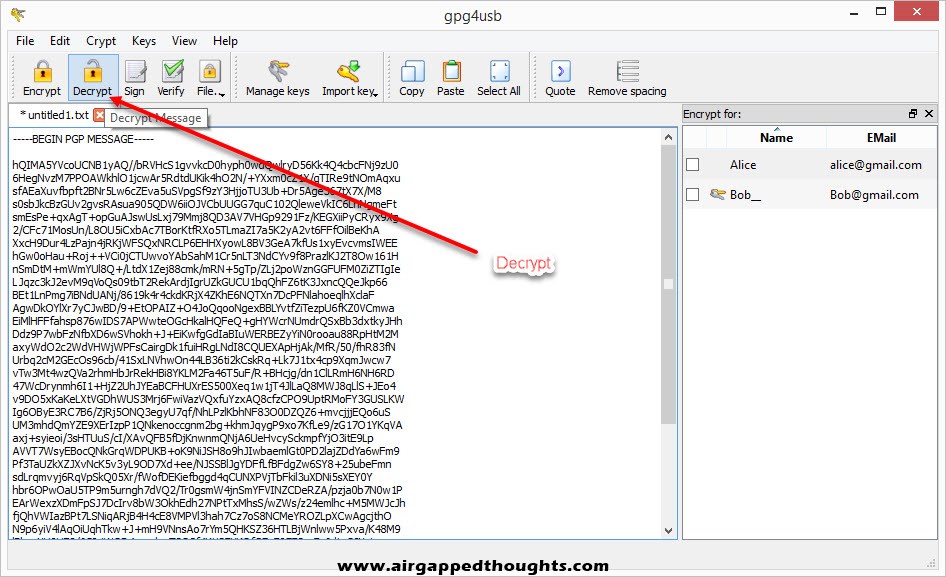
Now Bob pastes the encrypted text into the GPG4USB application and chooses “Decrypt” from the top.
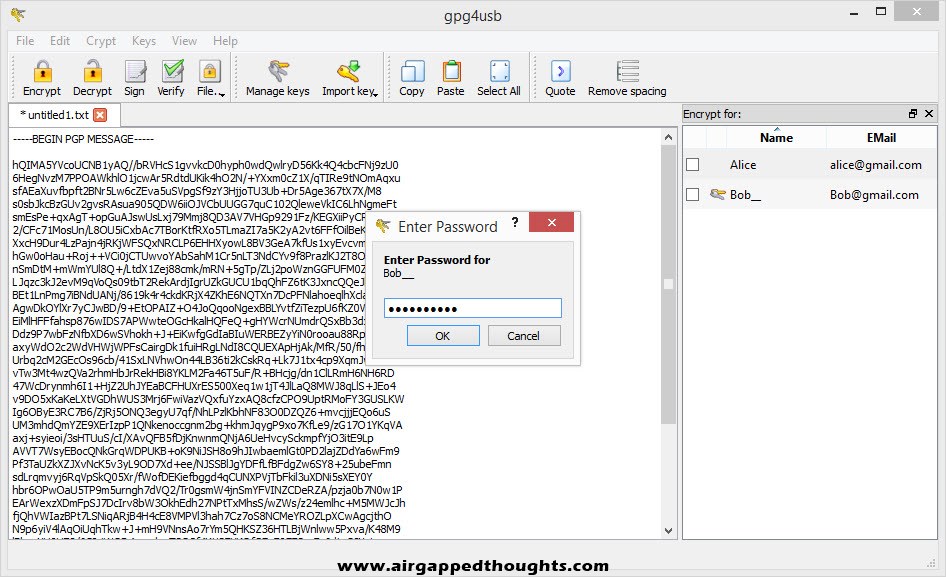
After inserting his private key password, the message is decrypted.
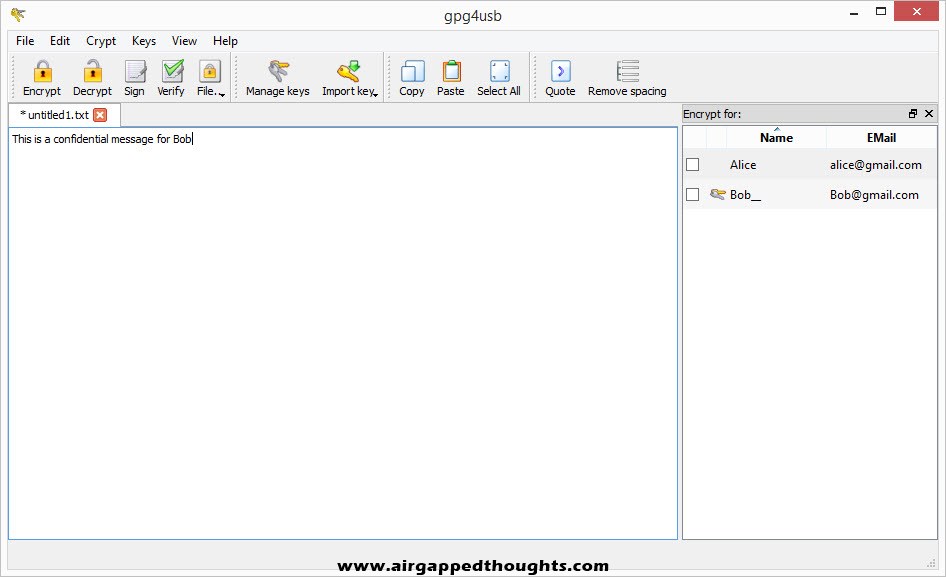
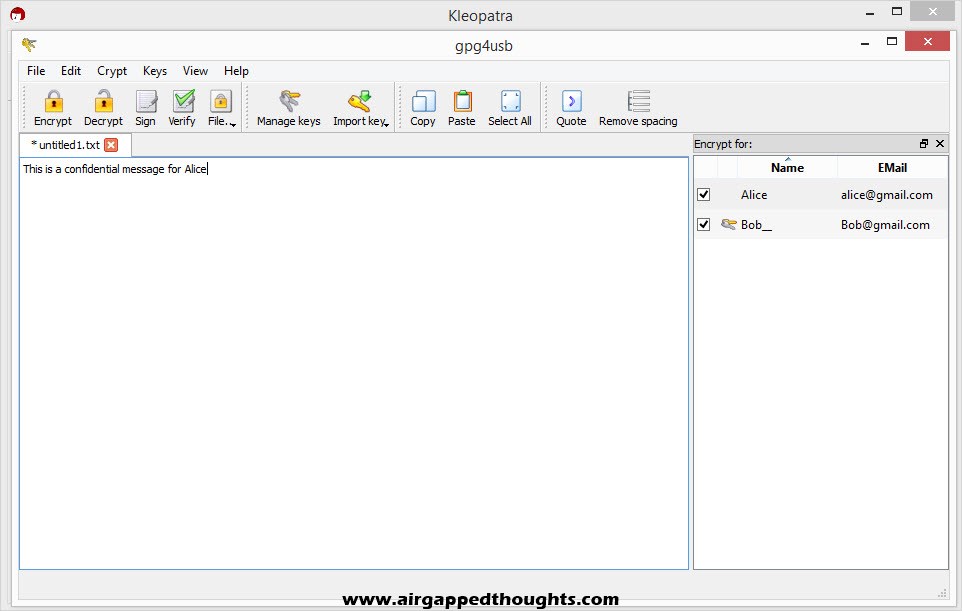
Now Bob replies back with a confidential message for Alice. Don’t forget to add recipients that will be able to decrypt the message from the right side of the screen! Encrypt, copy the encrypted message and let’s go back to Alice and the Kleopatra application.
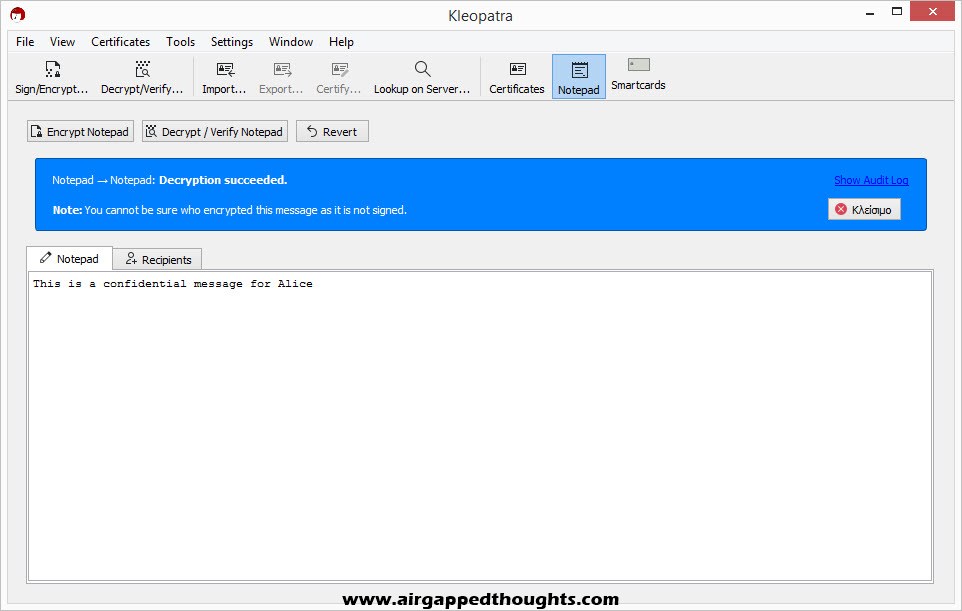
Paste the encrypted message in the Notepad tab and choose Decrypt / Verify Notepad. The message is decrypted.
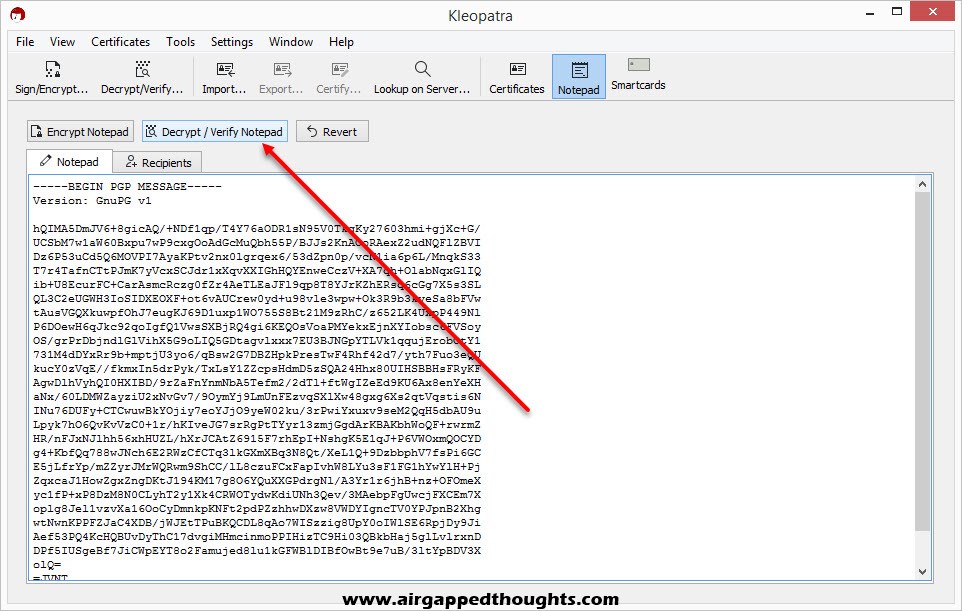
Notice the warning we just got “You cannot be sure who encrypted the message as it is not signed”. That’s because Bob only used the “Encrypt” option to encrypt the message and didn’t use the “Sign” option.
You can also encrypt and decrypt files while the same rules for encryption and decryption apply. Just choose the Sign/Encrypt… or Decrypt/Verify… icon in Kleopatra to choose file for encryption / decryption and File —-> Encrypt File / Decrypt File using GPG4USB.
KEY SERVERS
Instead of sending your public key to friends using e-mail, you can also use a PGP key server. These servers host PGP public keys of other users and you can search for one by using various criteria like a name, e-mail address or a fingerprint. If you want to share your public key with the world, this is the fastest way to do so.
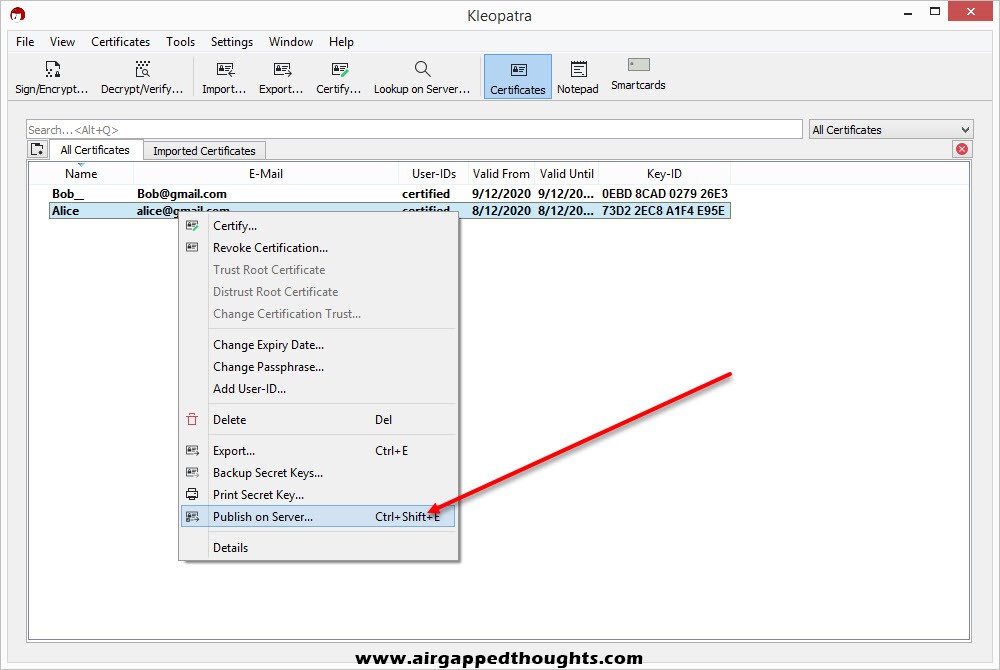
You can directly upload your public key from Kleopatra right after creating a new key pair and choosing “Upload Public Key To Directory Service…”. Else, you can use the Certificates icon and choose the public key you want to upload, right click to it, and choose “Publish on Server…”.
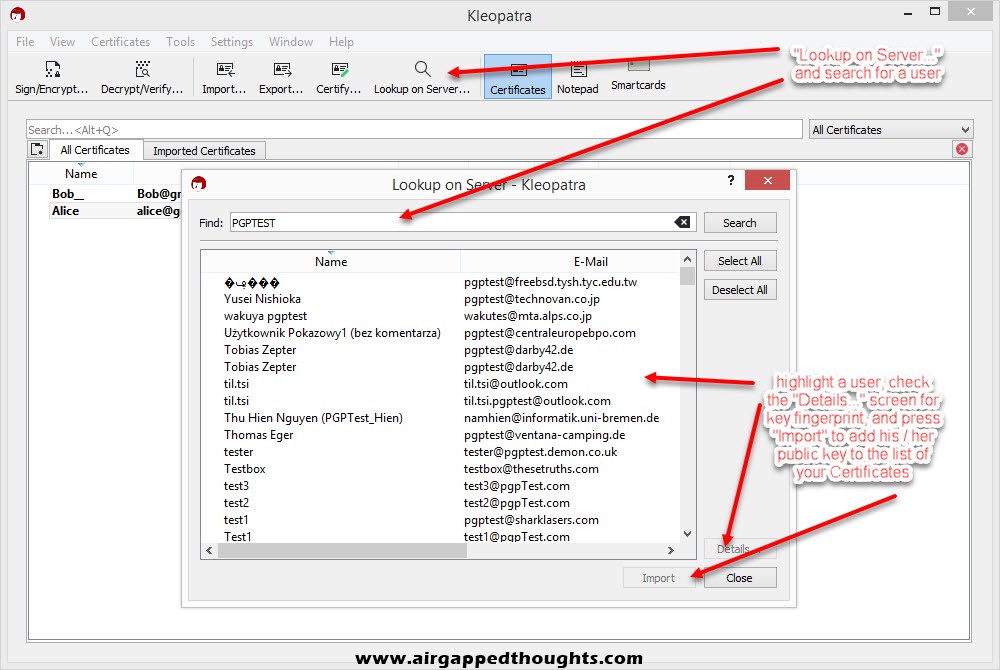
You can also search for other users public keys by choosing the “Lookup on Server…” icon.
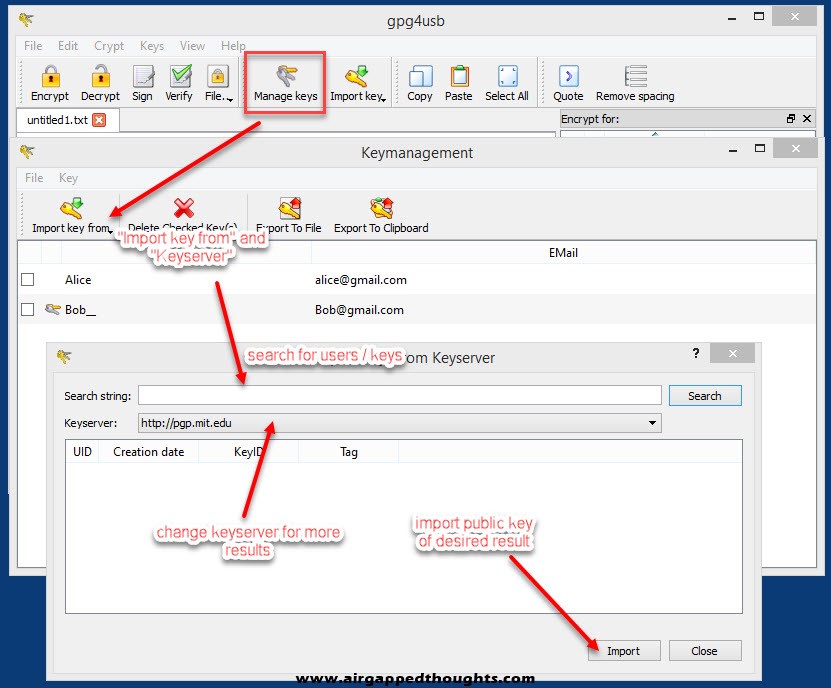
For the GPG4USB program you can find the key server option by clicking on the “Manage keys” icon to open the Keymanagement window, and then choose “Import key from” and “Keyserver”. GPG4USB only supports searching and download of public keys and doesn’t support direct upload of yours.
You can also search for pgp key servers using a search engine, some famous options are the PGP Global Directory, OpenPGP keyserver, or MIT PGP Key Server.
SETTING UP YOUR E-MAIL CLIENT
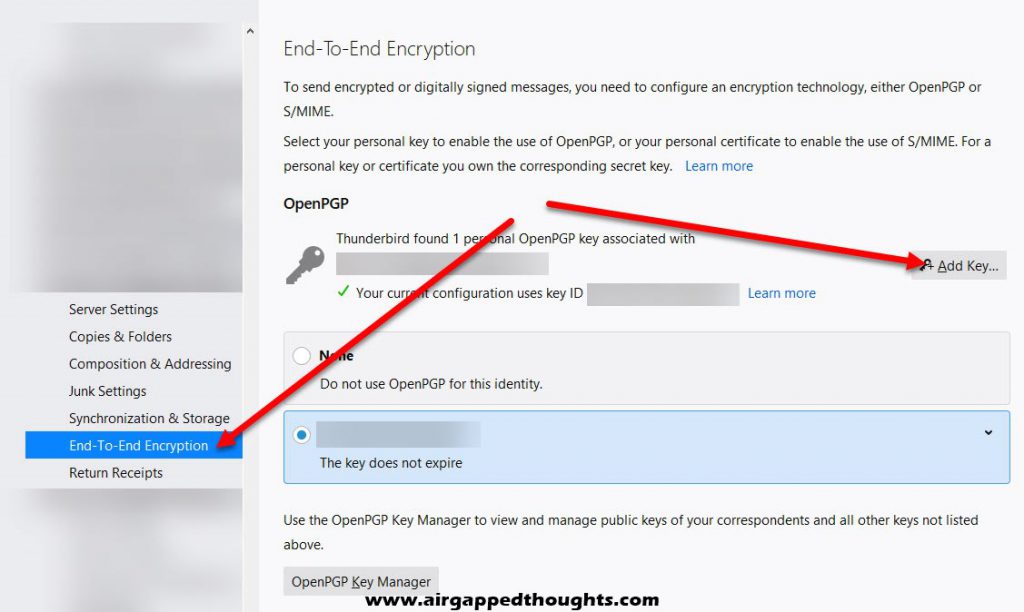
Many e-mail clients support PGP by default but have this option disabled. I’m going to give an example on how to enable this option in Thunderbird, you can start by choosing Tools and Account Settings. From the Account Settings windows, choose your preferred email that you want to enable pgp for, and choose End-To-End Encryption and Add Key.
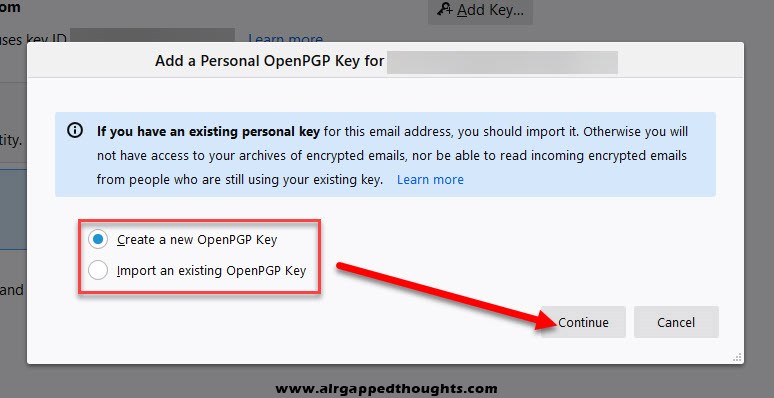
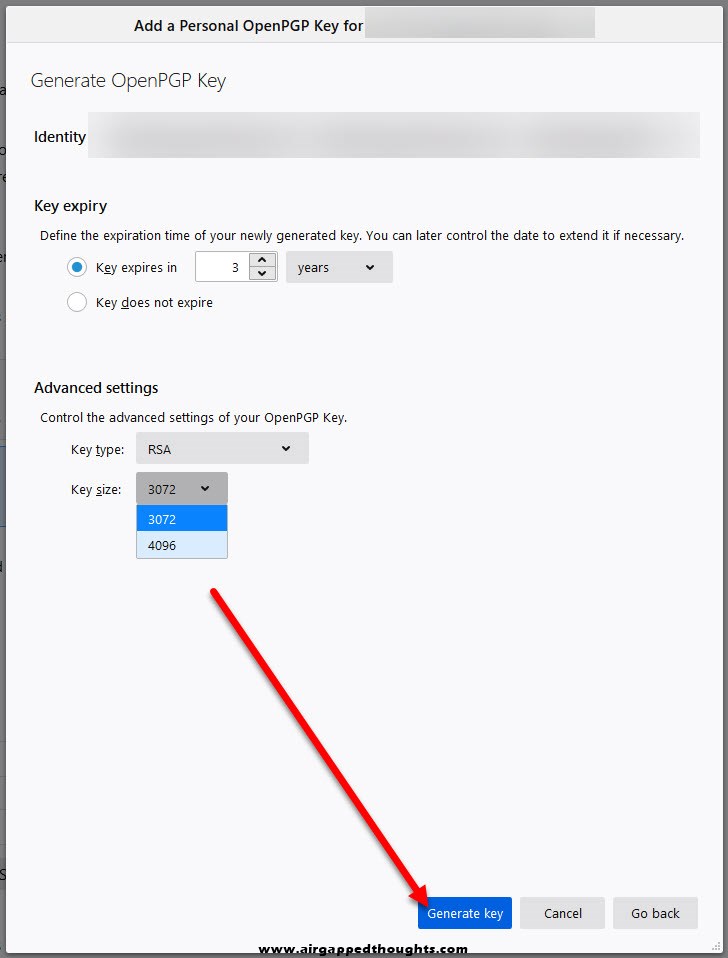
You can create a new key pair or import keys you’ve created with another application, we’re using a new OpenPGP key for this example
Choose expiration date and change the key type and size if you want
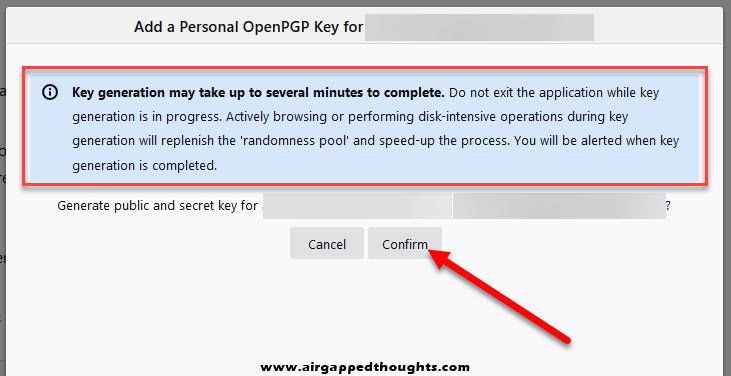
Do random stuff with your computer to accelerate the process of generating entropy for you key, press the Confirm button.
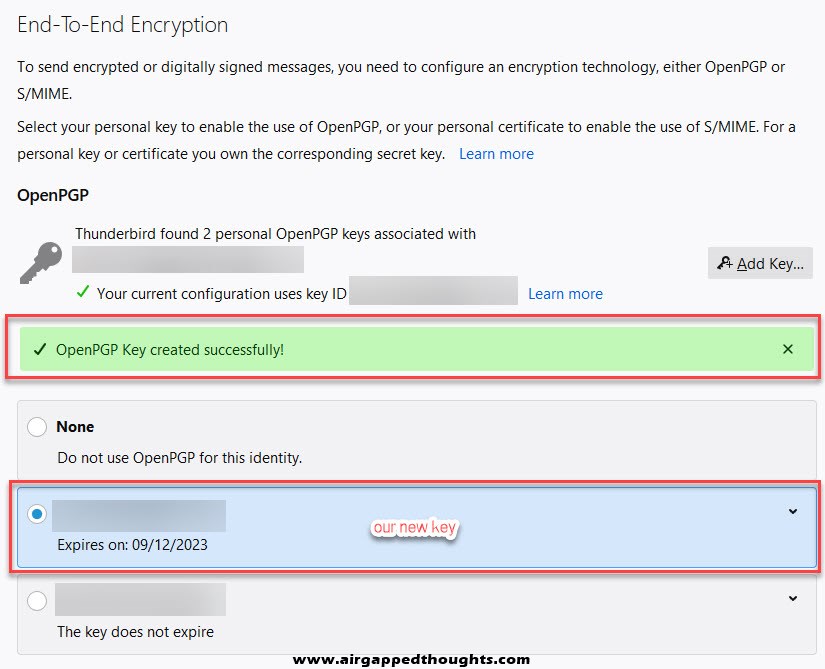
Done!
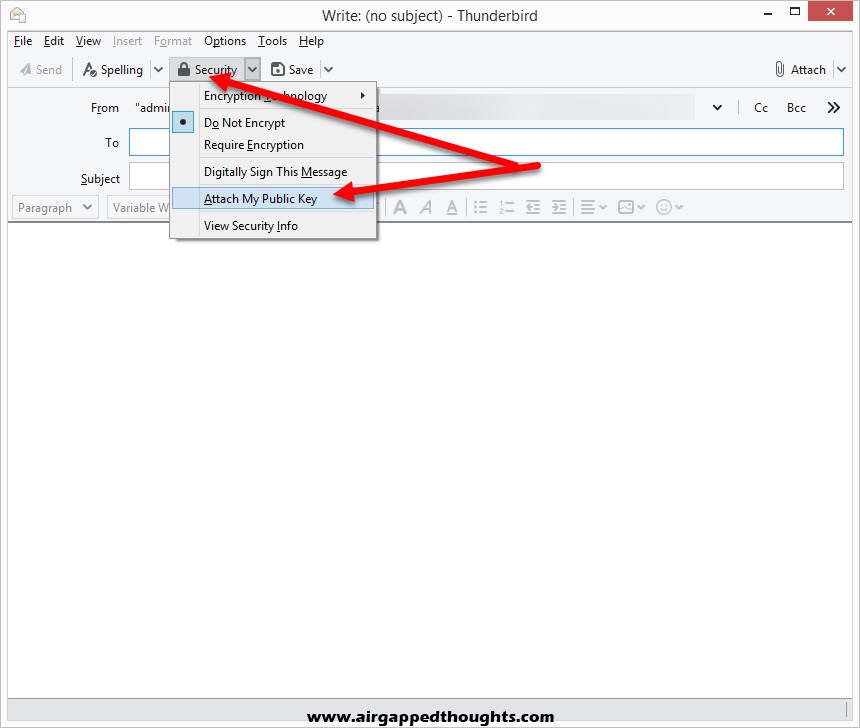
Now we have to send our public key to friends. Compose a new e-mail using the account you’ve created a key pair for, and from the Security tab choose to “Attach My Public Key” and e-mail recepients as you normally would, they will get your public key as an email attachment.
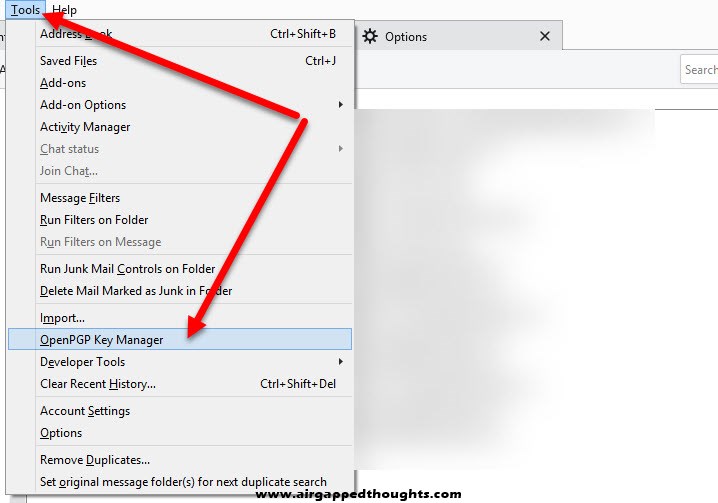
Friends should send their public keys back, you can import them using the Tools and OpenPGP Key Manager option.
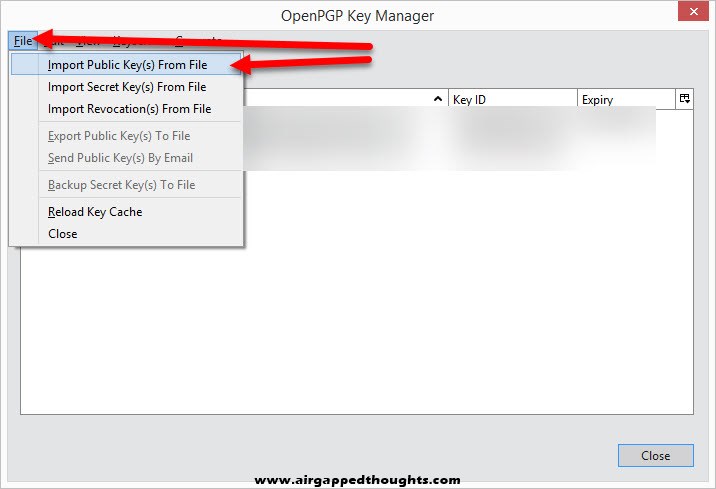
From the OpenPGP Key Manager, go to File and Import Public Key(s) From File option and choose your friends public keys.
After importing a public key, you can start encrypting your emails by choosing “Require Encryption” and “Digitally Sign This Message” from the Security option while composing an email.
CONCLUSION
Let’s be honest, cryptography stuff are not (and can’t be) user friendly. PGP has many software implementations that try to simplify the whole process but in the end, you won’t be able to avoid any kind of steep learning curve but it’s totally worth it. I just wanna add some things:
Many people are getting confused with the private and public keys usage, so do not forget that: you generate a private key and export a public key from it. Public keys are meant for encrypting messages specifically for the person that has the corresponding private key. You need a friends public key to encrypt data specifically for him / her, and you need to give your public key to start receiving encrypted data that were meant for you. You can use PGP to encrypt data just for you by choosing your public key on the encryption process or you can completely prevent the encryption from you by not choosing yourself. Do some tests before start using it cause there’s no turning back!
If you plan on publish your public keys on a key server, you should add a name, an e-mail, and a comment, so people can easily find you. This is called a User ID and truth is that most people who publish their keys online don’t really care about it. Also keep in mind that after publishing your public key online, there is no way to delete it.
Always sign your messages before sending them and don’t forget to publish your fingerprint online if you use an official site so that people can trust your messages more easily.
Have fun!


