Let’s be honest, handling crypto assets is a huge pain.
A big number of people are having a hard time managing their mnemonic seeds / private keys, many times they lock themselves out of their wallets because they forgot their password and haven’t backed up their keys, and there are numerous management problems for people who use a variety of software and hardware wallets.
In this article we are going to create the safest environment in which we will be able to safely store or generate mnemonic seeds and private keys for various assets, and safely use various tools for cryptocurrencies without having to worry about ANYTHING. This article requires some basic computer knowledge since we are going to create a working environment from scratch.
TOOLS THAT WE ARE GOING TO NEED
HARDWARE
A COMPUTER If you have one already, that’s great! But if you’re very serious about crypto investments, you might as well buy a used one exclusively for using it as a cryptocurrencies device, a basic used Core 2 Duo laptop with 4GB of RAM will do. (100$-120$)
AN EMPTY HARD DISK DRIVE You’ll need to buy an empty hard disk drive for this article, a simple and small SSD will do just fine (20$) unless you already have a spare one.
SOFTWARE
AN OPERATING SYSTEM
Unless you have a computer with no WiFi capabilities in the motherboard that can be used as a cold storage device (in which case i suggest you to skip the whole “AN OPERATING SYSTEM” section and just install Windows 8.1 or Windows 10 so you can follow most of this guide), then i suggest Windows XP SP3. Yes, i know that my decision to choose windows for a safe operating system, let alone an old windows version, is very laughable. But let me explain:
Although newer Windows versions are much safer, that’s only true while you work from inside the operating system. Since we’re going to encrypt our hard drive to prevent unauthorized entry and data theft, and since this installation will be completely air-gapped, a safer operating system won’t have any real positive impact. The environment from inside will be air-gapped, and from outside will be encrypted.
What matters the most since we are talking about an air-gapped environment, is to prevent our operating system from having any kind of wireless connection. Most modern operating systems will recognize your wireless card and start searching for networks to connect to, the only way to prevent that is to install an old enough operating system that will probably ignore most, if not all, wireless cards. I’ve tried many modern operating systems for this job and believe me, working with critical files from inside their environment feels much less safer, it seems that operating systems nowdays are network addicted. Windows XP are also fully compatible with all of the crypto tools that we are going to install and fast enough for old and new computers.
You can try to use a newer Windows version if you don’t have a copy of Windows XP but it’s up to you to take extra precautions. If you want to install Linux, encryption methods in this article wont work and encrypting a Linux distro isn’t user friendly. You can however use Pop!_OS which is one of the few distros with out of the box encryption which is just a click away. ReactOS is also another option if you wanna stick with Windows but you hate the closed source nature of them since it’s a reversed engineered and fully open sourced version of Windows Server 2003 compatible with Windows apps and drivers but it’s extremely buggy.
If you have a better idea for an operating system go ahead and use it since most cryptocurrency tools are operating system agnostic (most of them are just javascript / html tools, you only need a web browser to run them). You’ll probably miss some command line tools and maybe some software wallets but every important tool in this guide exists on all platforms but encryption of the hard drive which is a really important part will be exclusively up to you.
Moving on with the rest of the tools:
SOFTWARE
AN OPERATING SYSTEM Unless you have a computer with no WiFi capabilities in the motherboard that can be used as a cold storage device (in which case i suggest you to skip the whole “AN OPERATING SYSTEM” section and just install Windows 8.1 or Windows 10 so you can follow most of this guide), then i suggest Windows XP SP3. Yes, i know that my decision to choose windows for a safe operating system, let alone an old windows version, is very laughable. But let me explain:
Although newer Windows versions are much safer, that’s only true while you work from inside the operating system. Since we’re going to encrypt our hard drive to prevent unauthorized entry and data theft, and since this installation will be completely air-gapped, a safer operating system won’t have any real positive impact. The environment from inside will be air-gapped, and from outside will be encrypted.
What matters the most since we are talking about an air-gapped environment, is to prevent our operating system from having any kind of wireless connection. Most modern operating systems will recognize your wireless card and start searching for networks to connect to, the only way to prevent that is to install an old enough operating system that will probably ignore most, if not all, wireless cards. I’ve tried many modern operating systems for this job and believe me, working with critical files from inside their environment feels much less safer, it seems that operating systems nowdays are network addicted. Windows XP are also fully compatible with all of the crypto tools that we are going to install and fast enough for old and new computers.
You can try to use a newer Windows version if you don’t have a copy of Windows XP but it’s up to you to take extra precautions. If you want to install Linux, encryption methods in this article wont work and encrypting a Linux distro isn’t user friendly. You can however use Pop!_OS which is one of the few distros with out of the box encryption which is just a click away. ReactOS is also another option if you wanna stick with Windows but you hate the closed source nature of them since it’s a reversed engineered and fully open sourced version of Windows Server 2003 compatible with Windows apps and drivers but it’s extremely buggy.
If you have a better idea for an operating system go ahead and use it since most cryptocurrency tools are operating system agnostic (most of them are just javascript / html tools, you only need a web browser to run them). You’ll probably miss some command line tools and maybe some software wallets but every important tool in this guide exists on all platforms but encryption of the hard drive which is a really important part will be exclusively up to you.
Moving on with the rest of the tools:
NET Framework [Windows Users Only] For Windows XP you’re going to need Net Framework 4.0. (here)
VeraCrypt A powerful open source and multiformat encryption software that can encrypt files or even our whole operating system. Useful for protecting our files in case our hard drive falls into the wrong hands. It doesn’t support encryption of Linux / Mac OS partitions.
Portable QR Code Generator Like the best airgapped hardware wallets, we are going to communicate with our external devices using QR Codes. This is one of the best QR Code applications available, just install JRE in your operating system and you’re ready to run it.
Java Runtime Environment (JRE) Required to run the QR Code application since it’s a Java application. If you’re going to install Windows XP, you’ll need an old JRE version and you can get one from here (32bit version) or here (64bit version).
Keepass A powerful open source and multiplatform password manager with great encryption capabilities. We are going to use it to store our mnemonic seeds and private keys. The password database file will end up being the only important thing in the whole installation and you’ll have to back it up often.
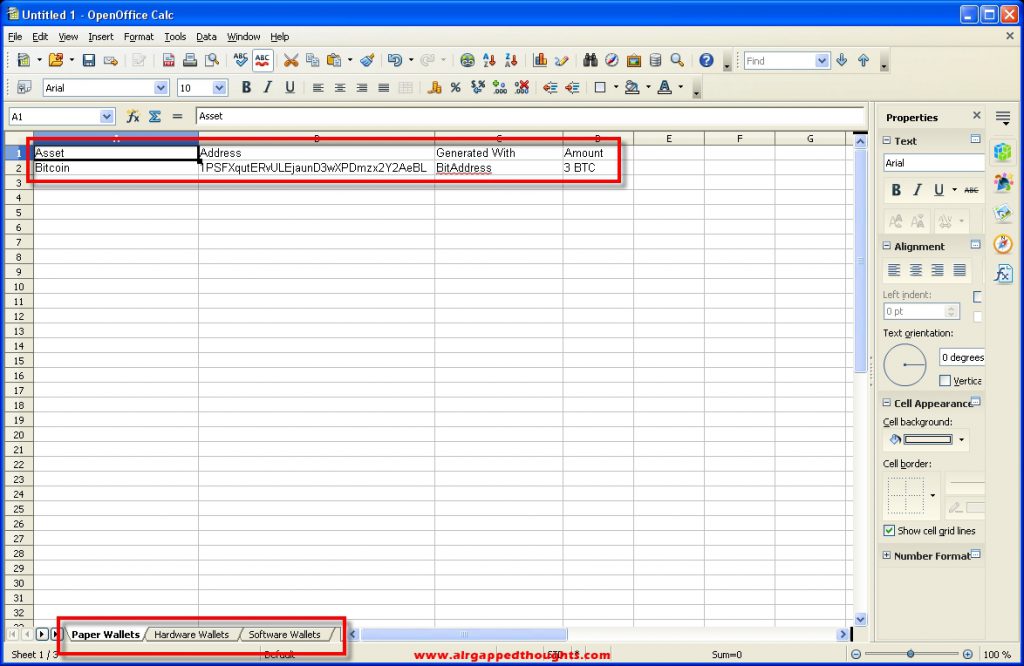
Apache OpenOffice A powerful, multiplatform and completely free office suite application, spreadsheet app is extremely useful for tracking our various software / hardware wallets and addresses.
Mypal [Only for Windows XP Users, for other Windows versions or operating systems use Firefox or something similar] Most crypto tools are web based. Although we will only use offline versions, we still need a web browser to open them. If you are going to use Windows XP, this is the best browser that you’ll be able to find and its still getting updates.
After finishing with all these downloads, put them inside a flash drive. Our operating system will be completely air-gapped, you wont be able to download them later. Remember that this guide is based on Windows XP SP3.

Also visit this page and download the most important crypto tools for your needs. Download only open source (tools that have a source code link) and offline versions and nothing else.
Let’s do this!
INSTALLING OPERATING SYSTEM
If you already have a main disk drive on your computer, disconnect it and connect your spare empty drive that will host your new installation. You can’t install the new operating system side by side with your main OS inside your main HDD cause we’re going to encrypt this installation and we want a different bootloader for it and not to mix it up with our main bootloader. So remove old drive from computer and connect the new one on its place.
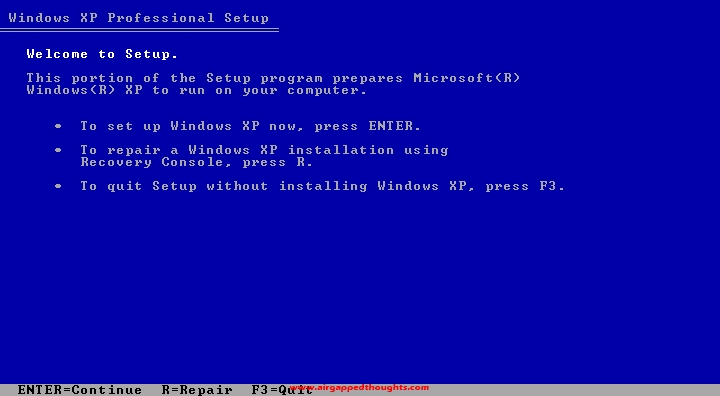
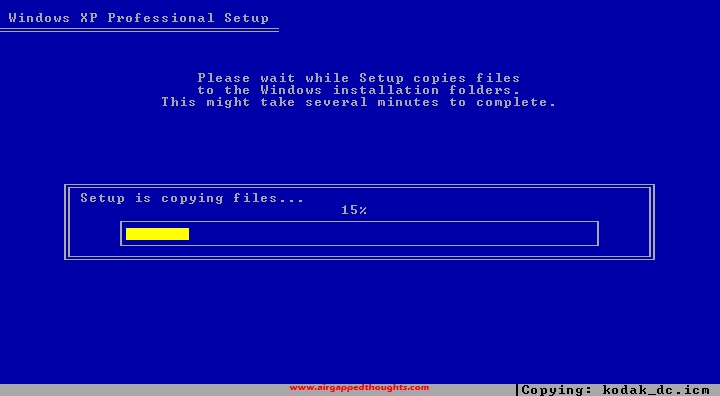
Insert the Windows XP SP3 CD into the disk drive and boot from it.
Press Enter at the first screen.
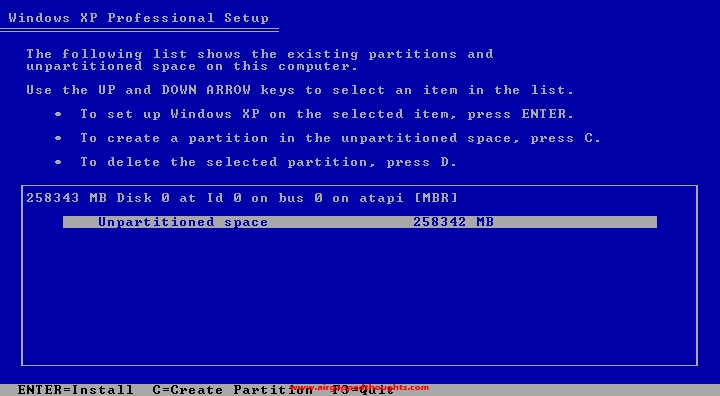
If there are many partitions on your disk, make sure you don’t have critical files in it and delete every partition by highlighting it and pressing the D button. When there’s only one partition left, highlight it and press the C button.
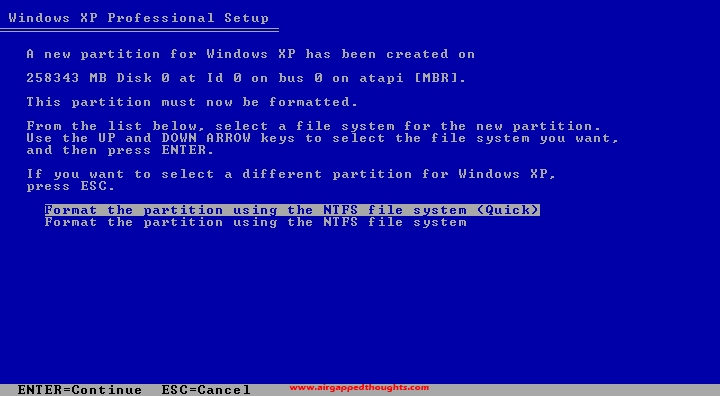
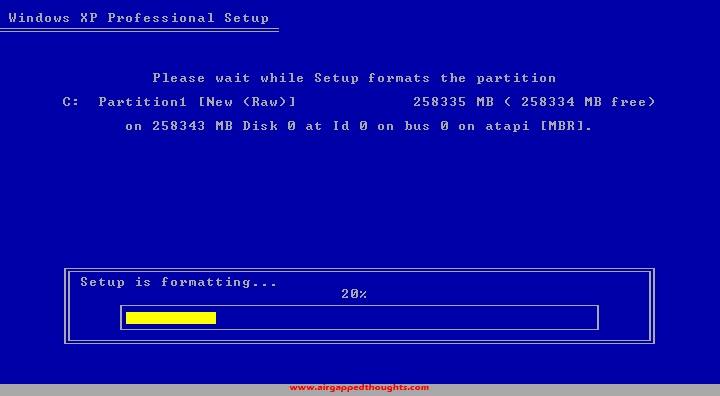
Do a quick format.
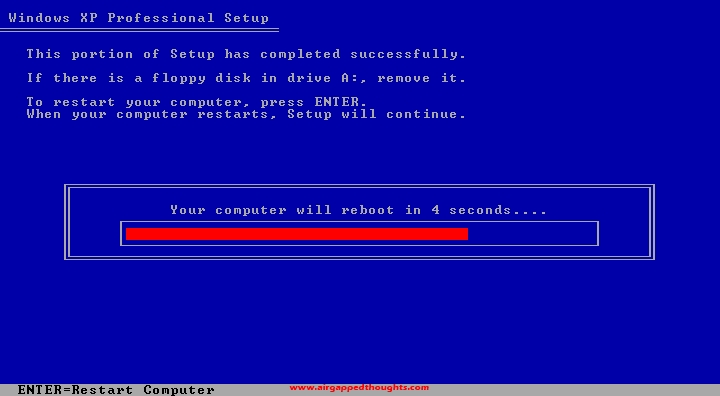
When your computer reboots during the setup, you’ll get prompted to press Enter again to boot from the CD. This time don’t do it, just let it boot the Windows to continue the installation.

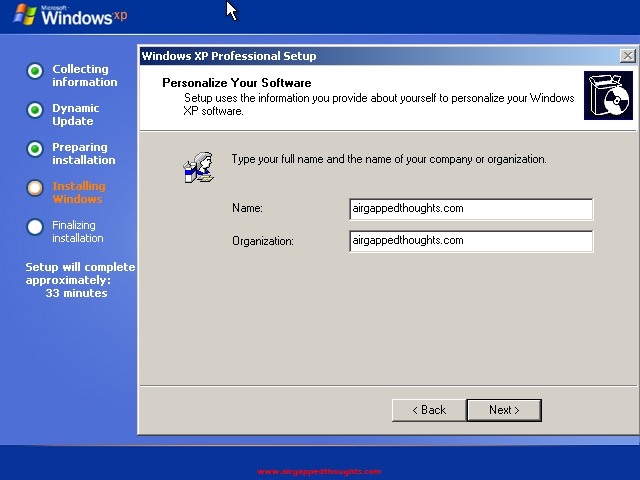
Not many things to change during setup, you’ll have to select a region and keyboard language, and a name / organization.
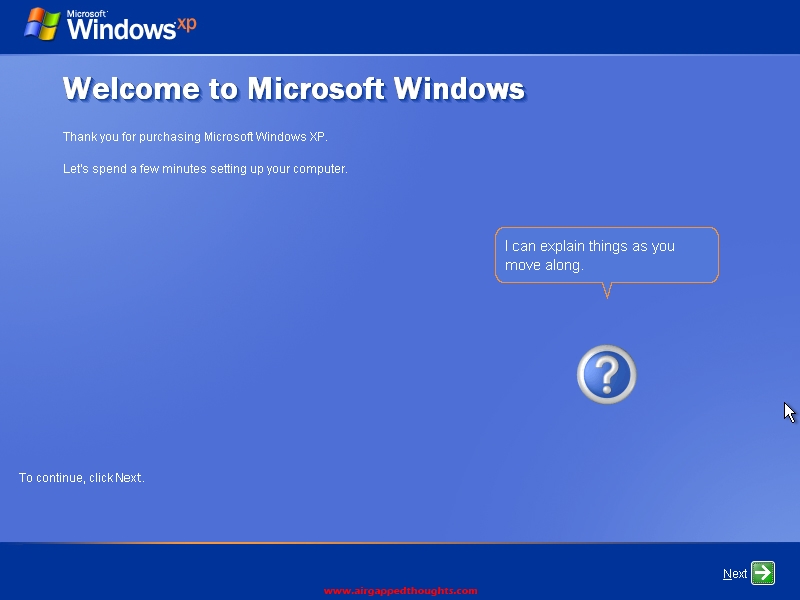
Almost there
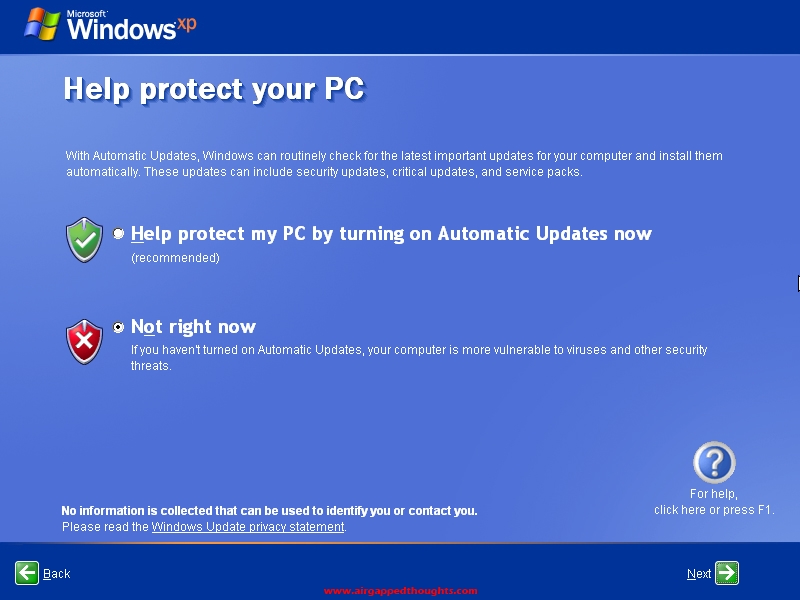
No need to protect your PC since we wont have any type of online connection to get updates, you can just choose “Not right now”.
Skip anything Internet related, uncheck TCP/IP boxes if you have to.

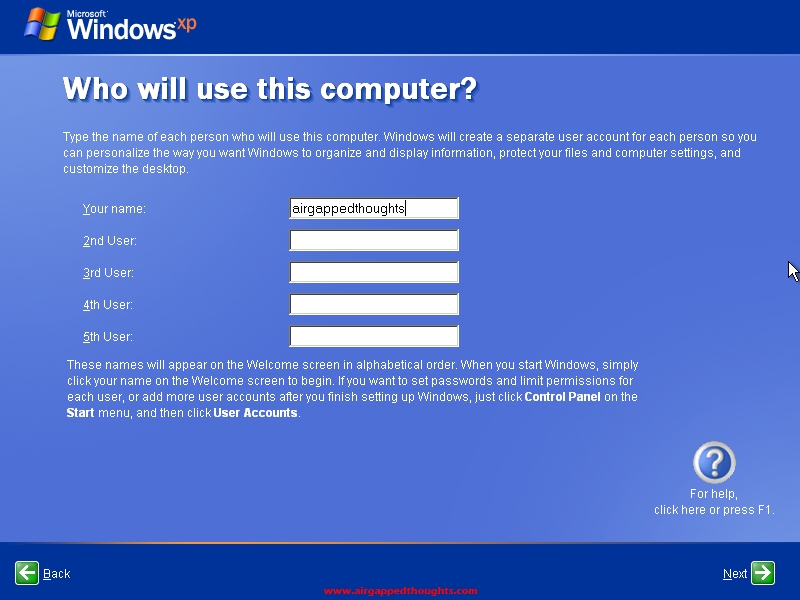
Username
We’re in!
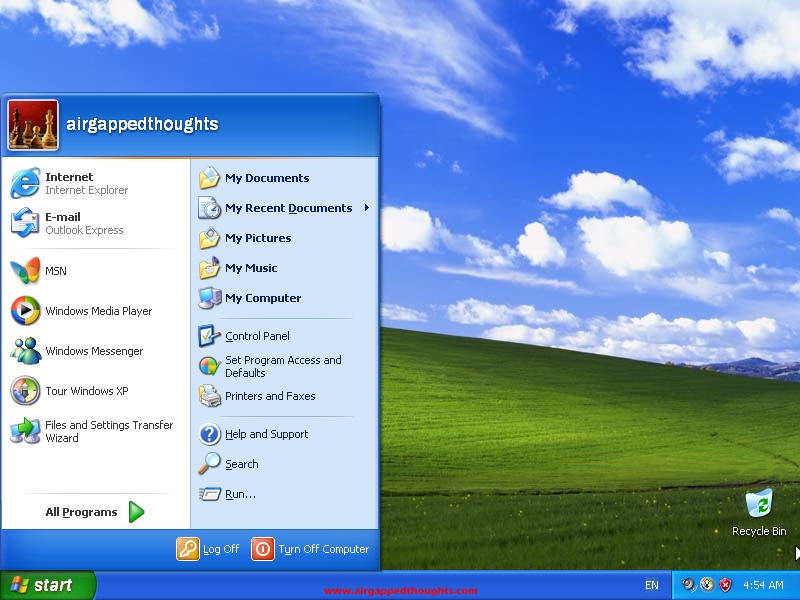
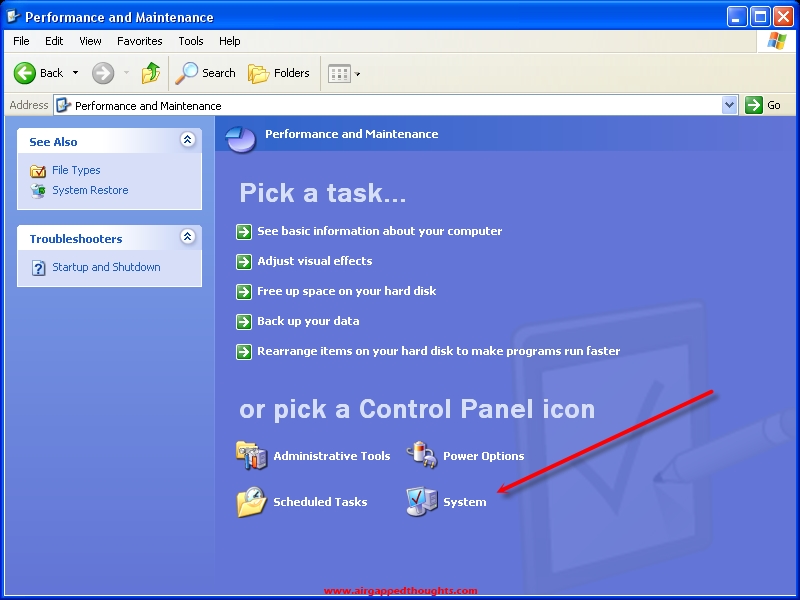
Let’s make sure that our computer is completely offline by going to the control panel and see if our network cards have been recognized by Windows XP. So go to the start menu and choose “Control Panel”. Then go to “Performance and Maintenance”.

System
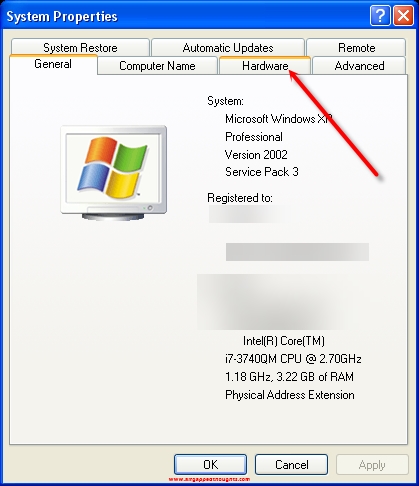
From the System Properties windows go to the “Hardware” tab.
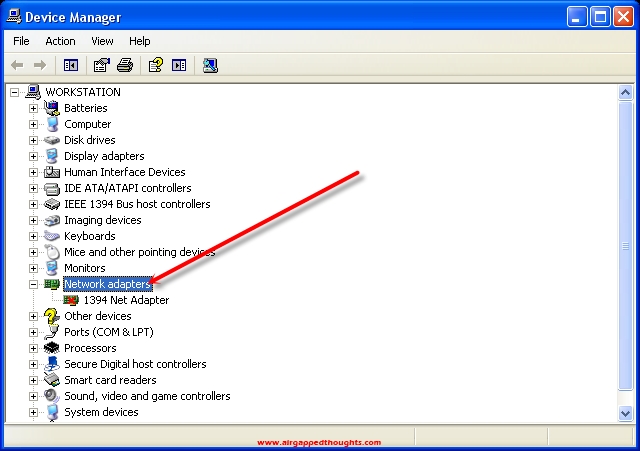
Device Manager
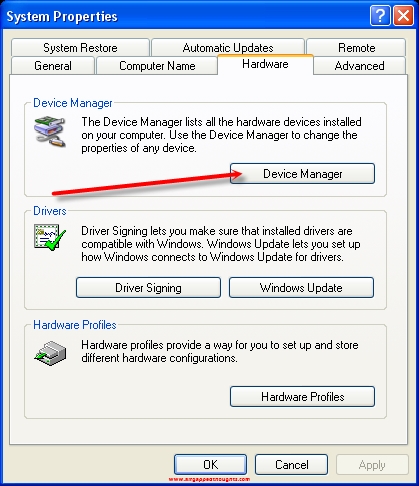
Check the Network adapters section. Choose everything under it and right click / disable. If you are using a dedicated computer for this job, you might as well open your computer case and remove the wireless connection component if it’s removable.
Now let’s go and add a user password for our account. Let’s go back to the control panel and choose “User Accounts” and the name of our user.

Create a password
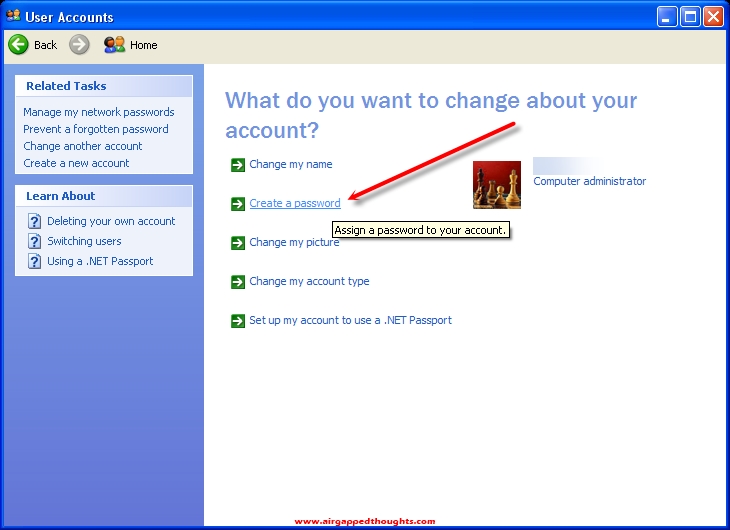
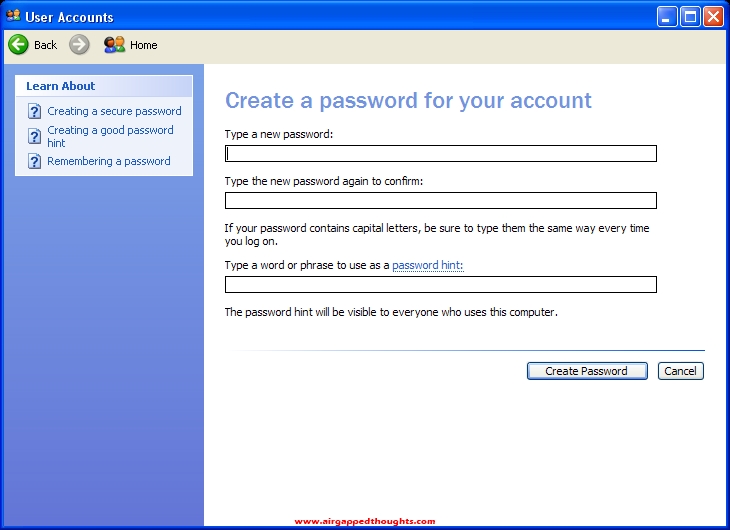
Type your preffered password twice and a hint, and we’re all set up.
NET FRAMEWORK
Now let’s install NET Framework 4.0 since many apps require it, without it Windows are kinda useless. So let’s go and double click to the dotNetFX40 file and install it and after that, it’s encryption time!
ENCRYPTING OUR HARD DRIVE
Encrypting our hard drive is mandatory for a system that is going to host important files like private keys and mnemonic seeds. After encryption, files will be readable only while we are inside the operating system. No one will be able to open up the computer and boot into our system since he’ll have to input a decryption password, and no one will be able to remove the drive and try to read it through another operating system.
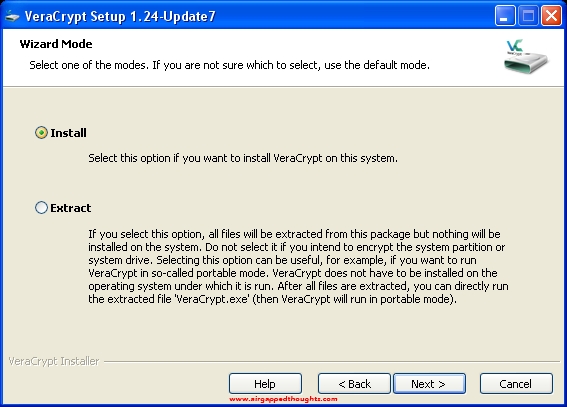
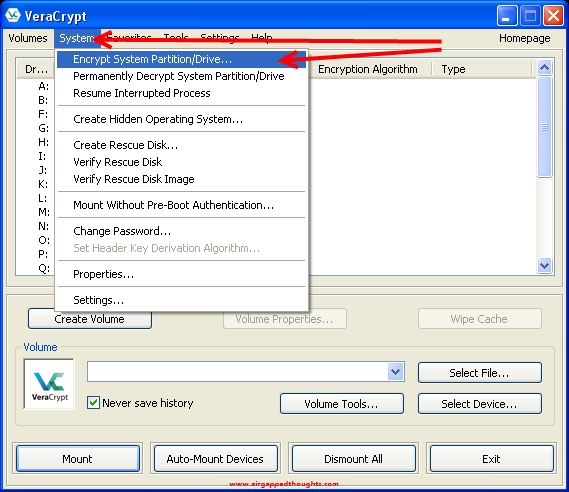
We are going to encrypt our drive using the VeraCrypt application which is a powerful encryption app with some sick features like hiding an operating system inside an other operating system. We are going to do a basic encryption though to keep things simple (for us, not for others). So let’s go and install it. Choose the “Install option”.
After installing and opening the application, go to System tab and choose “Encrypt System Partition/Drive…”.
Choose “Normal”

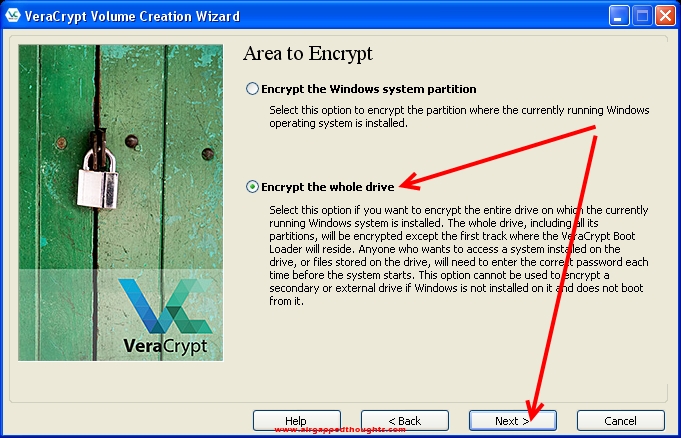
We want to encrypt the whole drive

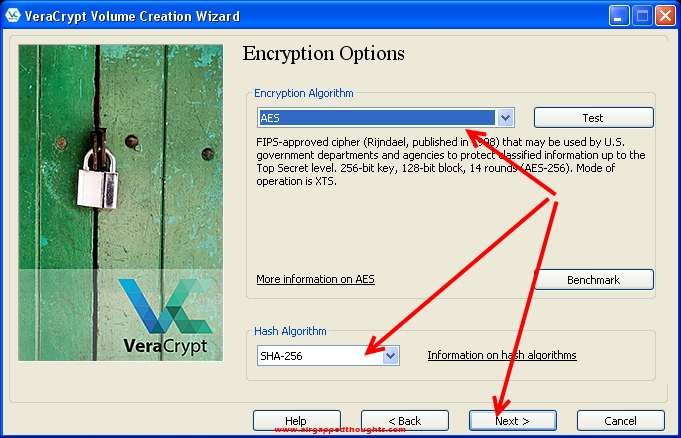
The next screen is very interesting since there are various encryption algorithms to choose from for our encryption. AES and SHA-256 are powerful enough.
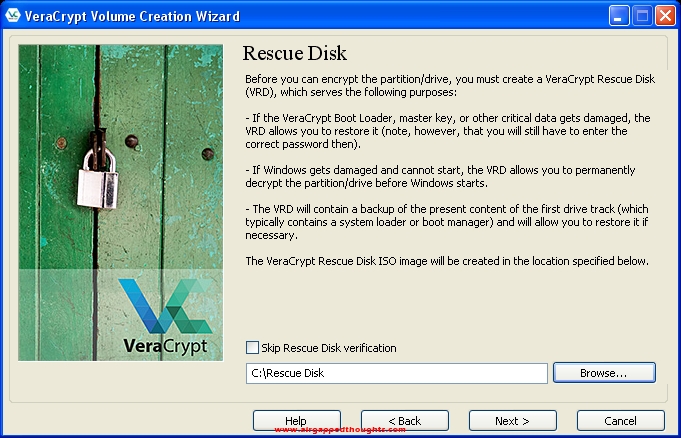
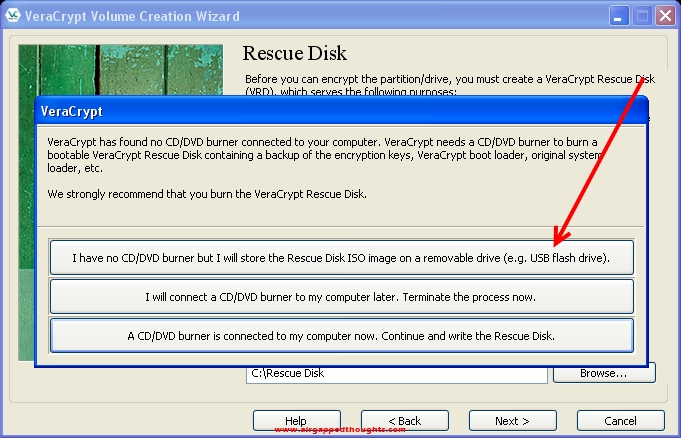
Now this is also very important. You will have to backup your rescue key. You can burn it in a disk right now if you have a DVDR in your computer, or you can back it up in a flash drive and do it later. DO NOT FORGET TO DO IT THOUGH. The rescue disk will help you to decrypt your drive if the bootloader gets corrupted, without a valid bootloader you won’t be able to decrypt the system and you’ll get locked out for good.

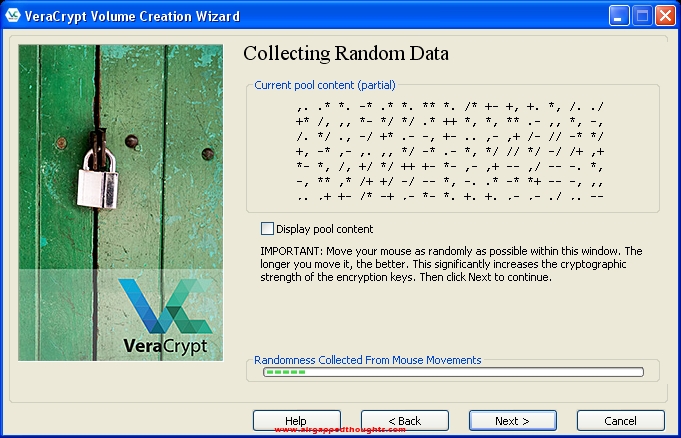
Move your mouse aroung to create entropy
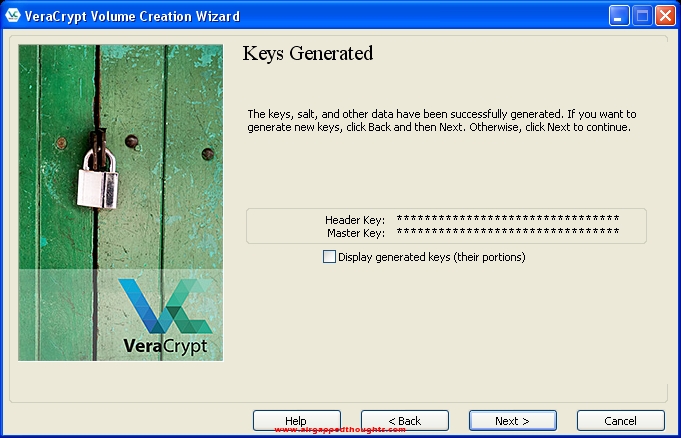
Almost there
Now this is also very important. You will have to backup your rescue key. You can burn it in a disk right now if you have a DVDR in your computer, or you can back it up in a flash drive and do it later. DO NOT FORGET TO DO IT THOUGH. The rescue disk will help you to decrypt your drive if the bootloader gets corrupted which will make the decryption impossible without it. You may lose everything on this hard disk drive without it.
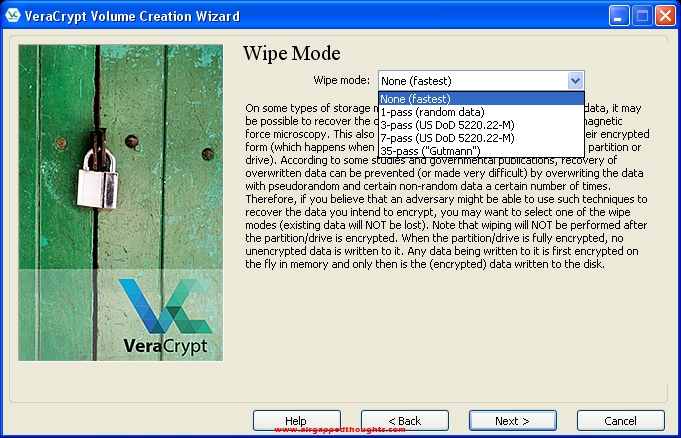
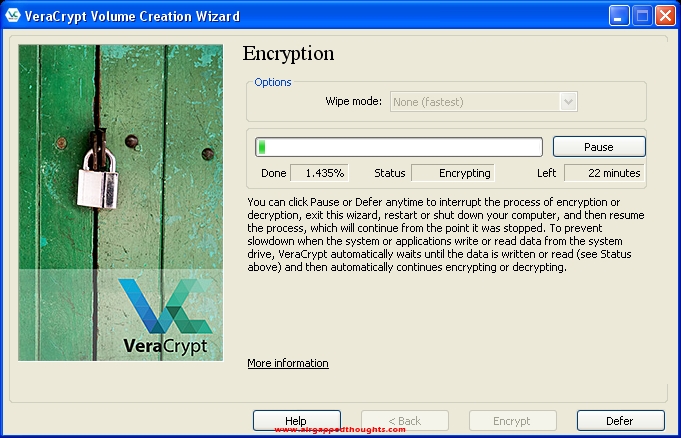
Since this OS installation is fresh, choose None in the Wipe Mode screen.
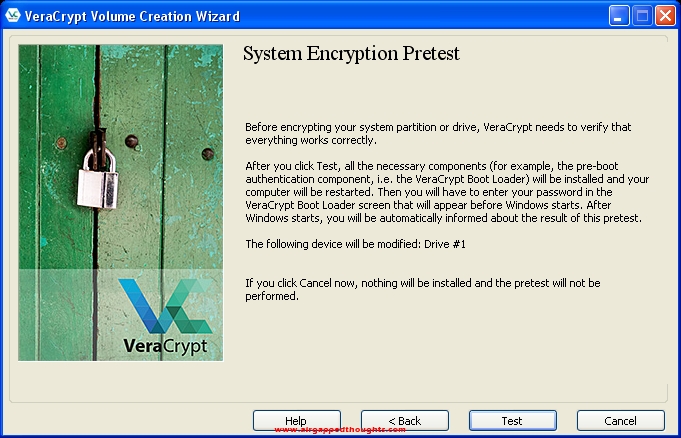
Press the Test button…
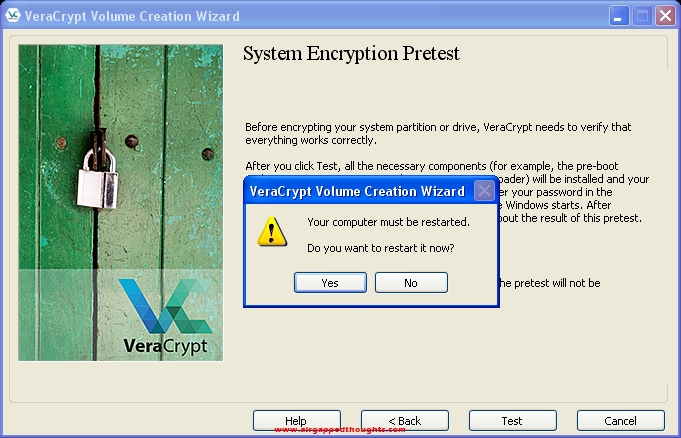
… and choose Yes to the restart prompt.
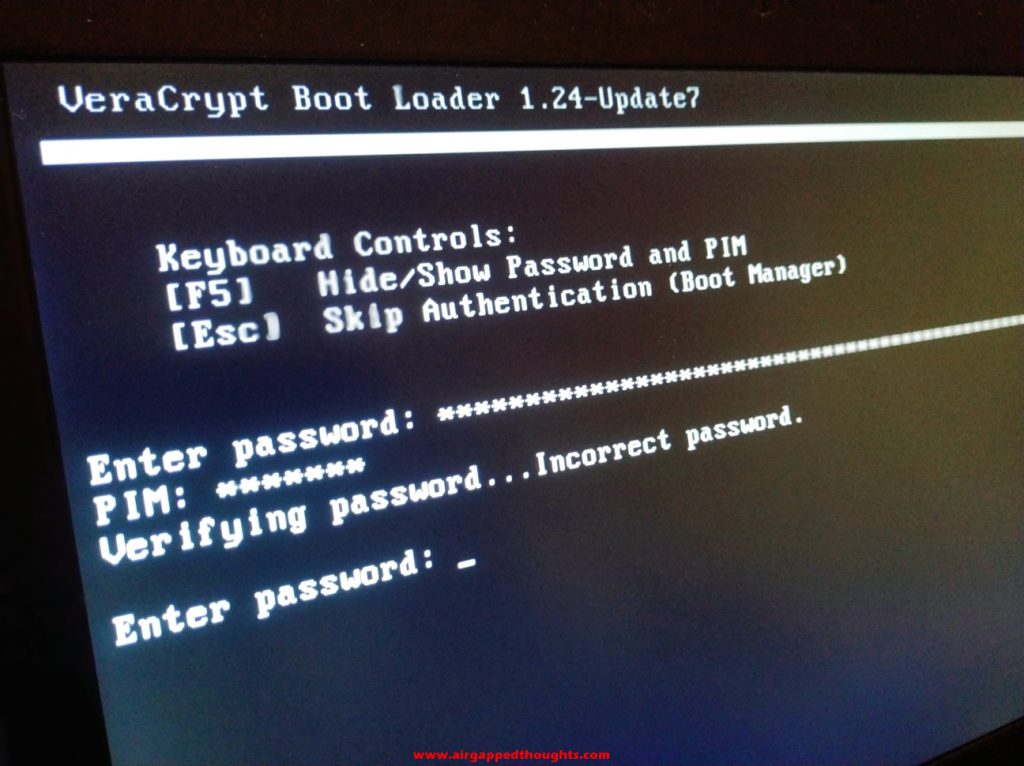
At the next boot you’ll get welcomed by your new VeraCrypt bootloader. Your disk isnt yet encrypted, this is a test screen. Enter your VeraCrypt decryption password.
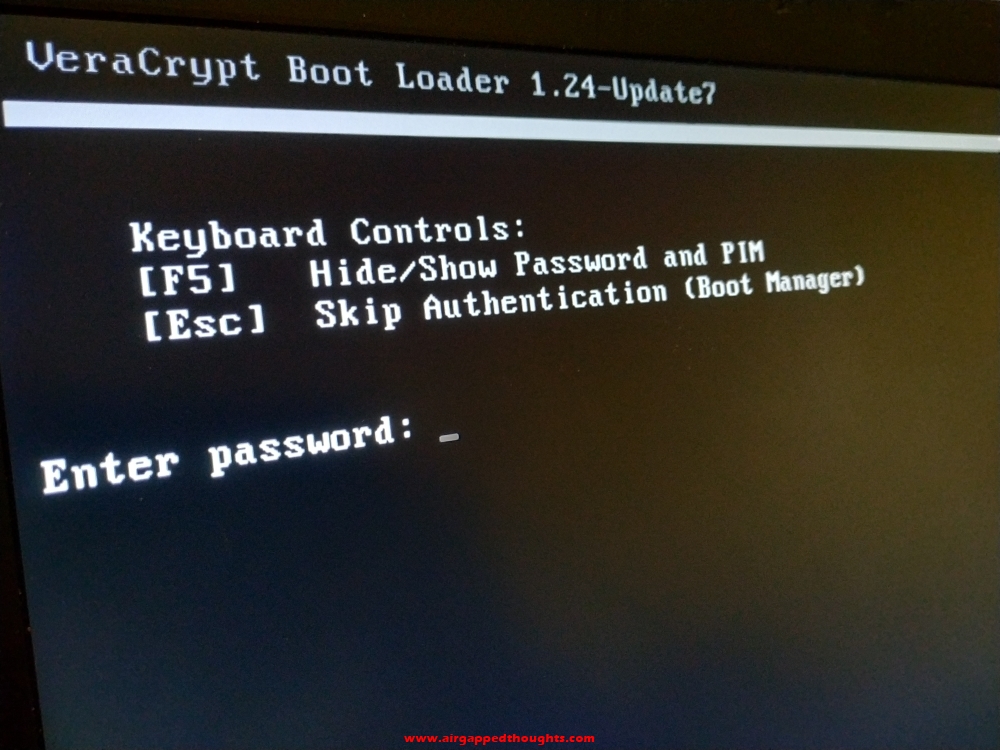
And if you get this message, type it again but more carefully.
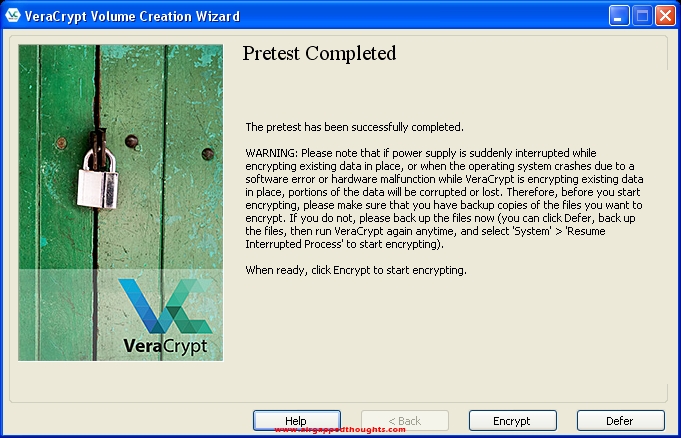
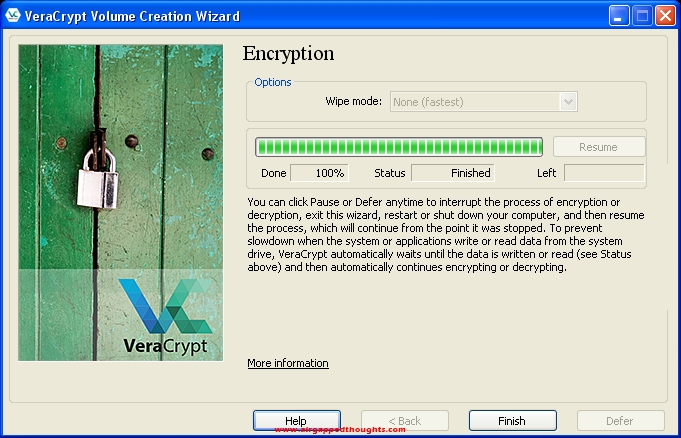
After getting into Windows again, VeraCrypt will welcome us with this message. Press the Encrypt button to start encrypting your drive.
Done. Our disk and its contents are now, bulletproof : )
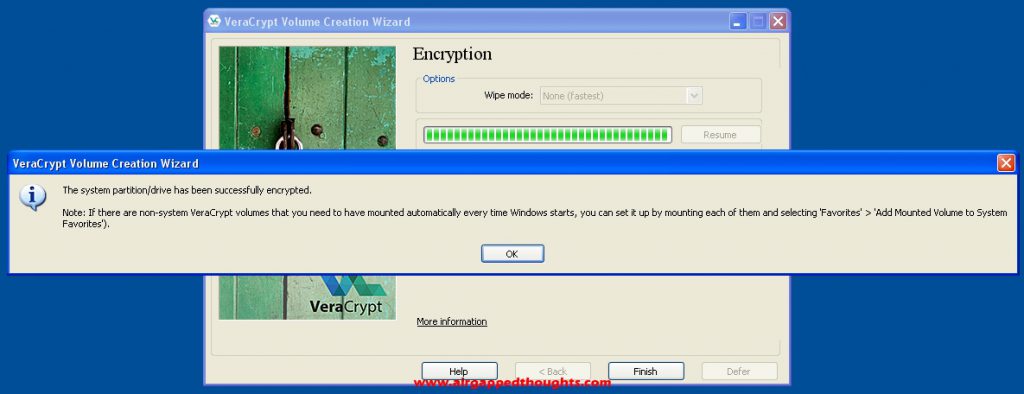
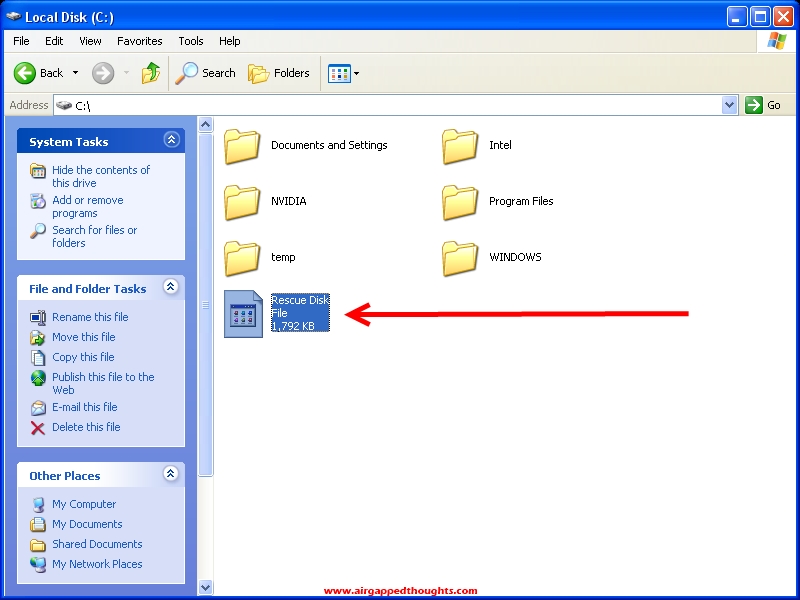
Now go and backup the rescue disk file before it’s too late or burn it to a cd which is something you’ll eventually have to do so.
INSTALLING TOOLS
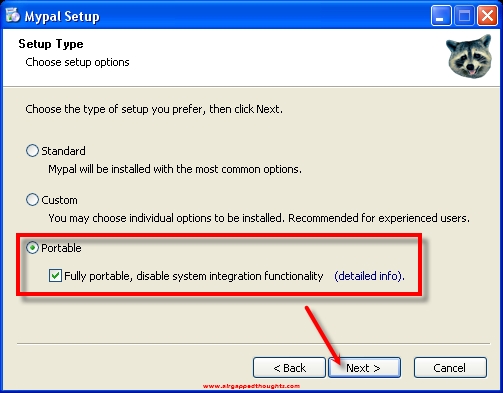
Now let’s see what an encrypted and airgapped operating system can do for us, we will start with a bitcoin wallet address generator. For this example, we are running the open source bitaddress tool that we got from this github page. We need a modern browser to run most of these web based tools, let’s install Mypal. Choose the portable version which will let you put the program inside a folder and run it from there without touching the registry, this will make it even safer, in case you’re even more paranoid than this tutorial.
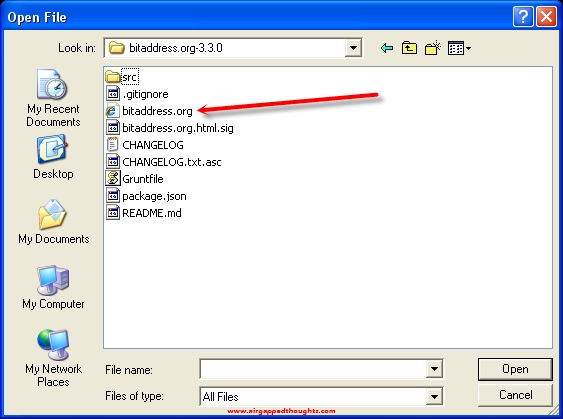
Go to File and choose Open File
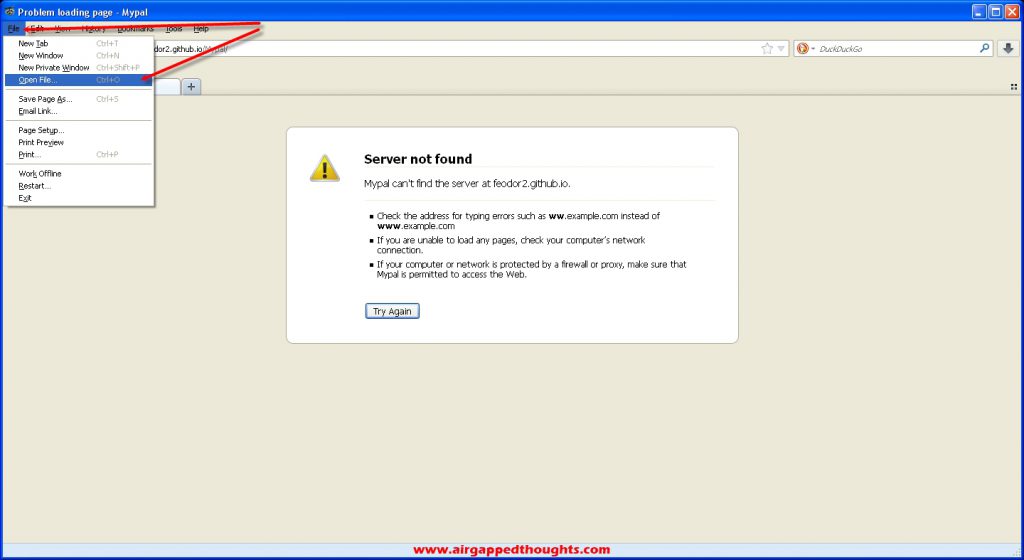
Choose the bitaddress tool
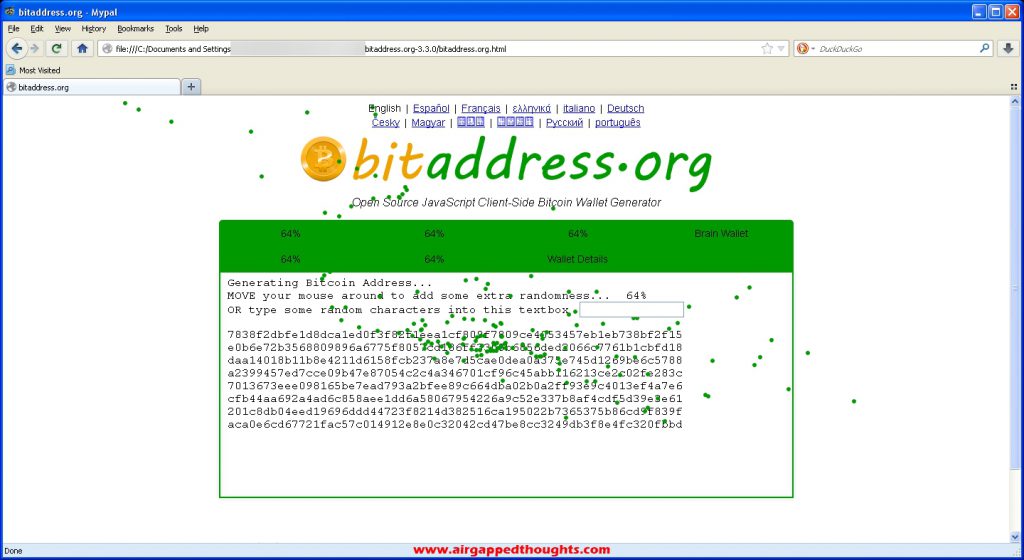
Move mouse around to create entropy
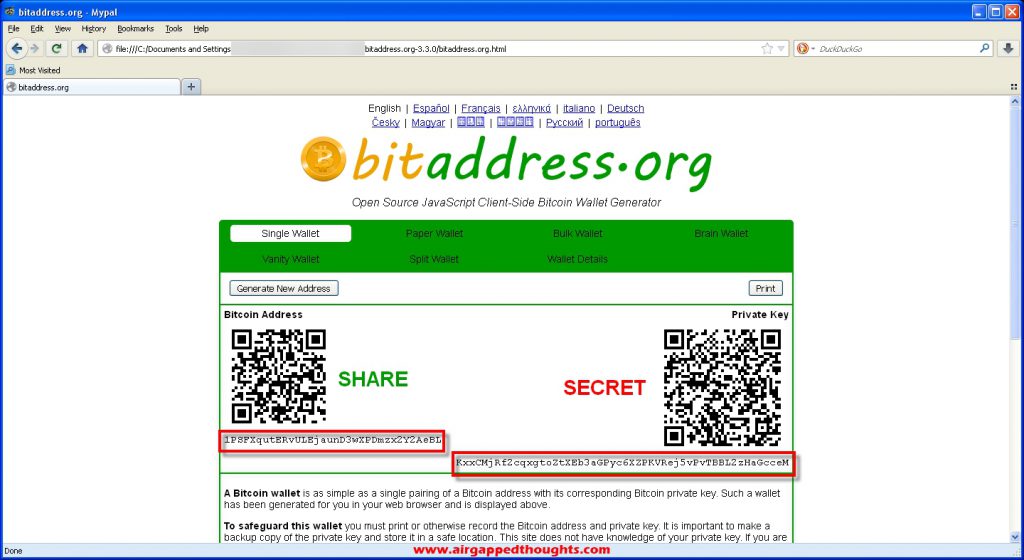
Here’s our generated public address and private key. Remember, this is a completely airgapped device, you don’t have to be afraid of leaks : ))) You will still have to trust these key generation tools though.
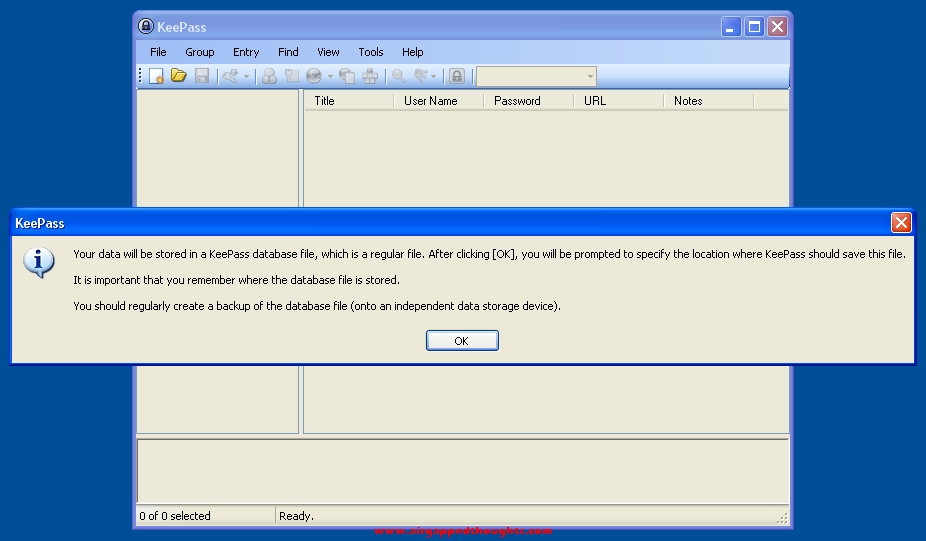
Now let’s install Keepass and save our generated Public Address and Private Key inside. After installing it, choose the new document icon.
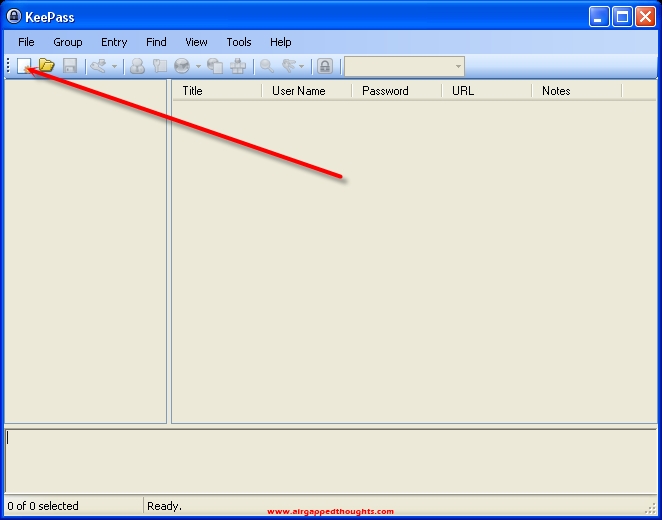
Short story: A new database file will be created, remember the location and to back it up after every new entry. You can use that database to save anything of critical importance. Passwords, mnemonic seeds, private keys, pins, anything. This isnt just an airgapped environment, this isnt just an encrypted hard drive, keepass has also some crazy encryption! Remember that the Keepass file is the most important file in the whole tutorial. Back it up all the time.
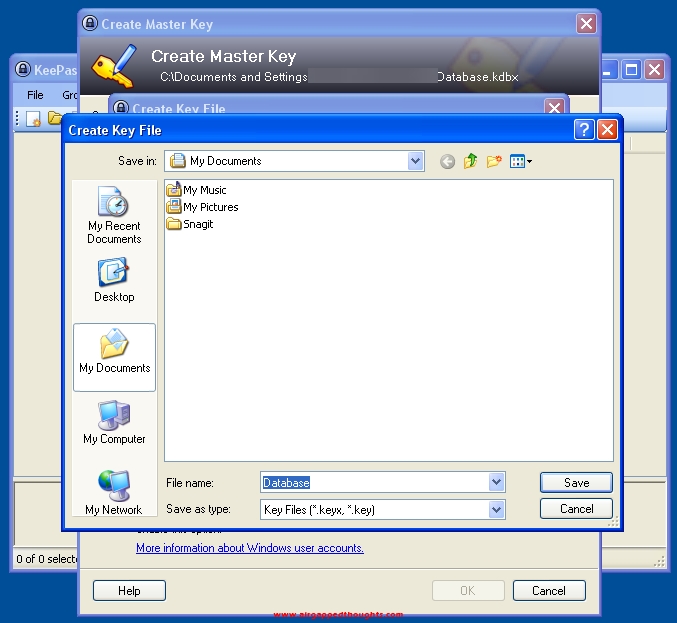
Choose location to save the keepass database file

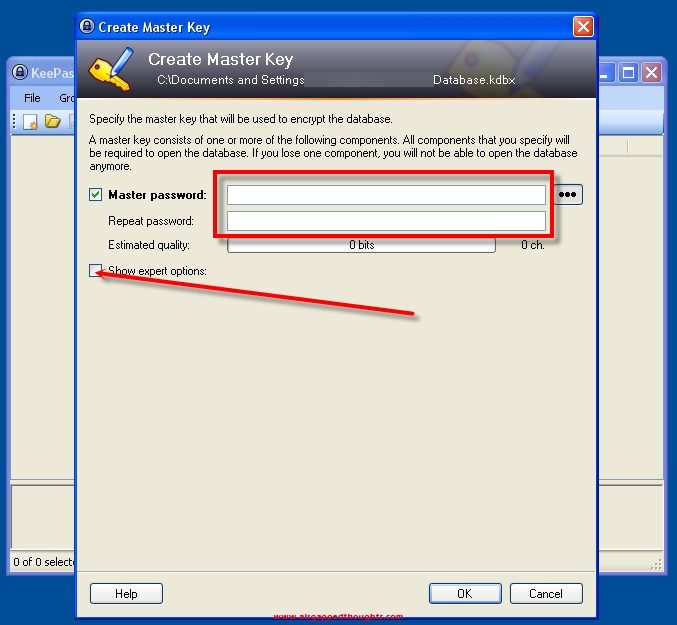
Create a master password. This is very important. Don’t make it easy. But don’t worry cause we will do it even safer. So go to the expert options…
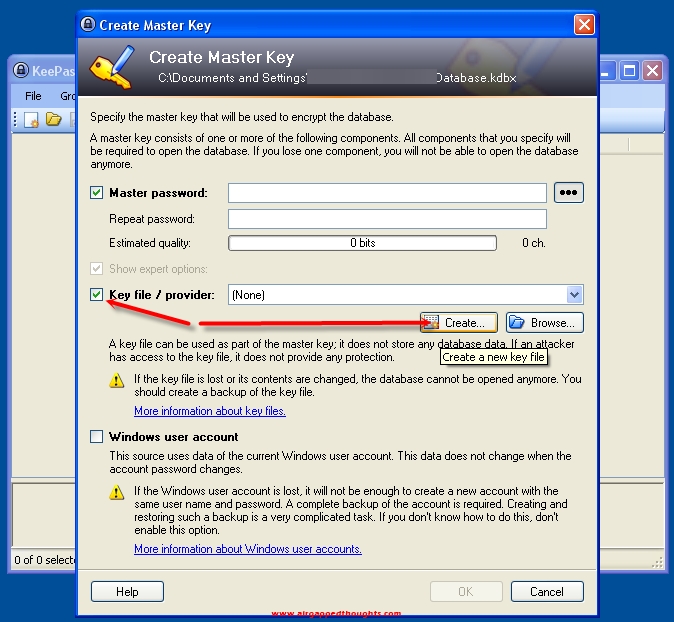
… and choose Key file / provider, and click at the Create… button. We are going to create a keyfile that from now on will be mandatory for opening up our keepass database (like a 2FA). If you thing it’s hard to manage all that stuff, you can ignore the creation of the keyfile and just put a master password and click at the OK button and ignore the next 3 images, otherwise, proceed.
Key file version 2.0
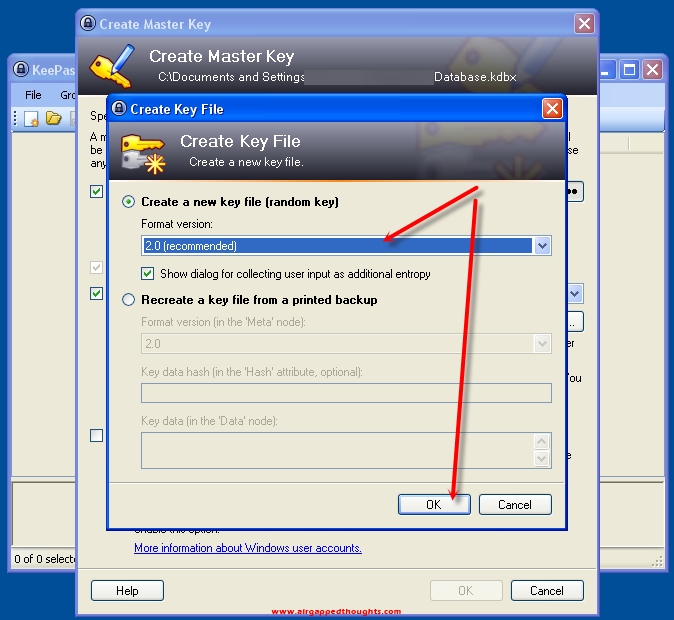
Save it
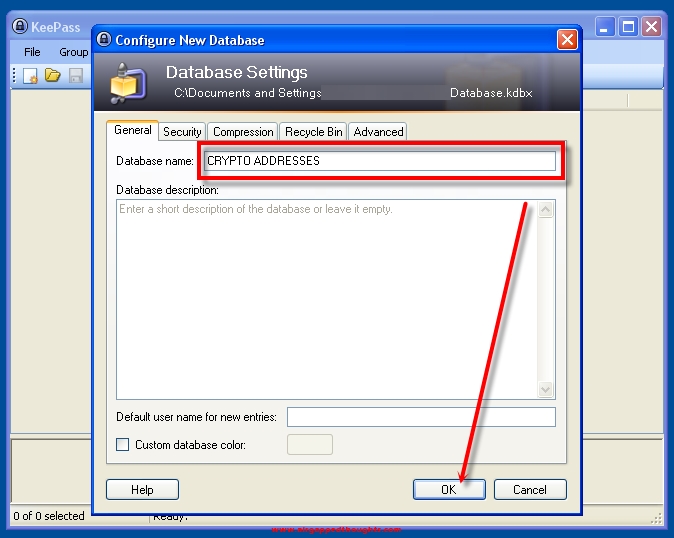
Give a name for your database
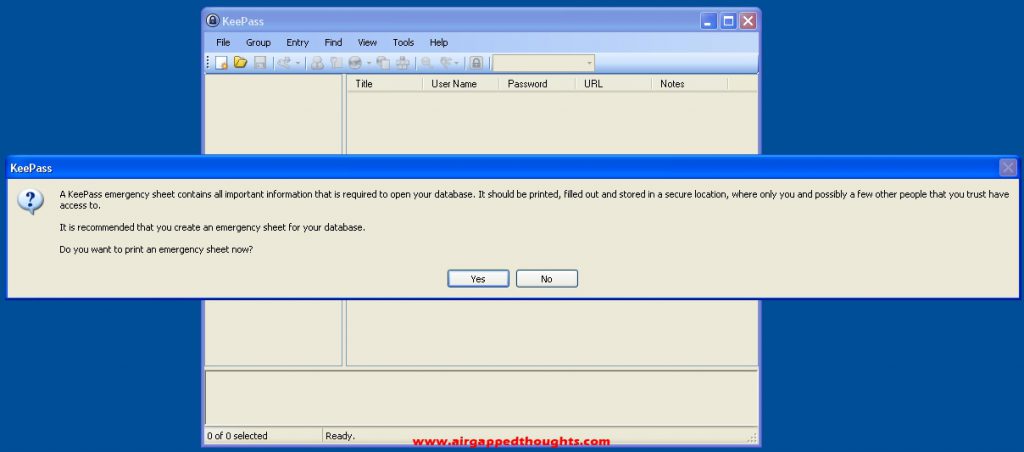
You can save your password in a document. Totally not recommended though.
Our newly created database has some dummy entries in it. Let’s delete everything and start creating our entries based on our needs.
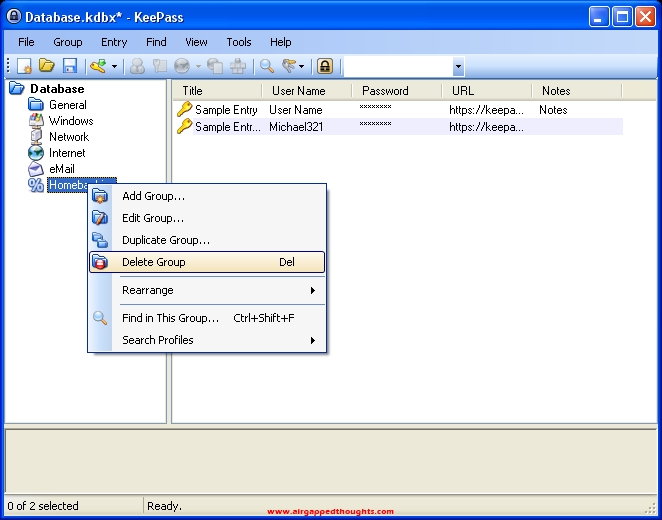
We created a bitcoin group in the left panel which will host all of our bitcoin keys. Let’s go the right panel and Add Entry
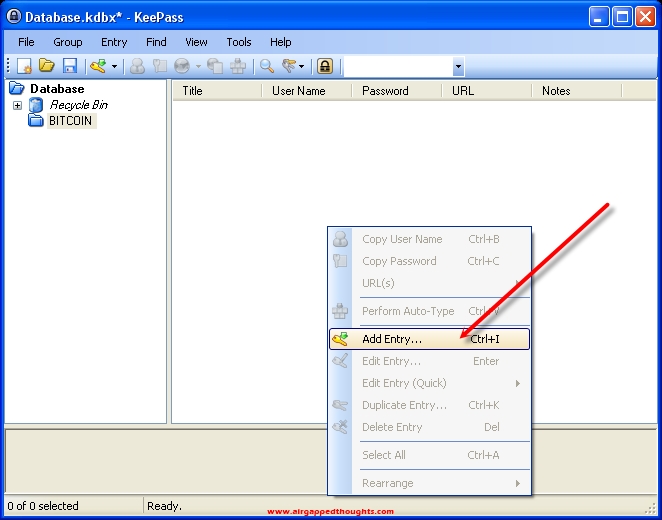
As a User name, let’s paste the generated Bitcoin Address from the bitaddress tool just a few steps before and as a password, our private key. And then… OK! Since this was a paper wallet generator, we can conviniently name it Paper Wallet 1 or give a name based on the device that has been generated from. We can even create groups based on the different software / hardware wallets and start saving our mnemonic seeds in them. Create groups and entries based on your needs.
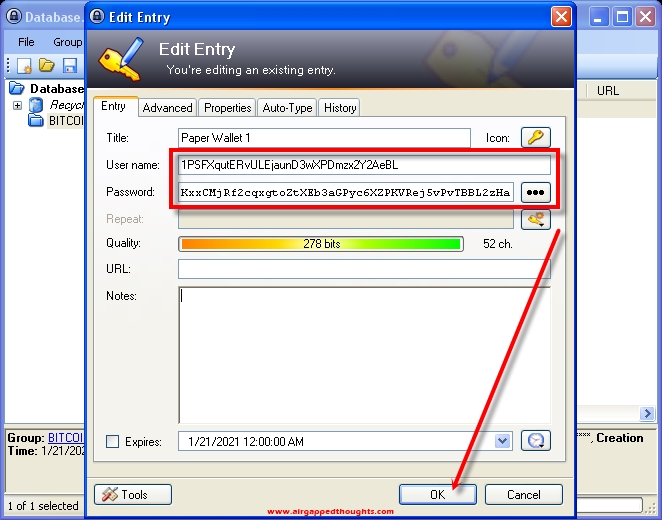
Save the new entry.

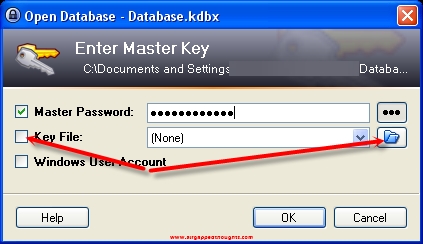
Next time that we’re going to open Keepass, we will have to give Master Password and tick the Key Fie box and give the location of our Key File, if we made one.
Don’t forget to save and make a backup copy of your database file everytime you add a new group / entry in it. You will only have to backup the Key File once, unless you change it.

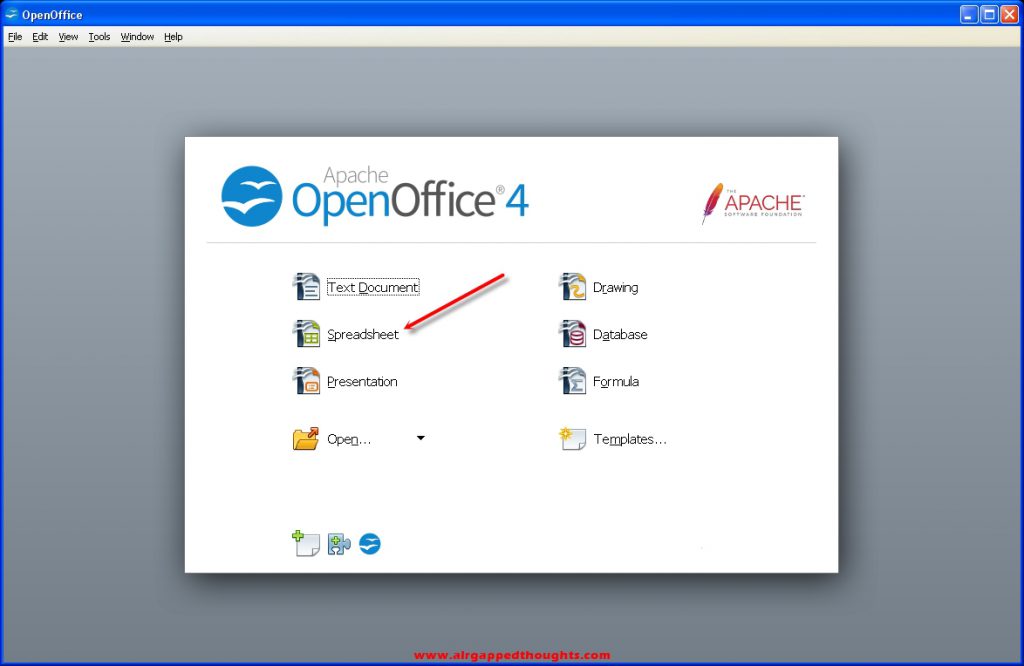
Now let’s install Apache OpenOffice, that Spreadsheet app is sweet and useful. Open it!
We can keep track of all of our public addresses and what each of them has and even make categories at the bottom of the screen using the tabs. You don’t have to put anything critical here (mnemonic seeds or private keys), just your public addresses or some code references that will link to your keepass database entries where the real important stuff is, you can organize your stuff really well with a bit of imagination.
Now let’s install Java Runtime Environment, useful for our next (very important) tool.
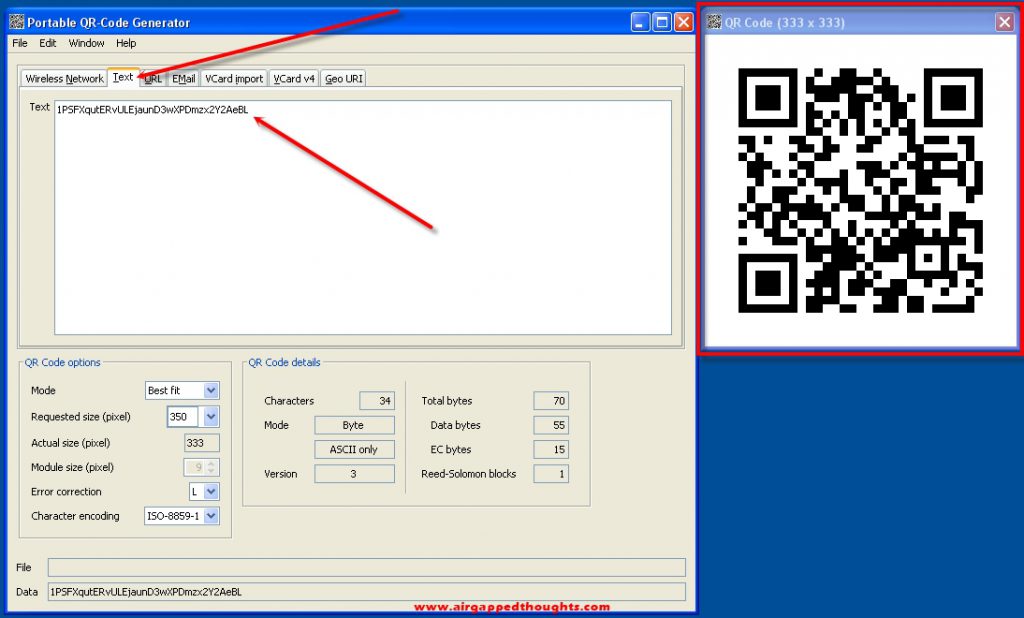
And now we can run the QRCodeGen.jar file by double clicking on it. The QR Code Generator will open. Let’s go to the Text tab and paste our public address that bitaddress generated for us. We could also paste our private key.

And here’s the QR Code inside an airgapped environment. We can now scan it with a software wallet / hardware wallet : )
You can find some awesome cryptocurrencies tools by searching through the web, don’t forget to take a look at the Software section where i host some great links.
Don’t forget to backup and burn to a disk the VeraCrypt rescue disk file, and backup your keepass database and key file. Don’t forget to not forget your VeraCrypt encryption password and your Keepass database password, EVER!!!
IF YOU DON’T HAVE A SPARE COMPUTER TO USE EXCLUSIVELY FOR THIS TUTORIAL (then we’re not finished)
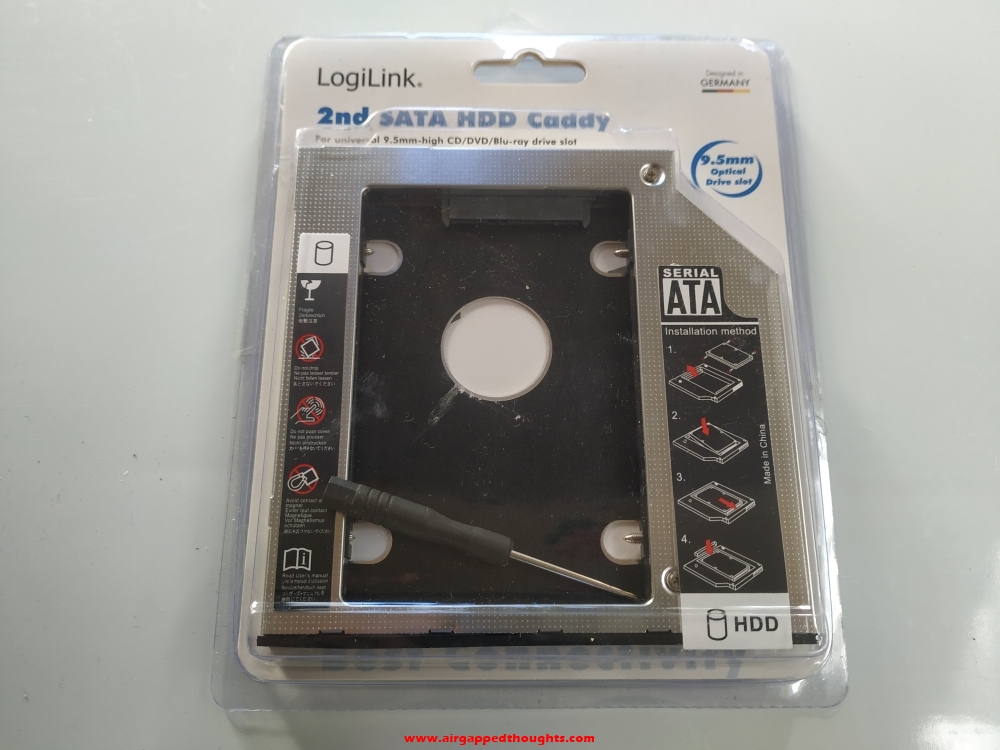
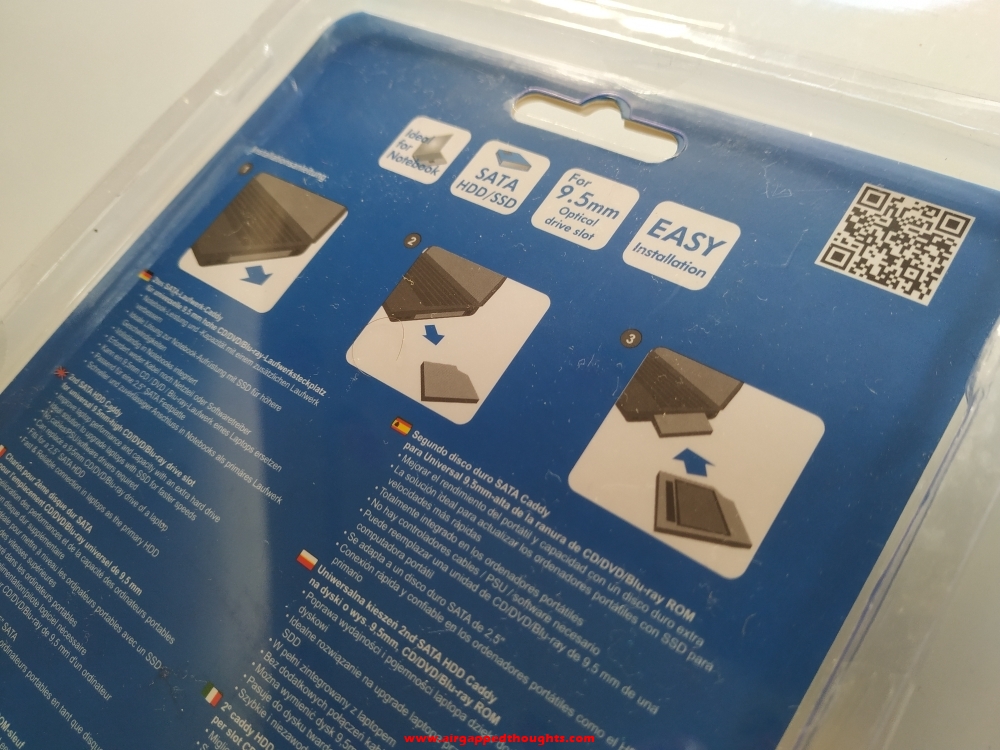
If you only have one desktop computer but you used a second hard drive for this installation, you can now connect both HDDs to your computer and change boot device depending on the drive that you want to load while booting up your PC (usually by pressing one of the F buttons while on the BIOS screen). If instead of a desktop you’re using a laptop, but used a second hard drive for this installation, you either will have to swap hard disk drives all the time, or replace your DVD drive with an HDD Caddy which will allow you to insert a second hard disk drive in there, and switch between both of your HDDs through BIOS.
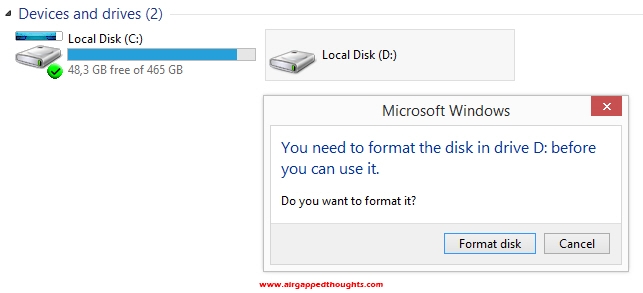
If you end up with 2 different hard disk drives, one with your main operating system and one with this one, and you want them both to be connected to your computer, you’ll have to make them ignore each other, mostly because you don’t want your main os which is connected to the web, to mess up with your encrypted drive. So go and boot up your main operating system (In this example i’m using Windows 8.1). Notice how the second drive that has the encrypted Windows installation in it is recognized by my main OS but cannot be accessed, Windows cant recognize the file system of that disk and offer to format the disk drive! Be very careful!
Open up the Control Panel and go to “System and Security” and then “System”. Choose “Device Manager”.
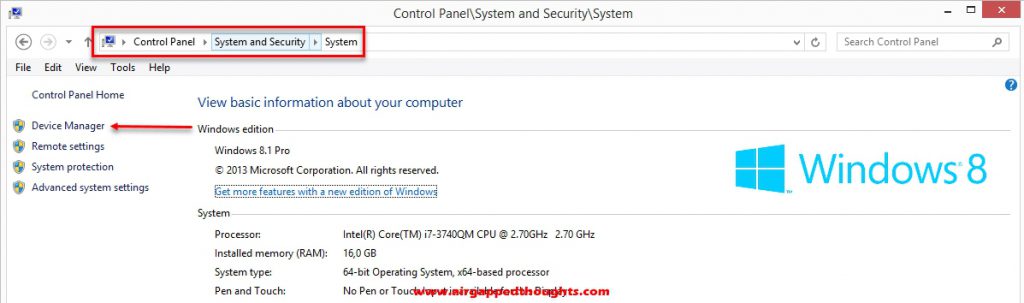
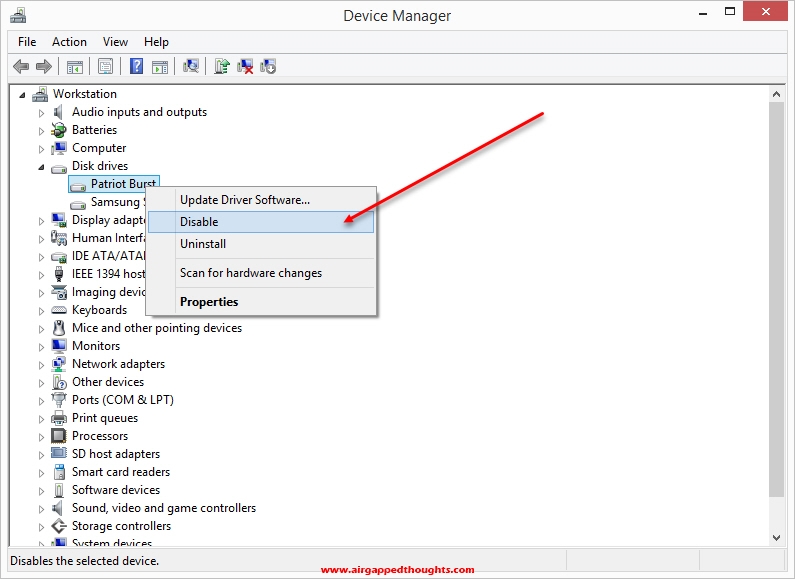
Go to the Disk drives section and disable the encrypted hard drive.
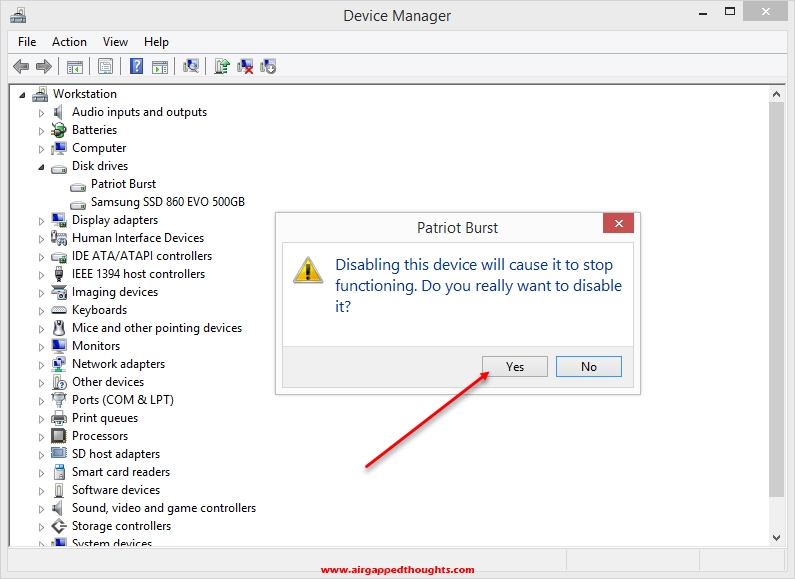
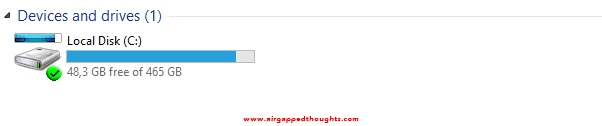
Now your main OS will completely ignore the existence of your other hard drive, cannot accidentally format it or access it from our main disk drive.
On the other hand, you might want to keep your encrypted OS capable of reading your main OS (in case for example that you want to use your main OS -which has internet access- to download various cryptocurrencies tools for your encrypted OS, boot the encrypted OS, and then simply grab the files from the main drive. (You can of course use a flash drive to transfer files between the two drives)
But in case that you also want to hide main OS from the encrypted one, here’s the process:
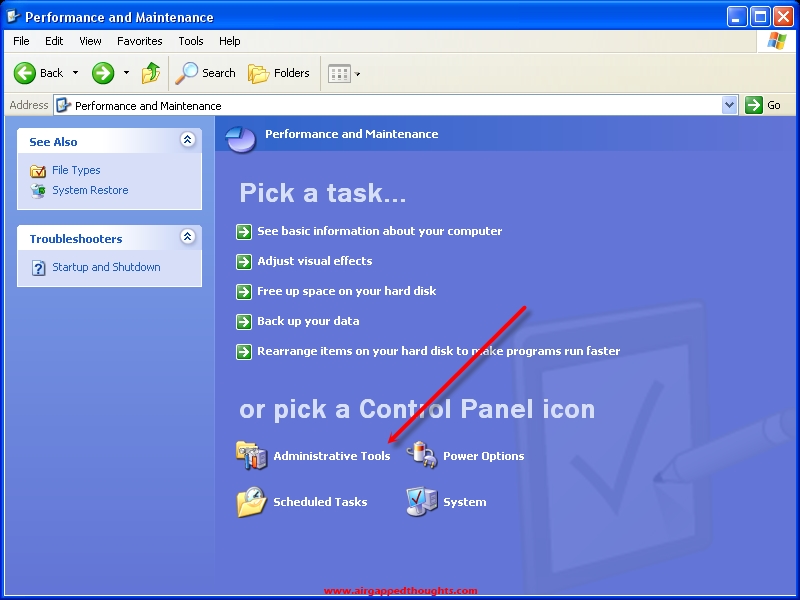
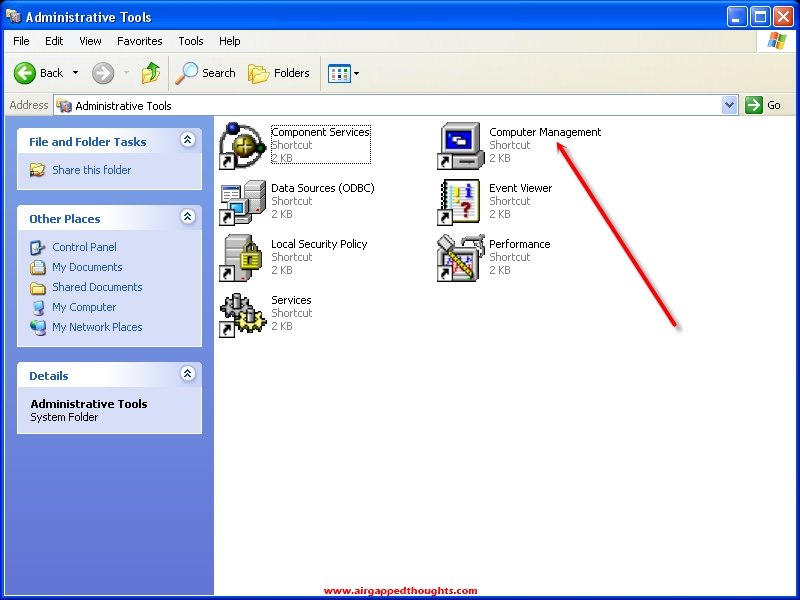
Load your cold storage OS and go to the Control Panel and choose “Performance and Maintenance” and go to “Administrative Tools”.
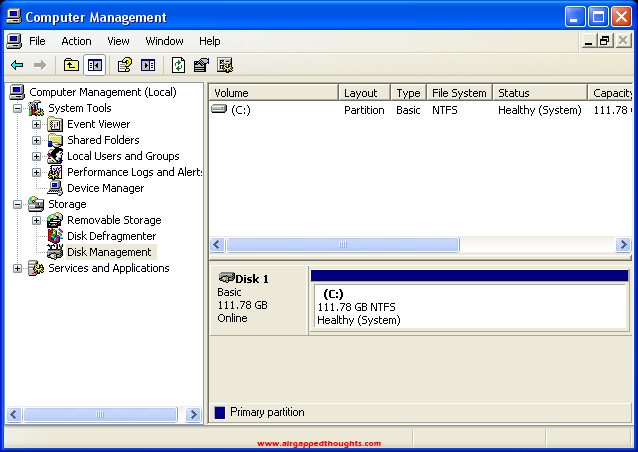
Computer Management
Storage
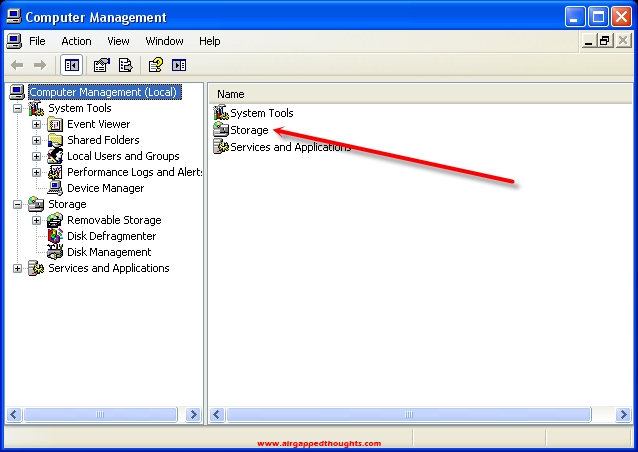
Disk Management (Local)

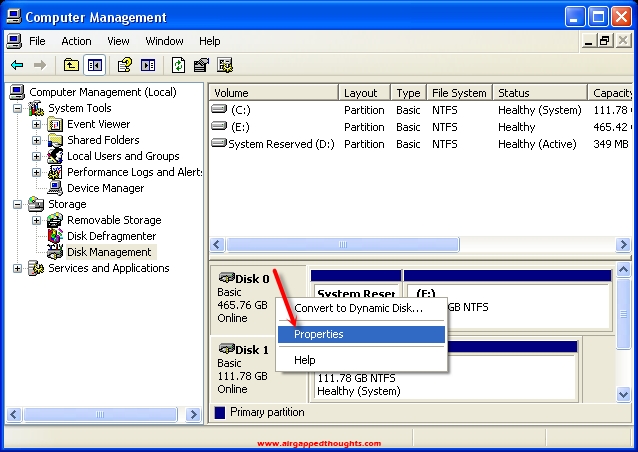
Right click on the Disk that you want to hide (not on the partition but on the disk icon) and choose Properties.
Change Device usage to “Do not use this device (disable)”.
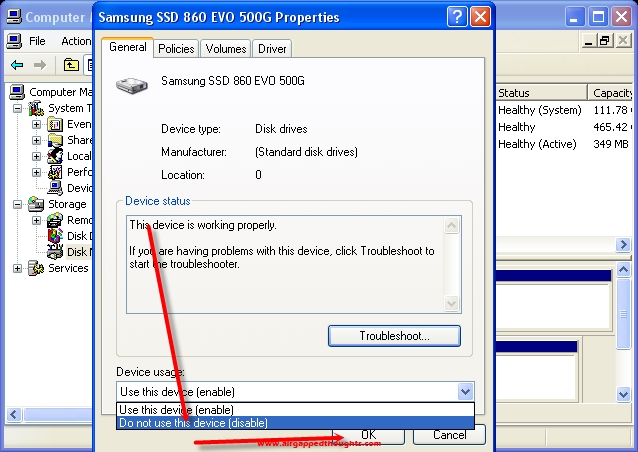
Now both operating systems are hidden from each other! : )
IN CONCLUSION – IS IT REALLY SAFE?
For starters, let me say that i’m using a similar cold storage environment (old operating system in a computer with no drivers at all) from 2015 and never had a single problem. As i already said, one of the reasons that i chose Windows XP is because operating systems back then didn’t care for an online connection and so companies didn’t care to include wireless drivers in them. With Windows XP, the probability of having your card recognized (or any other kind of wireless connection), is close to zero. You can also replace your wireless mouse with a wired one since bluetooth connections can also be hacked though the probability of that happening, let alone getting something out of it, is unlikely to ever happen. My current computer has a hardware switch that completely disables network connections which is an extra step towards security.
I’d say that this setup is probably safer than most (if not all) hardware wallets out there. Let’s do a quick comparison with most of them:
- Most hardware wallet are not airgapped, almost all of them are using bluetooth to connect with their application while we will exclusively use QR codes to communicate with our wallets. We will obviously need to connect flash drives every now and then to add more apps to our installation.
- Almost all hardware wallets generate mnemonic seeds using closed source methods, you’ll have to trust their entropy methods and that these seeds are indeed unique and not preloaded to the device. In our installation, we can use any open source tool to generate mnemonic seeds and keys with various entropy methods.
- Most hardware wallets have limited assets support and you’ll have to wait for the next firmware upgrade hoping that you’re going to get a much needed asset. On our installation, we can add wallet generators and other tools, the same moment that you can find them online. We can also create different addresses for each one of them very easily which is much safer than keeping all assets under the same mnemonic seed.
- All hardware wallets have limited capabilities. Mnemonic seed generation, some backup features, some can also export or accept partially signed bitcoin transactions, maybe some DEX for fast trading. In our installation we can add tools about anything. We can create and verify mnemonic seeds, export a specific private key from them (in case we want to sell just a specific asset from a mnemonic seed) without exposing our whole mnemonic to a wallet. We can create vanity addresses, sign transactions, safely backup our various wallets PIN & keys so we can reset them to a new address.
There’s literally no limit to the things that we can do as long as we can think about a feature and find a tool that can make this feature true. There’s only one thing that hardware wallets can do much better called simplicity. You get a mnemonic seed, you’re ready to start signing transactions. Doing this manually inside an air-gapped environment is a lengthy and disturbing process. I’d say that such an installation is much better than a hardware wallet for long term holding but much worse in case you want to trade all the time.
Also keep in mind that this is one of the best environments against theft. You literally have:
1. An encrypted operating system that asks for a password for decryption and the hdd cannot be placed anywhere else to get files from it.
2. A password protected OS.
3. A password locked database.
4. A key file that must be used with the database.
That’s four walls before you can reach any critical data. My setup is x3 times more paranoid than this and there are many more crazy stuff you could add. You can for example hide an operating system inside another operating system and depending from the boot password, load the right one. You could store the veracrypt bootloader inside an external device making your computer completely useless for thiefs, you’d need that device to load the veracrypt bootloader from. Or you could make your computer start main OS if upon booting there’s no user interaction, and start the encrypted OS if you have a specific device connected to the computer. The possibilities are endless as long as you know how to play with bootloaders and partitions.
Of course you should always remember that with great power comes great responsibility!! Don’t forget to backup your critical file(s) often and be careful not to get locked out of your own system or you’re going to lose much more than getting locked out from a single hardware wallet.
Have fun!!!
PS) If you like the idea of a custom made cold storage environment for cryptocurrencies there are more stuff that you could look into like the RockPro64 or Banana Pi, both mini computers can be shipped without WiFi ability at all but since they are using an ARM processor, you can kiss Windows goodbye. Librem is also manufacturing some great security based devices that can be shipped with no WiFi capabilities (Librem Mini) or have hardware switches that completely disable Wireless / BT connection (Librem 14).


