If you’re seriously into computers, you’ve probably installed some operating systems in the past, tried different Linux distributions, burned and wasted a lot of empty CD / DVD for various tools like disk cloning and disk partitioning software, and many times you ended up losing your disks and had to reburn them when you needed them the most. What if you had a usb flash drive that upon boot would bring up a menu with all these great tools inside and you just had to choose what to load?
You could for example:
- Download all the Linux distros that you want to test, copy the ISO files to the flash drive, and just use that menu to load the one you want. Since most distros have a live version, this could be the ultimate way of testing distros fast.
- Create a flash drive with every possible Windows version in it, just in case you want to reformat your computer or you have to move to an older / newer hardware.
- Create a flash drive with many open source bootable tools about literally everything, from virus scanning to deletion or recovery of files.
- Create a flash drive with all of the above!
And since usb flash drives are much faster than CDs / DVDs, everything will be much faster, especially when you try and install operating systems.
For doing this, we are going to use Grub4Dos, one of the best bootloaders out there that is commonly used by many distros and tools.
TOOLS THAT WE ARE GOING TO NEED
. An empty USB flash drive.
. WinSetupFromUSB This tool will automate the process of adding operating systems and bootable isos to our flash drive. It will also add these entries to the menu.lst file which is the menu that our bootloader will use to boot stuff from the flash drive.
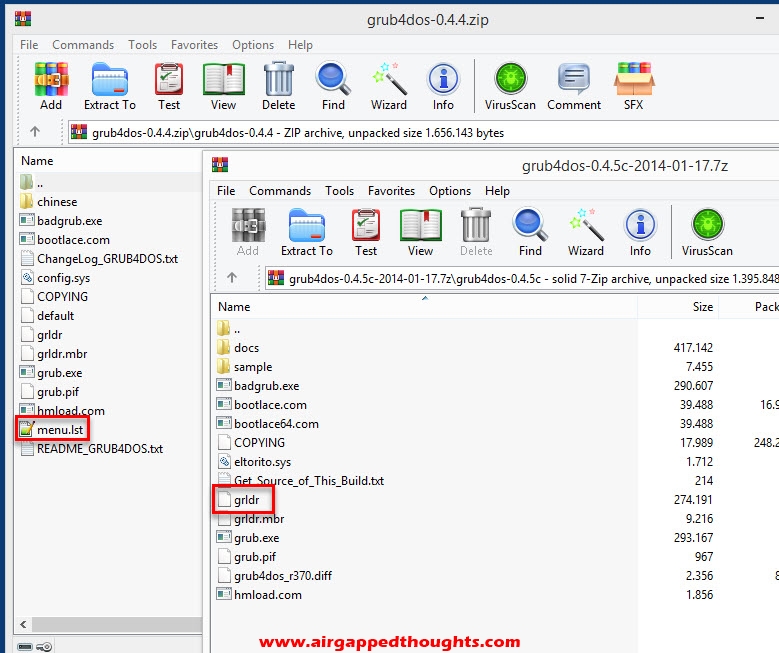
. Grub4Dos [*optional] This is our bootloader, it’s purpose is to run immediately after booting our computer and load the menu.lst file letting us choose what to load. We only need to take the menu.lst file from this version, the actual bootloader is incompatible with the WinSetupFromUSB tool.
. Grub4Dos 0.4.5c [*optional] This is the compatible grub4dos version with the WinSetupFromUSB tool, we need the grldr from inside the zip file which is the actual bootloader.
. ImageMagick For adding our own image inside the Grub4Dos menu, prefer a portable version of the tool.
* WinSetupFromUSB will automatically add grldr and menu.lst files to your usb flash drive during the 3rd section of this tutorial “ADDING AN OS AND A TOOL” in case it doesn’t find them, so you can actually skip downloading the above 2 optional tools (Grub4Dos and Grub4Dos 0.4.5c) and completely ignore the 2nd section of the tutorial “INSTALLING GRUB4DOS“. By not 100% following this tutorial though, you’ll end up with a different menu.lst file, it’s better to do everything manually.
WRITING THE APPROPRIATE MASTER BOOT RECORD
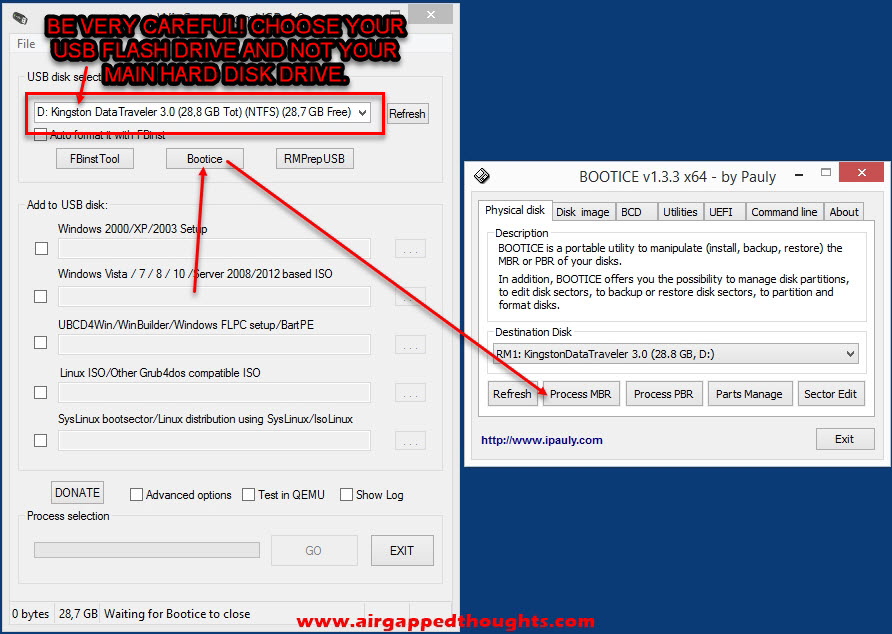
First things first, before creating and adding entries to our menu, we need to write the appropriate master boot record to our flash drive so we can make it bootable. Connect your (empty) USB flash drive to your computer and after installing the WinSetupFromUSB, run it.
Before proceeding make sure that in the top field of the app, you can see the name of your flash drive (in the below example it’s a Kingston Data Traveler 3.0). Don’t choose your main hard disk drive or you’ll destroy your MBR and you wont be able to get back into Windows in your next boot. After choosing your flash drive, choose Bootice, and from the BOOTICE window make sure that the Destination Disk is still your flash drive, and choose “Process MBR”.
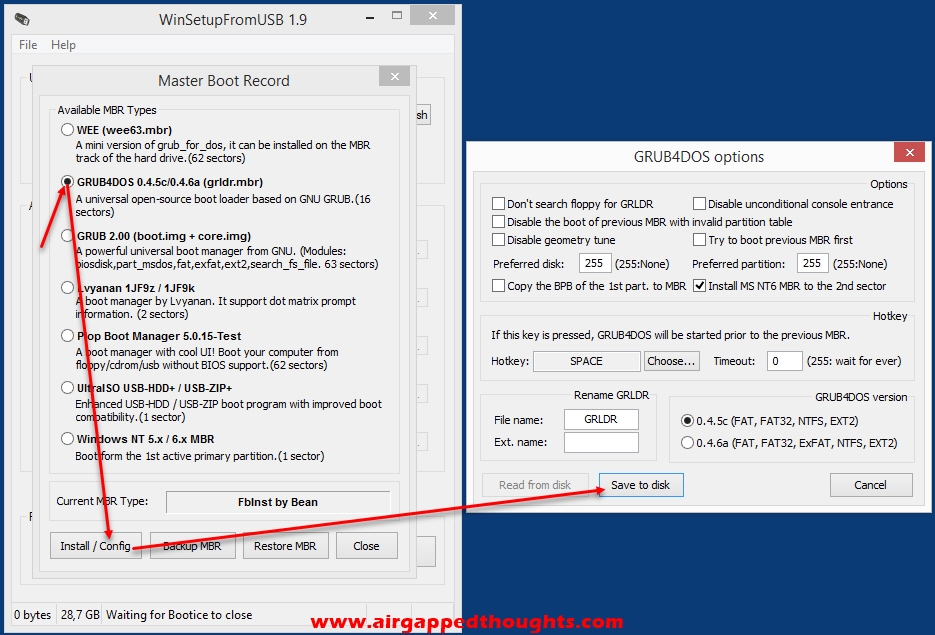
We now have to choose the right MBR Type, just choose “GRUB4DOS” and from the new GRUB4DOS options window, choose “Save to disk”.
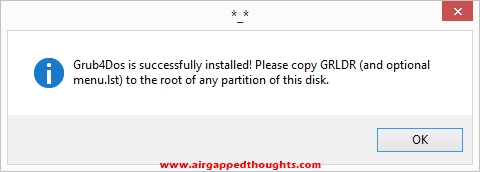
Done!
INSTALLING GRUB4DOS
Now open up the grub4dos 0.44 zip file and copy the menu.lst file to the flash drive. Then open up the grub4dos 0.4.5c zip file and grab the grldr file and move it to the flash drive. The grldr is the bootloader and the menu.lst is our menu that will host the entries for all of our operating systems and tools. You don’t have to install these two manually since WinSetupFromUSB will install them automatically for you in the next step but it’s good to know what is happening.
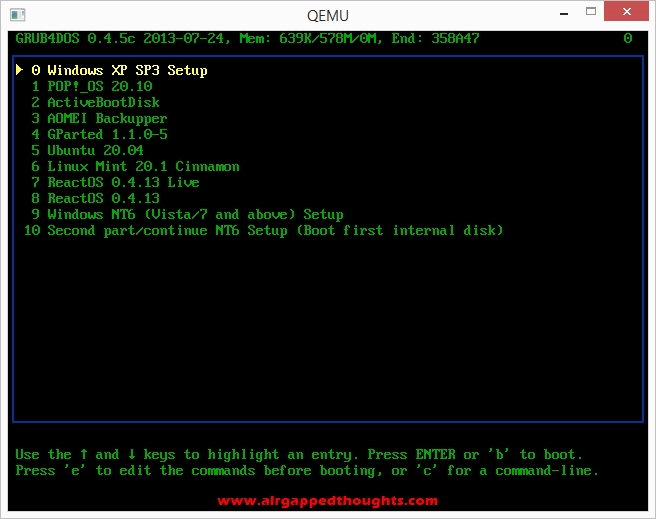
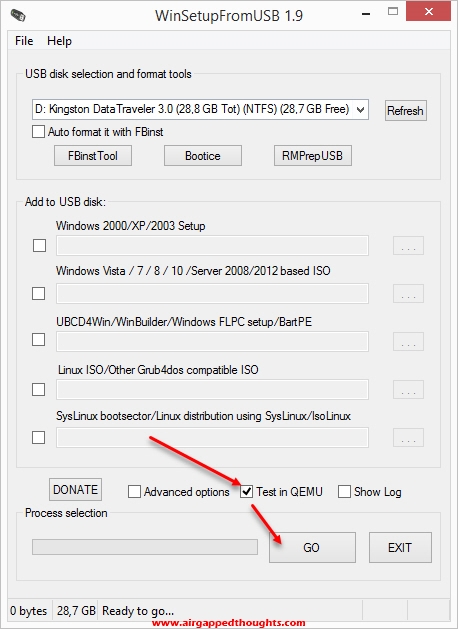
Although there are no real entries to test, you can test the menu to see what it looks like. You can restart your computer and choose as a boot device your USB flash drive to load the menu, or open up WinSetupFromUSB, there’s an actual emulator in it and you can test your flash drive there. Just choose “Test in QEMU” and then “GO”.
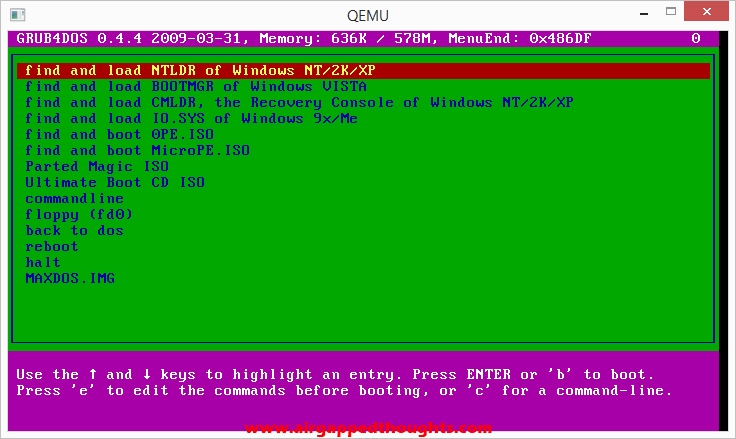
And here’s our current Grub4Dos menu with some dummy entries in it. We can modify these entries by just opening up the menu.lst file using a text editor.
ADDING AN OS AND A TOOL
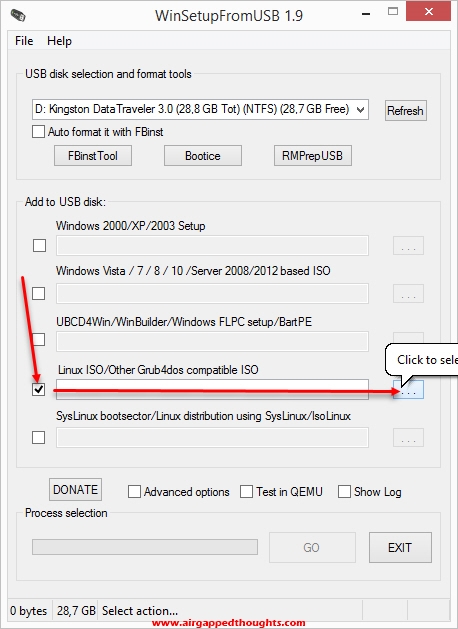
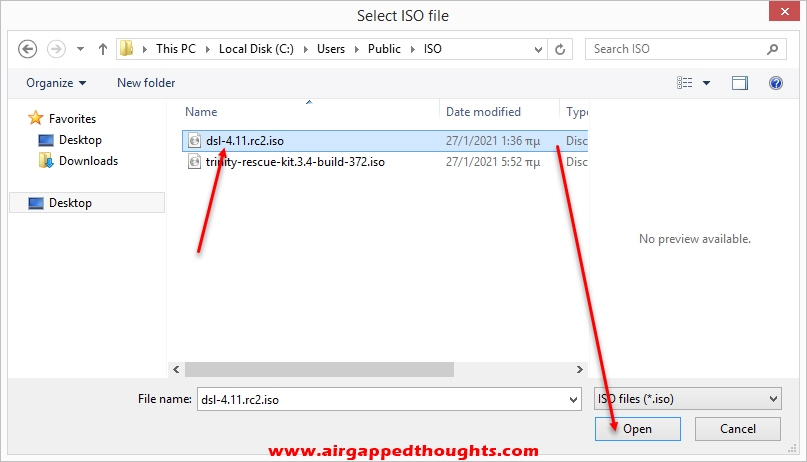
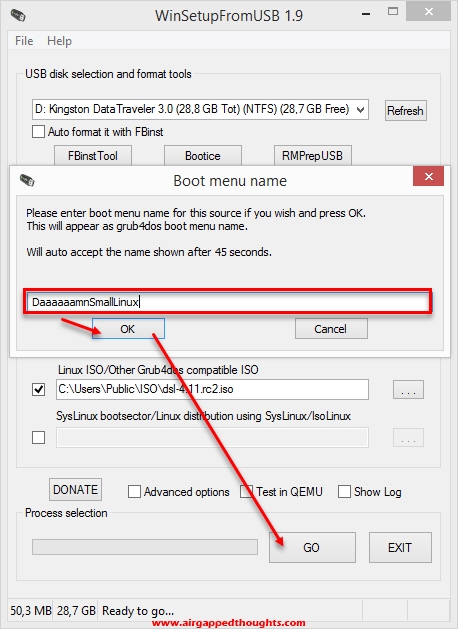
Let’s add our first operating system to the flash drive. Let’s go and download DamnSmallLinux which is an extremely small Linux distro. Let’s go and download Trinity Rescue Kit too, it’s a CD with many tools for fixing various software related problems. After downloading them both, go back to the WinSetupFromUSB, and from the “Add to USB disk:” section, tick the “Linux ISO/Other Grub4dos compatible ISO” box, and choose the DamnSmallLinux iso file.
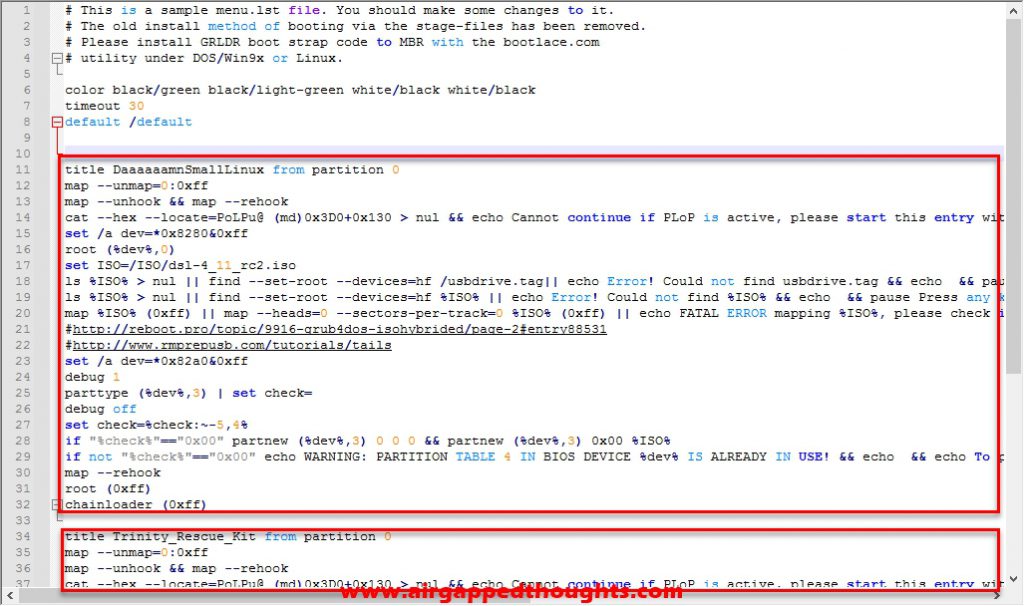
Give a name for the DamnSmallLinux entry in the menu, it the below example i just gave DaaaaaamnSmallLinux.
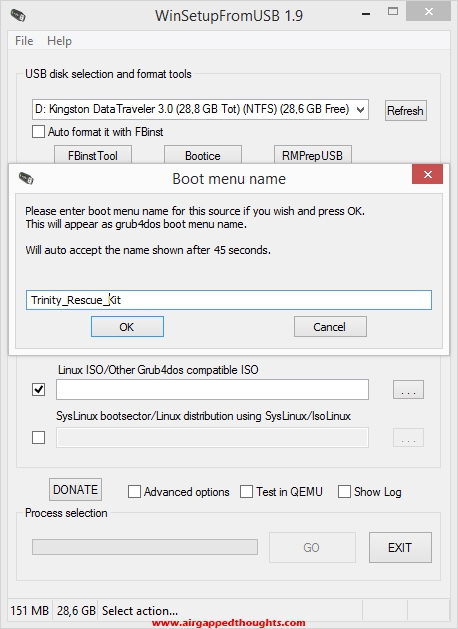
Do the same with the Trinity Rescue Kit iso and give a name for this one too.
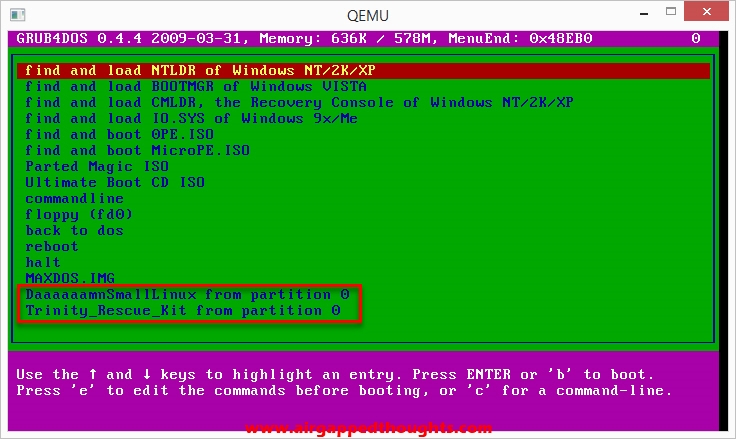
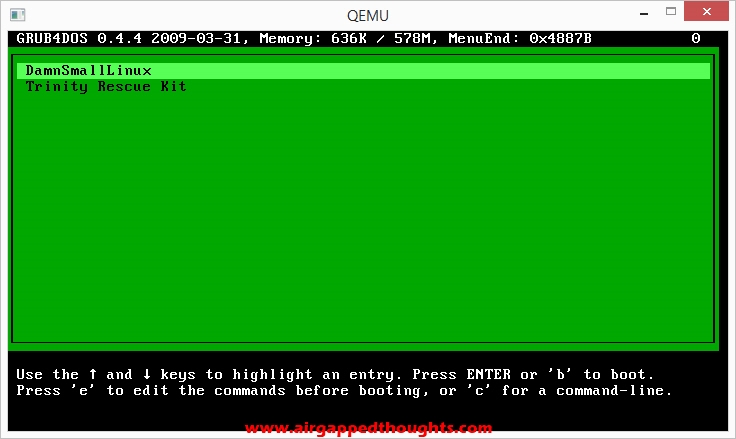
Now let’s test the usb flash drive inside the emulator environment. We can see our 2 new entries to the bottom and even run them : )
You can also add Windows to your flash drive, you can tick on the 2nd box “Windows Vista / 7 / 8 / 10 /Server 2008/2012 based ISO” and directly give the location of the Windows ISO file (for Vista and newer versions) or (for Windows 2000 up to 2003) extract their data to a folder, tick on the first box “Windows 2000/XP/2003 Setup” and give the location of that folder.
CHANGING MENU COLORS
Let’s go and edit the menu.lst file. At the top of the text file, we can clearly see the color command, followed by 4 different color combinations: blue/green yellow/red white/magenta white/magenta
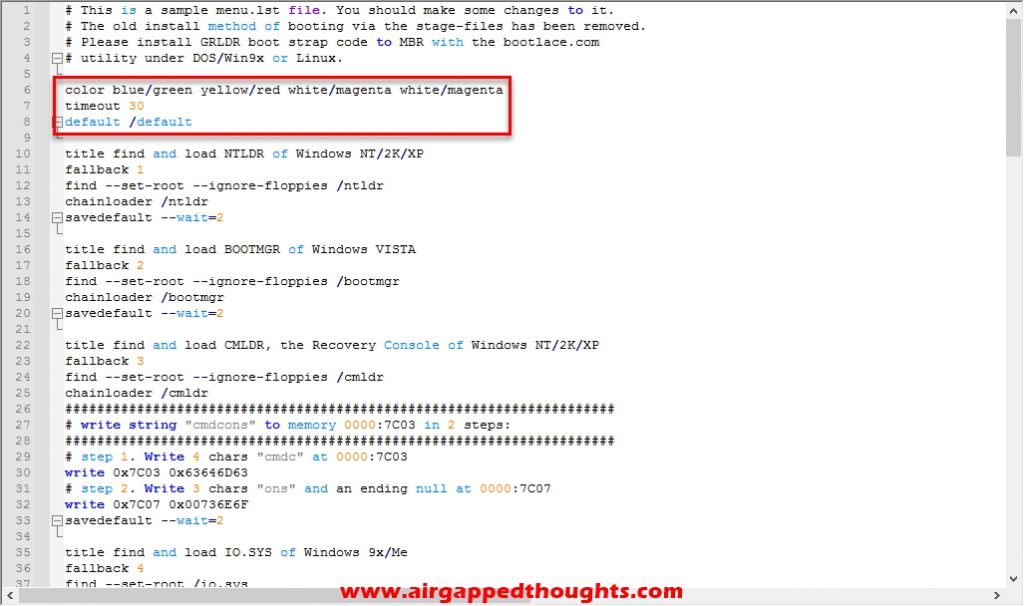
The first combination is about the entries color / background color (blue letters for the entries / green background)
The second combination is about the entries color after they have been highlighted / the color of the highlight box
The third combination is about the helptext at the bottom of the screen, letters color / box color (white letters, magenta box)
The fourth combination is about the header at the top of the screen, letters color / box color (white letters, magenta box)
We can modify these colors, available options are: black, blue, green, cyan, red, magenta, brown, light-gray, dark-gray, light-blue, light-green, light-cyan, light-red, light-magenta, yellow and white
Let’s change it to black/green black/light-green white/black white/black, don’t forget to save the changes.
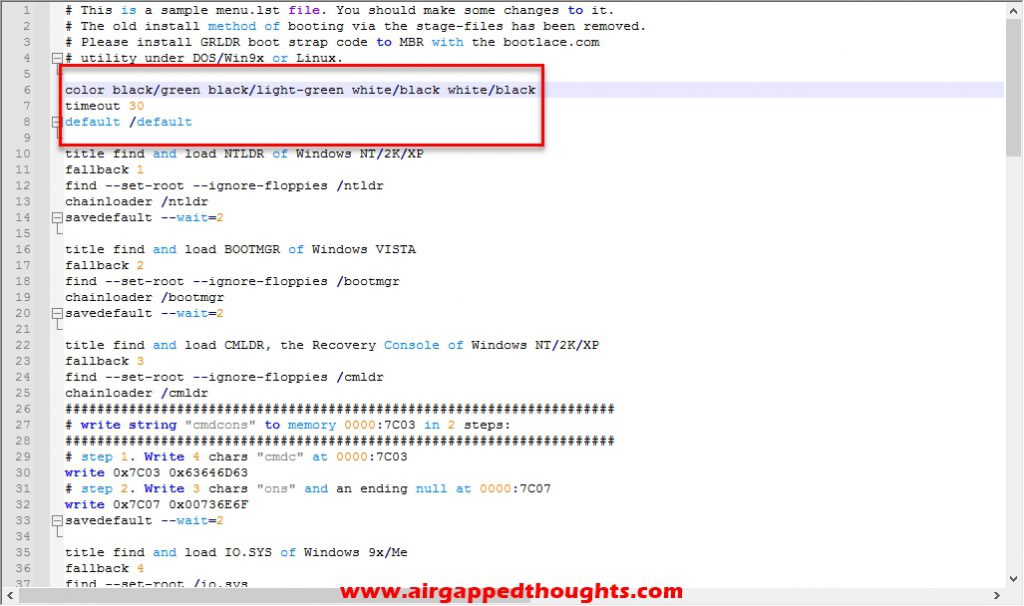
Now go and rerun the emulator to see the color changes. That’s much better!!

EDITING ENTRIES / LINKING MENUS
Most of the entries inside our menu are dummy entries and don’t work, we can open up the menu.lst and remove them. So let’s do just that. Delete everything from right after the default/default line, all the way to the bottom where our 2 entries of our applications are, do not delete those.
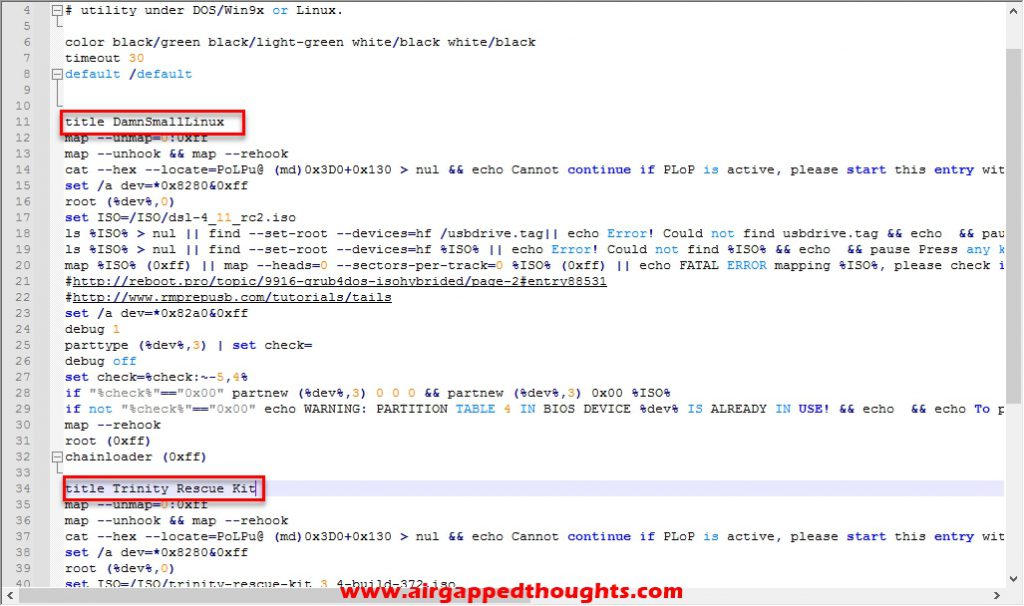
We can edit the name of each menu entry if we changed our mind by editing the title field, in the below example i’ve changed them back to their normal names. We can also remove the “from partition 0” reference.
Let’s organize our entries into menus. We will create two menus, one for hosting our operating systems entries, and one for everything else. A menu is just a text file with the .lst extension, so go ahead and create 2 text files and name them operatingsystems.lst and tools.lst and put them inside the flash drive (in the same path as the menu.lst file). Open up the menu.lst file with a text editor, inside there are 3 different sections, one for the colors and timeout seconds of the menu, one for the DamnSmallLinux entry, and one for the Trinity Rescue Kit entry. Cut-paste the DamnSmallLinux section inside the operatingsystems.lst file and save it, and cut-paste the Trinity Rescue Kit section inside the tools.lst file, and save it.
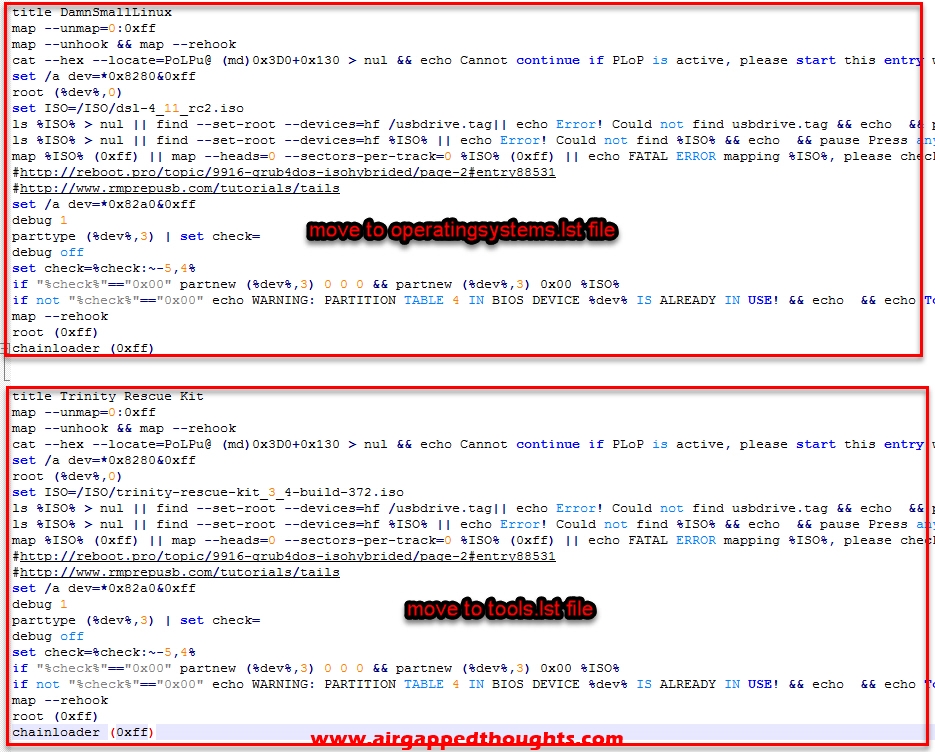
You should copy the color section too, so that all of your menus have the same color.
Now let’s go to the menu.lst file and create entries that will link to our other two menus. We link to other menus with the command:
configfile /path_to_lst_file
Let’s add the following lines:
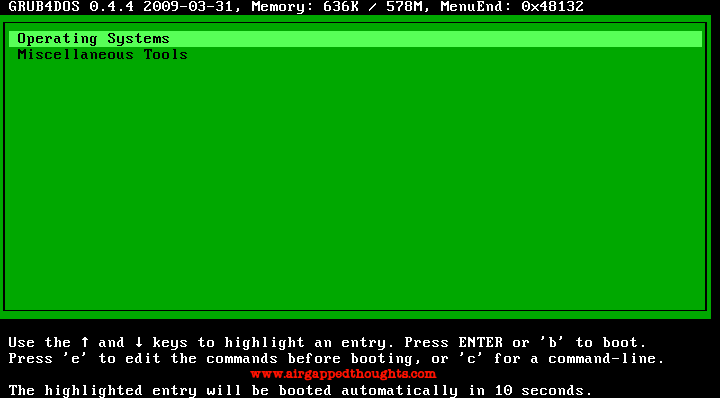
title Operating Systems
configfile /operatingsystems.lst
title Miscellaneous Tools
configfile /tools.lst
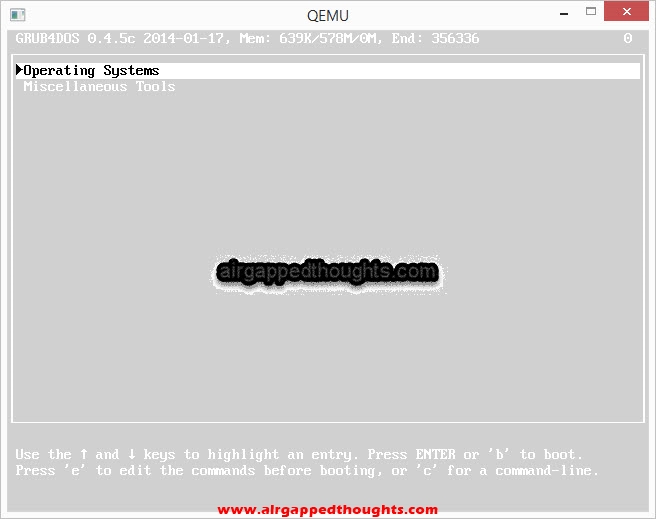
We just created 2 entries, one with the name Operating Systems that will bring up our operatingsystems.lst menu, and one for the tools.lst menu named Miscellaneous Tools. Before booting from the flash drive to check the results, we should also add entries to our linked menus that will throw us back to the main menu.
So open up and add the following two lines in both operatingsystems.lst and tools.lst menus:
title Back To Main Menu
configfile /menu.lst
The result should be as the one below.
ADDING BACKGROUND IMAGE
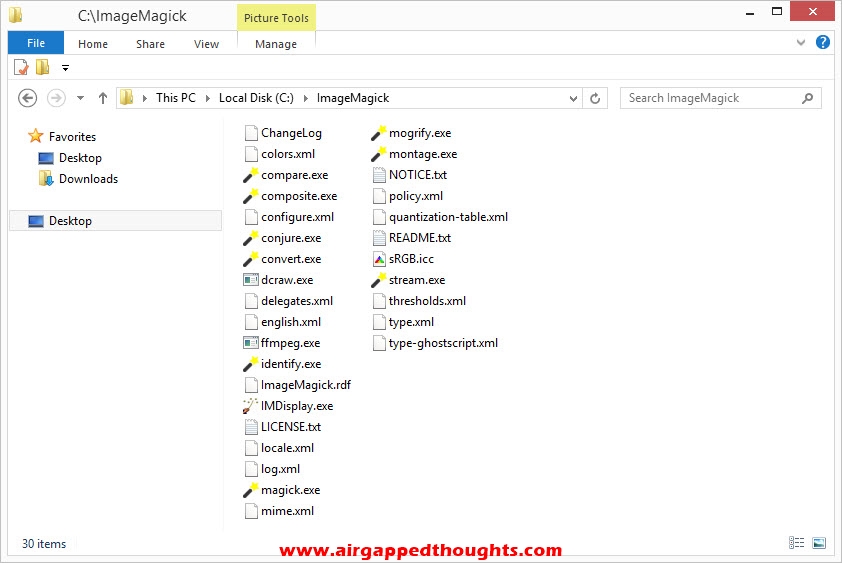
Finally, let’s go and add an image as the menu background. The image should be in compressed (gz) xpm format (xpm.gz) with 14 colors max, and a resolution of 640×480. There aren’t many offline tools that can convert images to xpm format (Gimp, MTPaint, and ImageMagick). We’re going to use the last one which is a command line tool and can also resize our images and reduce the colors to 14. Download and extract the portable version of ImageMagick inside a folder.
Go and create an image using some editing software, you can use paintbrush for example or download an image from the web. I’ve created a simple black & white watermark.

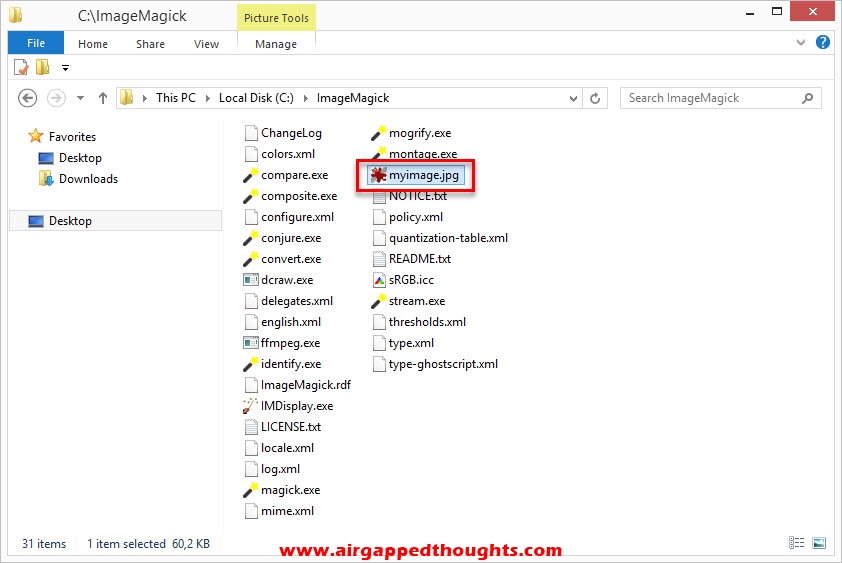
Move your image inside the ImageMagick folder and give it a convinient name, mine is called “myimage.jpg”.
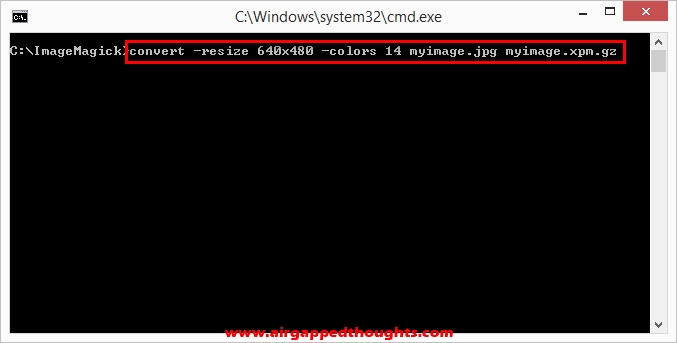
Now it’s time to convert it to xpm format. While holding the shift button, right click the ImageMagick folder and choose “Open command window here”. Type the following command and press the Enter button:
convert -resize 640×480 -colors 14 name_of_your_image name_of_your_image.xpm.gz
in the following example we used:
convert -resize 640×480 -colors 14 myimage.jpg myimage.xpm.gz
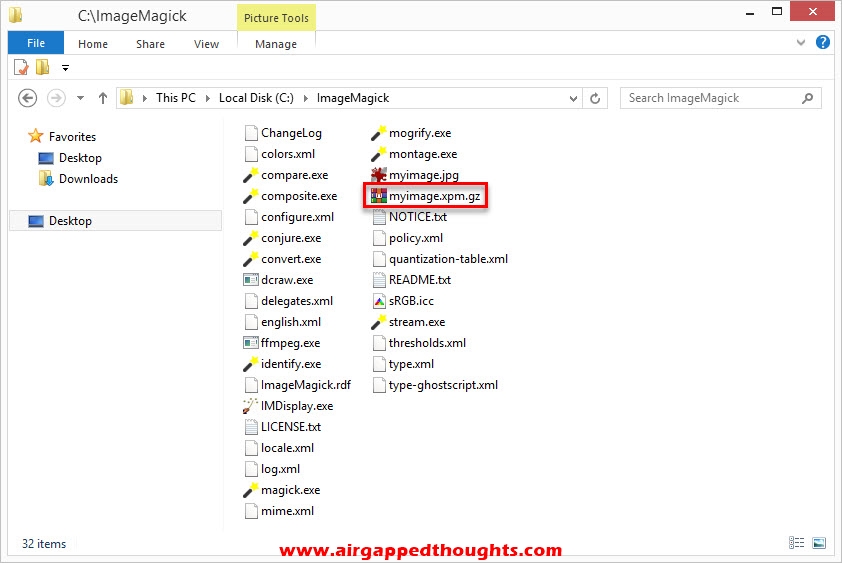
The converted image is inside the ImageMagick folder. Move it to your flash drive.
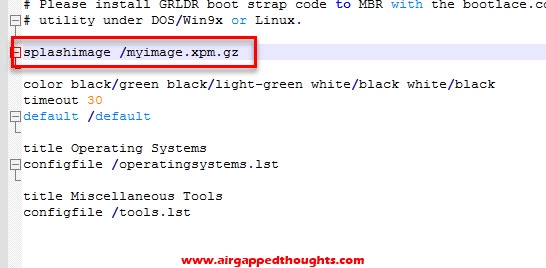
Open up the menu.lst file and add the following line:
splashimage /name_of_your_image.xpm.gz which in the following example is:
splashimage /myimage.xpm.gz
Don’t forget to save the new entry.
Here’s our background in action!
IN CONCLUSION
This was just a basic intro to one of the most well known bootloaders. There are many tools that simplify the process of creating a flash drive with Grub4Dos and filling it with useful bootable tools, but it’s always better to do some stuff manually to understand what’s happening under the hood. There are also many more bootloaders available, each one with their own features and limitations, you can find a list of them here. With a bit of experimenting and finding the best bootable tools across the web, you will be able to create the ultimate swiss army flash drive!
Have fun!!!


